How to Hive a Package of Bees: Step-by-Step Guide for Beginners
This post contains affiliate links. As an Amazon Associate, I earn from qualifying purchases at no extra cost to you.
Hiving a package of bees is the moment beekeeping goes from theoretical to real. You have a screened box buzzing with 10,000 bees, a caged queen they have never met, and an empty hive waiting. The process itself takes about 15 minutes, and once you have done it, you will wonder why you were nervous. I have installed dozens of packages over the years and the bees are remarkably cooperative during this process - they have no home to defend and no brood to protect, so aggression is minimal.
Here is the full process from pickup to first inspection.
Safety Note: Wear your full protective gear for your first package install even if you plan to work gloveless later in the season. A veil is non-negotiable. Have your smoker lit and nearby but you likely will not need it - packages are exceptionally calm. If you are allergic to bee stings, have an epinephrine auto-injector within arm’s reach and work with a partner who knows how to use it.
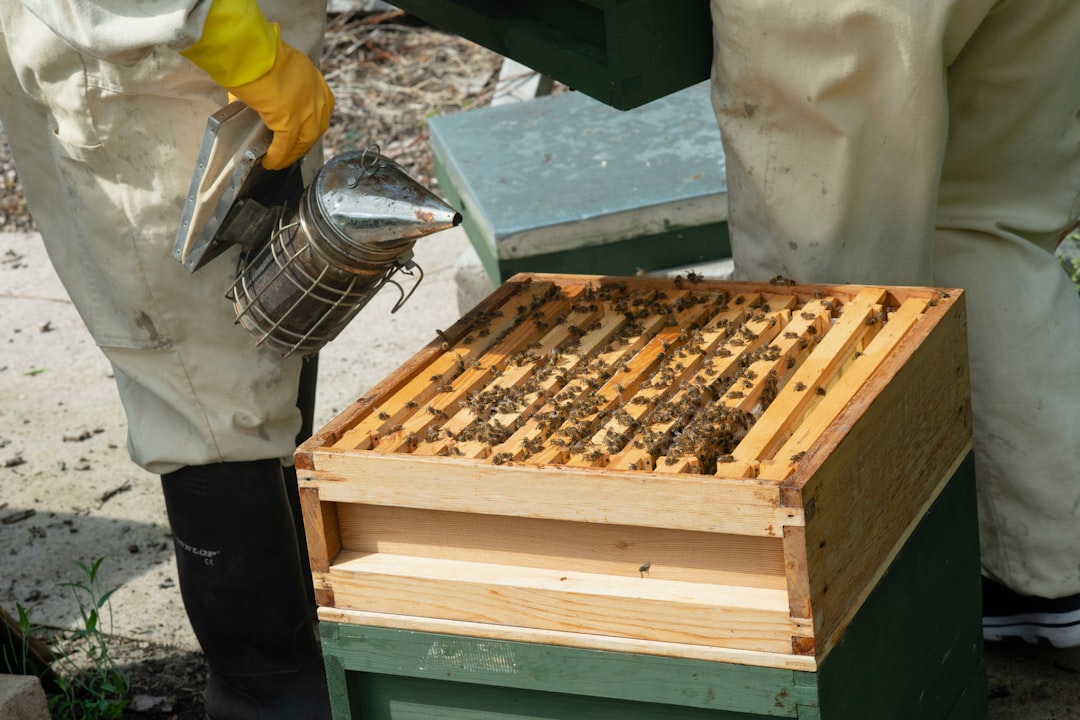
Photo by Age Cymru on Unsplash
Before the Bees Arrive
Prepare the Hive
Your hive should be fully assembled and in its permanent location before the package arrives. Moving a hive after bees are installed disrupts their orientation and causes confusion.
Set up a single deep brood box with 10 frames on the bottom board. Remove 4 frames from the center to create space for dumping the package. Keep the removed frames nearby - you will replace them shortly after installation. Install the inner cover and outer cover loosely so you can access the hive quickly.
If you are in a cold climate and installing in early spring, make sure the hive location is sheltered from north winds. A southeast-facing entrance catches morning sun and gets the bees active early. I position my hives near a tree line on the north side, which blocks the worst of the prairie wind during those chilly April nights when a new package is most vulnerable.
Prepare the Feeder
A new package has zero food stores. No drawn comb, no honey, nothing. You need to start feeding 1:1 sugar syrup (equal parts sugar and water by weight) immediately. Have your feeder filled and ready before you open the package.
A hive top feeder is the best option for new packages because it holds a large volume and does not require opening the hive to refill. Fill it the morning of installation so the syrup is at ambient temperature.
Timing
Install packages in the late afternoon or early evening - between 4:00 and 6:00 PM is ideal. The bees will settle into the hive overnight rather than immediately flying out and getting disoriented. If you install in the morning, a significant number of bees will fly out, circle, and potentially drift to neighboring hives or get lost.
If the package arrives early in the day and you cannot install until evening, keep it in a cool, dark, well-ventilated space (a garage works well). Lightly mist the screen sides with 1:1 sugar syrup every few hours to keep them hydrated and calm. Do not leave a package in direct sun - the bees will overheat and die.
The Installation Process
Step 1: Suit Up and Prepare Your Tools
You need your protective gear, your hive tool, a spray bottle of 1:1 sugar syrup, and optionally a pair of pliers or a small nail to help with the queen cage cork. That is it.
Step 2: Spray the Package
Give the screened sides of the package a generous misting with sugar syrup. This does two things: it gives the bees something to focus on (eating), and wet bees are heavier and fly less. A well-sprayed package is noticeably calmer.
Step 3: Remove the Syrup Can and Queen Cage
The package has a syrup can feeding the bees during transport and a small queen cage suspended from the top. Sharply bump the package on the ground to knock the bees to the bottom, then quickly remove the plywood or screen cover, pull out the syrup can, and retrieve the queen cage. Immediately cover the hole with the plywood to keep bees from pouring out.
Inspect the queen cage. You should see a live queen moving around inside with a few attendant bees. If the queen is dead (motionless, often with bees biting at the cage), contact your supplier immediately for a replacement. Do not install a package with a dead queen.
Step 4: Prepare the Queen Cage
The queen cage has a candy plug at one end - a small piece of fondant that the worker bees will chew through over 2-4 days to release the queen. This delay is critical. The package bees were not raised with this queen. They need time to accept her pheromones before she is released. If you release her immediately, they may kill her.
Check that the candy plug is visible and intact. Some beekeepers poke a small hole in the candy with a nail to speed up the release slightly, but this is optional. I do it if the candy looks very hard, and skip it if the candy is soft and fresh.
Remove any cork covering the candy end of the cage. Leave the non-candy end corked shut.
Step 5: Place the Queen Cage
Suspend the queen cage between two of the remaining center frames, candy end down, with the screen facing outward so workers can access the queen through the mesh. You can wedge it between the frames or hang it from a small wire or rubber band looped over the top bar. Make sure it is secure - you do not want it dropping to the bottom of the hive.
Step 6: Dump the Bees
This is the part that feels dramatic. Bump the package firmly on the ground again to knock the bees down, remove the cover, invert the package over the open space in the hive, and shake. Firmly. Most of the bees will pour out in a large clump directly into the hive. It is loud and looks chaotic, but the bees are focused on finding the queen and clustering, not on stinging you.
You will not get every last bee out of the package. That is fine. Set the open package on the ground in front of the hive entrance. The remaining bees will smell the queen pheromone and walk into the hive over the next few hours.
Step 7: Replace Frames and Close Up
Gently slide the 4 removed frames back into position, being careful not to crush the mass of bees. They will move out of the way. Place the inner cover on top, set the hive top feeder (already filled with syrup) in position, and put the outer cover on.
You are done. Walk away. Resist the urge to open it again for at least 3 days.
The First Week
Day 1-3: Leave Them Alone
The bees are orienting to their new home, clustering around the queen cage, and beginning to draw comb on the empty frames. Opening the hive during this period disrupts the process and risks the bees rejecting the queen. The only thing you should do is check that the feeder has syrup. Refill if empty.
Day 3-4: Check Queen Release
This is your first quick inspection. Open the hive gently, locate the queen cage, and check if the candy plug has been chewed through and the queen is released. If she is out, remove the empty cage and close up. If she is still inside and the bees seem calm around the cage (not biting at it aggressively), give it another day or two.
If by day 5 the queen is still caged and bees are clustered calmly on the cage, you can manually release her by removing the remaining cork. If they are biting aggressively at the cage, the colony has not accepted her - contact your supplier for advice.
Day 7: First Real Inspection
One week after installation, do a gentle frame-by-frame inspection of the brood box. You are looking for three things:
Eggs: Tiny white grains of rice standing upright at the bottom of cells. If you see eggs, the queen is alive and laying. This is the most important confirmation.
Drawn comb: The bees should be actively building wax comb on the frames. New white wax is a sign of a healthy, well-fed colony.
Syrup consumption: If they are going through syrup quickly, that is excellent. It means they are drawing comb aggressively. Keep feeding.
If you see eggs, drawn comb, and active syrup consumption at day 7, your installation was successful. Continue feeding and inspecting weekly. If you do not see eggs by day 10, you may have a queen problem - read up on queenless hive indicators or consult your local beekeeping association for mentorship.
Common Package Installation Mistakes
Installing in the morning. Bees fly out immediately, get disoriented, and drift. Late afternoon installation gives them the night to settle.
Not feeding immediately. A package with no comb and no stores will starve or fail to build up if not fed from day one. Feed 1:1 syrup continuously until the second brood box is underway.
Releasing the queen immediately. The slow candy release exists for a reason. Impatient beekeepers who manually release the queen on day one risk queen rejection and colony failure.
Opening the hive every day. I understand the excitement. But every opening disrupts the colony, chills the brood area, and slows progress. Once at day 3-4 for queen check, once at day 7 for first inspection, then weekly after that.
Not checking for the queen. Some beekeepers install the package and do not inspect for weeks. If the queen died during transit or was rejected, you have lost critical time. The day 7 egg check is essential.
A good reference for understanding queen behavior and package dynamics is the USDA Bee Research Laboratory, which publishes practical research on colony establishment and queen acceptance.
What You Need for Installation Day
- Assembled hive in its permanent location (single deep, 10 frames)
- Hive top feeder filled with 1:1 sugar syrup
- Spray bottle of 1:1 sugar syrup
- Protective gear (full suit and veil for first-timers)
- Hive tool
- Small nail or pliers (for queen cage cork)
- Smoker (lit, nearby, probably will not need it)
- A bee brush for gently moving bees off frame tops when replacing frames
Plan for the whole process to take 15-20 minutes. It feels longer in the moment, but it really is that quick.
FAQ
What if I drop the queen cage into the hive? It happens. Do not panic. The bees will cluster on it wherever it lands. Use your hive tool to gently retrieve it and position it properly between frames. The queen will be fine.
What if bees are flying everywhere during installation? Normal. A cloud of bees in the air during a package dump looks alarming but is not dangerous. They are disoriented, not aggressive. Stay calm, move slowly, and finish the process. They will settle within 30 minutes.
Should I use a smoker during installation? Have one lit and nearby, but you probably will not need it. Packages are extremely docile because they have no home or brood to defend. If they seem agitated, a light puff at the entrance calms things down.
Can I install a package in the rain? Avoid it if possible. Rain chills the bees and makes the whole process messier. If a storm is coming and you cannot wait, install quickly and get the cover on. The bees will be fine once they are inside.
How long until the package feels like a real colony? By week 3-4, a well-fed package should have several frames of drawn comb, visible brood in all stages, and a growing population. By week 6-8, the colony should be strong enough to start filling the second brood box. It takes a full season for a package to reach the strength of an established colony.
Related Reading
- Beginner’s Guide to Starting a Beehive
- How to Winter Bees in Cold Climates
- Best Hive Insulation for Cold Winters
Just getting started? Our beginner’s guide covers equipment, costs, and the full first-year timeline.
About the Author
MB Beekeeping covers cold-climate beekeeping with a focus on practical techniques for northern winters. Our guides draw on hands-on experience keeping bees through prairie winters - we write about what actually works when temperatures drop below -30.