How to Split a Hive for the First Time: A Beginner's Walk-Through
This post contains affiliate links. As an Amazon Associate, I earn from qualifying purchases at no extra cost to you.
Splitting a hive is how beekeepers turn one colony into two. It is the natural progression after your first successful season - your colony is strong, population is booming, and if you do not give them more space, they will split themselves by swarming. I did my first split in my second year of beekeeping and was surprised by how straightforward it was. The bees do most of the work. Your job is timing and setup.
This guide covers the two main split methods, when to do it, and how to avoid the common mistakes that trip up first-timers.
Safety Note: Splitting involves extended hive manipulation with frames of brood, honey, and bees fully exposed. Wear full protective gear including gloves. Work on a calm, warm day above 18C (65F). Have your smoker well-lit and producing cool white smoke - hot smoke with embers agitates bees. If the colony becomes highly defensive during the split, close up and try again another day.
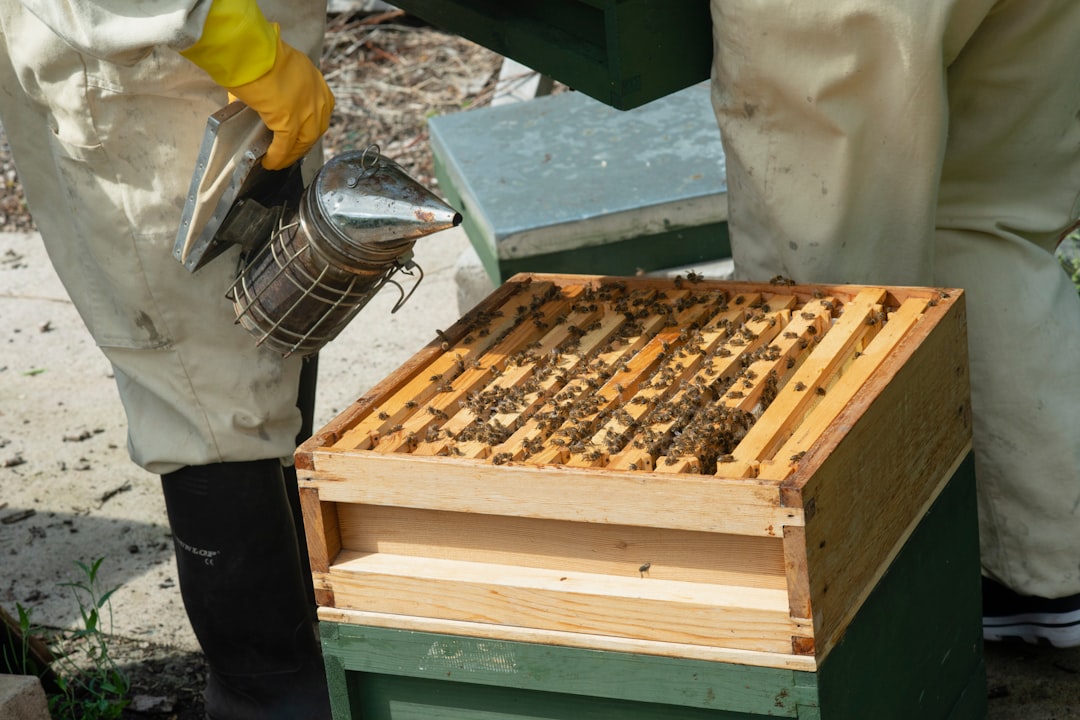
Photo by Age Cymru on Unsplash
Why Split a Hive?
There are three reasons to split, and knowing which one applies to you determines when and how aggressively to do it.
Swarm prevention. A strong colony running out of space will swarm - half the bees leave with the old queen to find a new home. You lose half your workforce and the swarm may not survive. Splitting gives them the space expansion they need under your control rather than on their terms.
Increasing your hive count. Splits are free bees. Instead of buying a $200-350 nuc, you create one from your own stock. The genetics are proven (the parent colony survived your local conditions) and the cost is just another set of hive equipment.
Replacing winter losses. In cold climates where winter losses of 20-30% are common, splits made in spring from surviving colonies rebuild your numbers without buying packages. This is how experienced northern beekeepers maintain their apiary size year over year.
When to Split
The Short Answer
Split when the parent colony is strong enough that dividing it in half still leaves both halves viable. In northern climates, that typically means late May through mid-June - after the colony has built up from winter but before the main nectar flow peaks.
What “Strong Enough” Looks Like
The parent colony should have a minimum of 8 frames covered with bees across two deep brood boxes, with brood in all stages (eggs, larvae, capped brood), multiple frames of capped honey, and a visibly healthy laying queen.
If the colony does not meet all of these criteria, it is not ready to split. Splitting a colony that is still building up from winter or recovering from a problem will weaken both halves to the point where neither thrives.
Timing Relative to Nectar Flow
The ideal split timing is 4-6 weeks before your main nectar flow. This gives the queenless half time to raise a new queen, have her mated, and start laying before the flow begins. If you split too late, the queenless half misses the flow entirely and enters fall behind on stores.
In Manitoba and similar northern climates, the main flow typically starts in early to mid-July (canola, clover, alfalfa). That means splitting in late May or early June is the sweet spot.
Method 1: The Walk-Away Split
This is the simplest method and the one I recommend for your first split. You divide the colony roughly in half, make sure one half has the queen and the other has young brood, and walk away. The queenless half raises their own queen from the young larvae.
Step by Step
Step 1: Set up your new hive equipment next to the parent hive. You need a bottom board, one deep brood box with 10 frames (5 empty, 5 to be filled from the parent), inner cover, and outer cover.
Step 2: Open the parent hive and find the queen. This is the hardest part of the whole process. Work through every frame systematically. The queen is usually on a frame with eggs and young larvae. Mark her location mentally - you need to know which box she ends up in.
Step 3: Move 3-4 frames of brood (mix of capped and open brood with eggs) plus 1-2 frames of honey and pollen into the new hive. Make sure the queen stays in the parent hive. Shake additional nurse bees from 2-3 frames into the new hive to ensure adequate population.
Step 4: Fill the remaining empty slots in both hives with empty frames of foundation. Close up both hives.
Step 5: Walk away. The queenless half will discover they have no queen within hours and begin building emergency queen cells from the youngest larvae. A new queen will emerge in approximately 16 days, take her mating flights a few days later, and begin laying roughly 3-4 weeks after the split.
Critical Requirements
The queenless half must have frames containing eggs or larvae less than 3 days old. Bees can only raise a queen from very young larvae. If you transfer only capped brood (no eggs, no young larvae), the split cannot make a queen and will die.
Pros and Cons
Pros: Simple. No queen purchasing. The new queen is raised from your own genetics, which means she is adapted to your local conditions.
Cons: The 3-4 week queenless period means no egg laying and a population dip. The new queen’s mating success is not guaranteed - bad weather during mating flights can result in a poorly mated or drone-laying queen. You will not know if the split succeeded until you confirm eggs from the new queen, roughly 4 weeks after the split.
Method 2: The Managed Split with a Purchased Queen
This method eliminates the queenless period by introducing a mated queen to the queenless half immediately.
Step by Step
Steps 1-4 are identical to the walk-away split. Divide the colony, ensure the queenless half has brood and bees.
Step 5: Instead of walking away, introduce a caged mated queen to the queenless half. Suspend the queen cage between two center frames with the candy end down, just like a package installation. The bees chew through the candy plug over 2-4 days and release the queen.
Step 6: Check queen release at day 3-4. Confirm the queen is laying by day 7-10.
Pros and Cons
Pros: No queenless period. The new queen is already mated and begins laying within days. No risk of mating failure. The split builds up faster and has a better chance of being winter-ready by fall.
Cons: A mated queen costs $30-50. Availability depends on your area and timing - queens sell out fast in spring. There is a small risk of queen rejection, though this is less common with a genuinely queenless split than with a package installation.
My Recommendation
For cold-climate beekeepers doing their first split, I recommend Method 2 (purchased queen) if you can source one. The short northern season means every week of laying matters. A walk-away split loses 3-4 weeks of brood production, which often means the new colony cannot build sufficient stores for winter without heavy feeding. A purchased queen gets the new colony productive weeks sooner.
If you cannot source a queen, the walk-away split works - just split early enough (late May) to give the new queen maximum time to build up before fall. And feed the new split with a hive top feeder loaded with 1:1 sugar syrup from day one.
After the Split
Feed Both Halves
Both the parent and the new split lose foraging workforce in the division. Feed 1:1 sugar syrup to both hives for at least 2 weeks post-split, or until the nectar flow begins. The new split especially needs feeding to draw comb on the empty frames you added.
Monitor the New Split
Check the new split at day 7 for queen cells (walk-away method) or queen release and eggs (purchased queen method). At day 21-28, do a thorough inspection looking for a healthy brood pattern - consistent laying in a solid pattern across the frame center with few gaps.
If at day 28 you see no eggs and no queen, the split has failed. Recombine it with the parent colony before the population declines further. You can try again later in the season if the parent colony rebuilds.
Prepare Both for Winter
In cold climates, a late-May split has roughly 4 months to build up before winterization begins in October. Monitor stores closely through late summer and fall. A first-year split often needs supplemental feeding with 2:1 heavy syrup in September to reach the 80-90 pounds of stores needed for a northern winter. Our wintering guide covers the full preparation process.
For detailed research on split timing and queen rearing success rates in northern climates, the University of Manitoba Faculty of Agricultural and Food Sciences has published field studies on colony division in prairie conditions.
FAQ
How many times can I split one colony per season? In northern climates with short seasons, once. Splitting the same colony twice leaves both halves too weak to build winter stores. In warmer climates with longer seasons, experienced beekeepers sometimes split twice, but this is not a beginner strategy.
Can I split a first-year colony? Generally no. A first-year colony from a package or nuc is still building up and rarely has the population to support a split. Wait until your second spring when the colony has overwintered successfully and is bursting with bees.
What if I cannot find the queen? This is common and frustrating. If you truly cannot locate her, an alternative approach is to look for the frame with the freshest eggs (standing upright, one per cell). The queen is almost certainly on or near that frame. Place that frame and the frames immediately adjacent to it in the parent hive. The remaining brood frames go to the new split, which is now queenless.
Will the split colony make honey this year? Probably not in meaningful quantity, especially in cold climates. A split needs to draw comb, build population, and store enough for winter before producing surplus honey. Expect to harvest from the parent colony only. The split is an investment in next year.
What time of day should I split? Mid-morning to early afternoon on a warm, calm day. This gives foragers time to return to both hive locations before evening. Avoid splitting late in the day or in cold, windy weather.
Related Reading
- How to Winter Bees in Cold Climates
- Beginner’s Guide to Starting a Beehive
- How to Hive a Package of Bees
- What Is a Bee Nuc? How to Buy, Hive, and Manage a Nucleus Colony
Planning your first winter? Read our cold-climate wintering guide so your split has the best chance of surviving to spring.
About the Author
MB Beekeeping covers cold-climate beekeeping with a focus on practical techniques for northern winters. Our guides draw on hands-on experience keeping bees through prairie winters - we write about what actually works when temperatures drop below -30.