How to Use a Smoker Properly
This post contains affiliate links. As an Amazon Associate, I earn from qualifying purchases at no extra cost to you.
A beekeeping smoker is one of the most essential tools you will own, but most new beekeepers do not learn how to use one properly until they have already had a few rough inspections. Getting your smoke right - the right amount, the right fuel, and the right timing - makes every hive visit go more smoothly and reduces stress on both you and the bees.
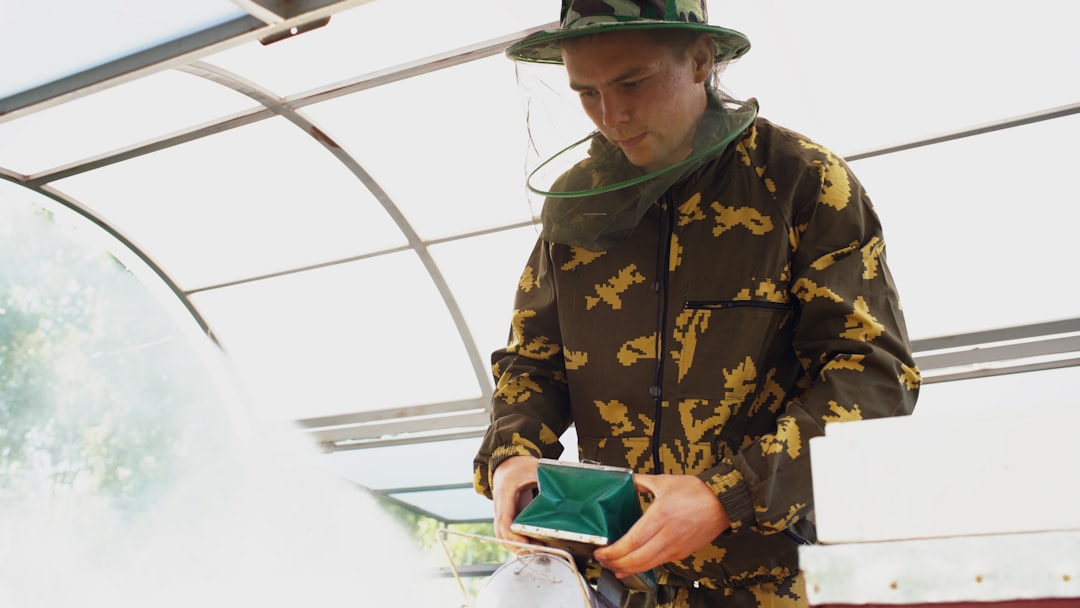
Photo by Vitaly Gariev on Unsplash
Safety note: A beekeeping smoker burns live fuel at high heat. Always keep the lit smoker upright and away from dry grass, wooden surfaces, and flammable materials. Never leave a lit smoker unattended near the hive or in a vehicle. After your inspection, allow the smoker to cool completely before storing it indoors - hot ash inside a closed smoker can start a fire hours later. Plugging the nozzle with a handful of green grass will help smother the fire and speed cooling.
Why Beekeepers Use Smoke
Smoke does not sedate bees or make them sleepy - that is a common misconception. What it actually does is trigger a feeding response. When bees detect smoke, they interpret it as a signal that their hive may be threatened by fire. Their instinct is to gorge on honey before potentially abandoning the hive. Bees that are full of honey are physically less able to flex their abdomens and sting, which is why a well-smoked colony tends to stay on the comb rather than coming off the frames to investigate you.
Smoke also masks the alarm pheromone that guard bees release when they feel threatened. That alarm pheromone - a sharp, banana-like scent - recruits other bees to join the defense. A few puffs of smoke at the entrance before you open the hive gives you a window to work before that chemical signal can spread through the colony.
Understanding this helps you use smoke more effectively. You are not trying to overwhelm the bees with a cloud of thick smoke. You are introducing just enough to trigger the feeding response and interrupt pheromone communication.
What You Need Before You Light the Smoker
Before your first inspection of the season, it is worth checking that your smoker is clean and in good working order. Old creosote and ash buildup inside the fire chamber can restrict airflow and make it harder to keep the fire going during a long inspection.
You will need: a lit smoker (more on that below), a hive tool, your protective gear including gloves and veil, and enough fuel to last your full inspection. In our experience, most beekeepers underestimate how much fuel they need for a thorough inspection of a strong colony - start with more than you think you will need.
A good quality stainless steel smoker with a heat shield and a sturdy bellow makes a real difference. Cheap smokers with flimsy bellows tend to let the fire die out mid-inspection, which is exactly when you do not want to be relighting. For a primer on what to look for during your inspection once you have smoke going, see our guide to your first hive inspection.
How to Light and Load a Beekeeping Smoker
Lighting the smoker properly is a skill that takes a few tries to get right. Here is the method we have settled on after a lot of trial and error.
Step 1: Start with a small tinder bundle. Use dry material that catches easily - a few squares of cardboard, a small handful of dry wood shavings, or crumpled paper. Light it and drop it into the bottom of the fire chamber, then pump the bellow gently to establish a small flame. Do not try to pack in all your fuel at once.
Step 2: Add your main fuel gradually. Once the tinder is burning, begin adding your main smoker fuel in small amounts. Pack it loosely - do not compress it, as that restricts airflow and smothers the fire. Pump the bellow between additions to keep the fire active.
Step 3: Check for cool, white smoke. Pump the bellow a few times and look at the smoke coming out of the nozzle. Cool, white smoke is what you want. Hot, dark, or acrid smoke means the fire is running too hot - usually because the fuel is packed too tightly or the nozzle is partially blocked. Cool smoke is much less likely to irritate or alarm the bees.
Step 4: Fill to the top and put on the nozzle cap. Once you have a good bed of coals, fill the chamber with fuel to about an inch below the rim. A full chamber will keep the fire going for 45 minutes to an hour, which is plenty for most inspections.
How to Use a Smoker at the Hive
Timing and placement matter. Here is our standard approach for a Langstroth hive inspection.
At the entrance: Before opening the hive, puff 2-3 times of smoke into the entrance. Wait about 30 seconds. This gives the guard bees time to retreat into the hive and triggers the feeding response before you disturb the colony.
Under the inner cover: Before fully lifting the inner cover, lift one edge and puff 1-2 times of smoke into the gap. Then wait another 10-15 seconds before removing the cover completely. This prevents the sudden rush of bees that often happens when you pull a cover off an unstimulated hive.
During the inspection: Use smoke sparingly as you work through the frames. A few puffs near the top bars if bees start bearding up or showing interest in you is usually enough. Avoid smoking directly onto brood frames or blasting smoke down at the bees - that is more disruptive than helpful.
On the veil: If you see bees clustering on your veil near your face, a gentle puff of smoke directed across the veil face (not at the bees themselves) will disperse them. This also helps mask any alarm pheromone that may have already been released near you.
Knowing how many bees you are looking at helps calibrate how much smoke you use. A strong colony with 50,000 or 60,000 bees needs more active smoke management than a small split with 10,000. Our guide to how to identify the queen bee covers what you are looking for once the bees are calm and on the frames.
What to Use as Smoker Fuel
Not all smoker fuel is equal. The goal is a fuel that lights easily, stays lit without constant bellow work, and produces cool, white smoke rather than hot, dark, or acrid smoke. Here are the options we have used.
Cotton fiber smoker fuel is our first choice for most inspections. It lights quickly, produces a clean white smoke, and burns slowly enough to last a full inspection without needing a refill. It does not produce the oily residue that some wood-based fuels leave behind inside the smoker.
Burlap (jute) is a classic and works well when it is dry. Old burlap coffee sacks are a traditional choice. The key is making sure it is completely dry before you use it - damp burlap smolders and goes out.
Wood pellets (the kind used for grilling or smoking) work in a pinch and are easy to find at hardware stores.
Fresh or green vegetation - grass clippings, pine needles, sumac - can be used to add bulk or to cool the smoke, but these should not be your only fuel. They smolder unevenly and tend to go out. We use a handful of green grass at the very end to cool the smoker down after an inspection.
Avoid: anything synthetic, painted, or treated, such as cardboard with colored ink, plastics, or pressure-treated wood scraps. These produce toxic smoke that is harmful to bees and to you.
According to the University of Minnesota Extension’s bee research page, using cool smoke effectively is one of the most important skills for reducing colony disruption during inspections - something the research repeatedly connects to overall colony health and beekeeper safety.
Common Smoker Mistakes and How to Avoid Them
Using too much smoke. Over-smoking agitates bees rather than calming them. You do not need to fog the entire hive. A few targeted puffs is almost always enough. We have seen new beekeepers pump the bellow continuously throughout an inspection - the bees end up running all over the place and the beekeeper ends up with more stings, not fewer.
Letting the fire go out mid-inspection. This usually happens when the fuel is packed too tightly or the fire was not well-established before opening the hive. Set up your smoker 5 minutes before you need it, and test it before you approach the hive. If it dies during an inspection, stay calm, close the hive, re-light, and wait a minute before continuing.
Hot smoke. If your smoker is running hot - the nozzle is very hot to the touch and the smoke looks dark or brown - stop and let it cool slightly before using it on the bees. Hot smoke can and will burn bees.
Smoking during nectar flow. Some experienced beekeepers go lighter on smoke during a strong nectar flow because bees in a well-populated hive with plenty of incoming forage tend to be calmer anyway. This is something you develop a feel for over time.
Not cleaning the smoker. Creosote and tar build up on the inside of the fire chamber and nozzle over a season. Clean your smoker at the end of the season and before your first spring inspection. A wire brush and a putty knife get most of the buildup out.
Maintaining and Storing Your Smoker
After each use, let the smoker cool completely before storing it. The safest way to extinguish it is to stuff the nozzle with a handful of fresh green grass or cork it with a wine cork, which cuts off the oxygen supply. Most beekeepers set the smoker on a non-flammable surface (a concrete block works well) while it cools.
Between seasons, wipe down the outside of the fire chamber with a dry cloth and clean out any ash or buildup from the interior. Check the bellow for cracks, since a damaged bellow loses air pressure and makes the smoker harder to keep lit. Inspect the nozzle for blockages. A stainless steel smoker with a solid bellow should last many years with basic care.
Recommended Products
The Honey Keeper Bee Hive Smoker with Stainless Steel and Heat Shield is a reliable mid-range option for backyard beekeepers. It has a solid stainless steel body, a metal heat shield that keeps the outside cool enough to handle, and a hook for hanging it while you work. A dependable choice if you want a smoker that holds up for several seasons.
The VIVO Stainless Steel Bee Hive Smoker is another widely used option in the hobbyist community. It is a straightforward, well-built smoker that lights easily and produces clean smoke. Good value for the price.
For fuel, Premium Cotton Fiber Smoker Fuel is one of the cleanest-burning options available. It lights quickly, stays lit, and produces the cool white smoke that bees respond best to. Worth keeping a bag on hand even if you also use natural fuels.
You can also find quality smokers and accessories directly from beekeeping suppliers: Mann Lake carries a full line of smokers and fuel, and Dadant & Sons has been supplying beekeeping equipment for generations.
As an Amazon Associate we earn from qualifying purchases at no extra cost to you.
Ready to put your smoker to work? Bookmark this guide and head over to our hive inspection walkthrough for a complete step-by-step of what to look for once you have the hive open and the bees calm.