What Is a Bee Nuc? How to Buy, Hive, and Manage a Nucleus Colony
This post contains affiliate links. As an Amazon Associate, I earn from qualifying purchases at no extra cost to you.
You’ve decided to start beekeeping, and now you’re trying to figure out how to actually get bees. You’ll quickly run into two main options: a package of bees or a nucleus colony (called a nuc). A lot of new beekeepers default to a package because it’s what they heard about first. But in our experience, a nuc gives you a significantly better shot at making it through your first season and understanding why can save you a lot of frustration.
This guide covers everything you need to know about nucleus colonies: what they are, how they compare to packages and other options, how to find and buy one, how to install it properly, and what to watch for in the weeks that follow.
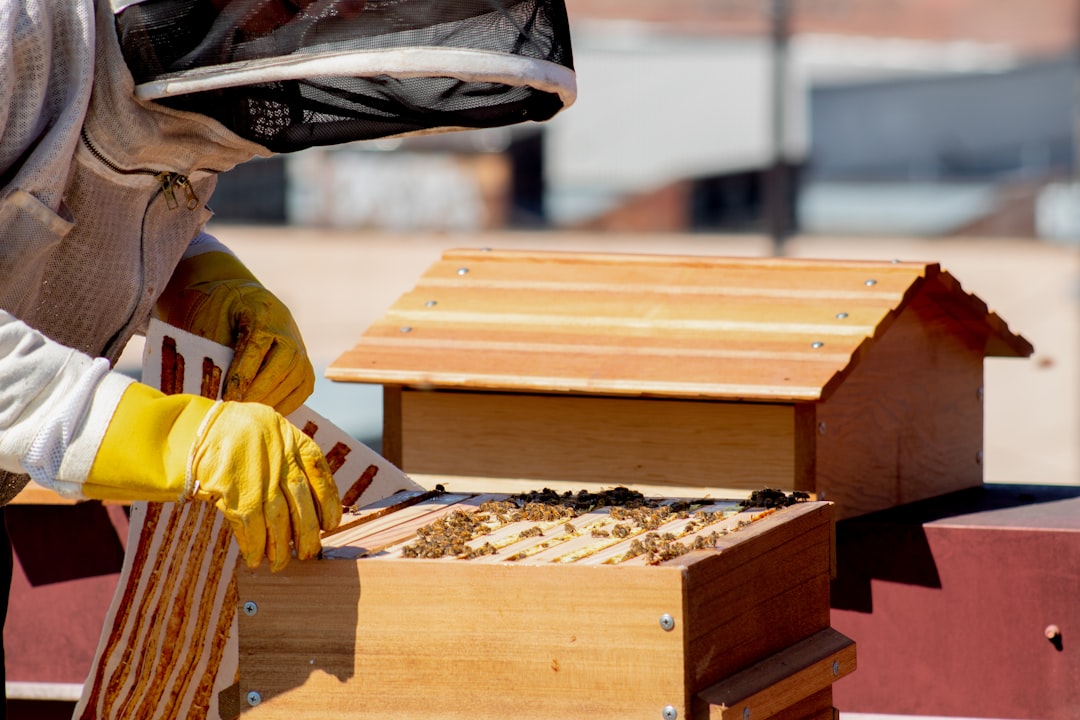
Photo by Meggyn Pomerleau on Unsplash
What Is a Bee Nuc?
A nucleus colony (universally called a “nuc”) is a small, self-contained bee colony built on frames. A standard nuc consists of five Langstroth frames that have already been drawn out by bees and are in active use by the colony. Those five frames typically include drawn comb with honey and pollen stores, frames containing eggs, open and capped brood in various stages of development, nurse bees, forager bees, and most importantly, a mated, laying queen.
That last point is the critical one. When you buy a nuc, the queen has already been accepted by the colony and has been actively laying eggs. You are not waiting to see if a queen will be accepted or if she is viable. She has already proven herself. The brood pattern on the frames is your first real piece of evidence about her quality.
The frames inside a nuc box are true Langstroth frames, the same size as what will go into your full hive body. When you install a nuc, you are literally lifting those frames out of the nuc box and moving them directly into your hive. The bees continue their work without significant disruption.
Nucs are sold in a corrugated cardboard or wood nuc box: a temporary, five-frame structure used only for transport and initial housing. You should plan to move the colony into your permanent hive within a day of picking up the nuc.
Nuc vs. Package vs. Swarm: Which Should You Start With?
These are the three primary ways to acquire bees as a new beekeeper, and they are meaningfully different in what you’re getting and what they demand of you.
| Nuc | Package | Swarm | |
|---|---|---|---|
| What you get | 5 frames of drawn comb, brood, workers, mated queen | ~3 lbs bees in a screened box, caged queen | Wild colony, mated queen |
| Queen status | Already laying and accepted | Caged, needs acceptance (5-10 days) | Laying, accepted |
| Brood present | Yes (eggs through capped brood) | No | Usually yes |
| Drawn comb | Yes | No | Sometimes |
| Installation complexity | Low | Moderate | Low to moderate |
| Cost | $150-$250 typically | $100-$175 typically | Free or very low |
| Availability | Limited, order early | Moderate | Unpredictable |
| Best for | New beekeepers wanting a strong start | Beekeepers wanting specific genetics | Experienced beekeepers |
A package gives you bees but no comb, no brood, and a queen who has not yet been accepted by the workers in the box. The colony has to draw out all of its comb from scratch, which consumes enormous resources (it takes roughly 8 lbs of honey to produce 1 lb of wax). A package colony is starting from zero in a box that is foreign to it.
A nuc starts in a fundamentally different place. The bees have a working queen, existing stores, and brood in multiple stages. The colony is already a functioning unit. In our experience with both, nuc colonies typically build faster, winter better in the first year, and require less supplemental feeding to get established.
Swarms are opportunistic. They arrive when they arrive, and catching them requires knowledge and readiness. A swarm can be a great deal, but it is not a reliable first-bees strategy.
For most new beekeepers, a nuc is the right choice.
How to Buy a Bee Nuc: Timing, Sources, and What to Look For
When to Order
Nucs are in high demand and sell out fast. In most regions of the United States, you should place your order in January or February for a spring delivery. Some producers sell out by December. If you are reading this in March and hoping for a May nuc, call local producers immediately. You may get lucky, but supplies are thin.
Nuc season in most of North America runs from late April through June, with the peak in May. This timing aligns with the main nectar flow in most regions, giving your colony the best conditions to build quickly.
Where to Buy
Local sources are strongly preferred over mail-order for nucs. A five-frame nuc with frames of brood is not designed for shipping. It is a colony in progress. Local producers allow you to pick up the nuc directly, which means the bees travel a shorter distance, arrive less stressed, and can be installed the same day.
Finding local producers: contact your state or regional beekeeping association. Most maintain a list of local nuc producers. Your county extension office is another resource. Local beekeeping clubs often have waiting lists for member-produced nucs, and club-produced nucs frequently come from queens selected for local climate performance.
Ask the producer these questions before committing:
- Are the nucs locally raised, or were bees and queens imported from another region?
- What is the queen’s origin? (locally mated, Italian, Carniolan, Russian, VSH)
- Have the colonies been treated for varroa, and with what?
- What do the five frames consist of? How many frames are brood vs. stores?
A producer who cannot answer these questions confidently is not someone you want to buy from.
Evaluating a Nuc at Pickup
When you go to collect your nuc, bring your veil and gloves. A reputable producer will let you inspect the frames briefly before you close the box. Look for a solid brood pattern with few empty cells within the brood area, the presence of eggs (which confirms a recently laying queen), capped honey and pollen in at least two frames, and a general sense of calm, even temperament in the bees.
If you see a spotty, scattered brood pattern, few eggs, or very little in the way of stores, ask questions before you leave. This is the time to raise concerns, not a week later when the colony has declined further.
Safety note: When inspecting a nuc at pickup, work calmly and deliberately. If you are new to handling bees, having the producer walk you through the inspection is entirely appropriate. Do not hesitate to ask. If you observe anything unusual (deformed wings, many dead bees, or an unusual smell), mention it before closing the box. Contact your local extension office or state apiarist if you suspect disease.
How to Install a Nucleus Colony: Step by Step
What You Need Before You Start
Have your hive ready before the nuc arrives. At minimum you need a bottom board, a hive body with 10 frames (you will use 5 from the nuc and have 5 new frames ready to fill the space), an inner cover, and a telescoping outer cover. An entrance reducer is essential for the first two to four weeks. A Little Giant beehive entrance reducer is an inexpensive addition that helps the new colony guard a smaller entrance before its population fully builds.
You’ll also want a good bee brush for gently moving bees off frames during installation without rolling or crushing them.
If you are setting up from scratch, a complete starter kit like the NuBee Deluxe Beehive Starter Kit includes the hive components you need and simplifies the process of getting everything ready before your nuc arrives.
For additional hive body options, Mann Lake’s hive bodies and Dadant’s nucleus colony resources are worth browsing for equipment that fits a nuc installation setup.
Installation Steps
Step 1: Choose the right time. Install on a warm, calm day, ideally 60°F or above with low wind. Mid-morning to early afternoon is best, as many foragers will be out. This reduces the population density in the box during transfer and gives the colony time to orient before dark.
Step 2: Position your hive. Place the hive where it will live permanently. Bees orient to their home location. If you move the hive later, you will need to do so gradually (a few feet per day) or else returning foragers will look for the hive where it used to be.
Step 3: Light your smoker. Give it a few puffs to ensure it is drawing cleanly and producing cool, white smoke. A smoker with good fuel (burlap, dried wood chips, or pine needles) should sustain itself through the installation.
Step 4: Set the nuc box beside your hive. Remove the tape or plug closing the entrance so bees can fly. Wait two to five minutes before opening the top. This lets any agitated bees settle.
Step 5: Remove 5 frames from your empty hive body. The frames you remove should leave a gap in the center of the box that matches the arrangement of the nuc frames. Set those empty frames aside. You will use them to fill the remaining space after installation.
Step 6: Open the nuc and transfer frames one at a time. Lift each frame carefully, keeping it vertical at all times (tilting frames can roll the queen). Move it directly into your hive body in the same order it came out of the nuc. Do not rearrange the frames. Maintain their original sequence so the brood nest is not disrupted.
Step 7: Fill in the sides. Once all five nuc frames are in place, slide the five empty frames into the remaining space, two or three on each side of the nuc frames. Press everything together gently so there are no large gaps.
Step 8: Shake remaining bees from the nuc box. Hold the empty nuc box over the open hive and give it a firm shake. Most of the remaining bees will drop in. Set the empty nuc box on the ground near the hive entrance, opening facing up. Any remaining bees will find their way to the hive on their own over the next day.
Step 9: Reduce the entrance. Install the entrance reducer on the smallest opening. Leave it in place for at least two weeks while the colony builds its guard bee population.
Step 10: Close the hive and leave it alone for a week. Resist the urge to open the hive for the next seven days. The colony needs time to settle into its new space.
Managing Your Nucleus Colony Through the First Season
The First Inspection (7-10 Days After Installation)
Your first post-installation inspection should confirm that the queen is still present and laying. You are looking for eggs and young larvae. If you see them, the queen is there and active. You do not necessarily need to find the queen herself. Look also for healthy brood development (C-shaped, pearly white larvae in a tight pattern), pollen and nectar being stored in the frames outside the brood area, and general calm behavior.
Refer to our guide on how to read brood patterns for more detail on what a healthy brood nest looks like and what warning signs to watch for.
Feeding
Whether to feed a new nuc depends on conditions. During a strong nectar flow (spring in most climates), a nuc installed in late April or May may not need supplemental feed. Foragers will bring in enough. During early spring when nectar is sparse, or if you install a nuc into an empty box during a dearth, a 1:1 sugar syrup feeder inside the hive can help the colony draw comb on those empty frames faster.
Do not feed during a heavy nectar flow, as it can trigger robbing and create confusion about what the bees should be doing. Watch what foragers are bringing in. If you see pollen and nectar being stored, the colony is finding what it needs.
Adding a Super
A nuc colony installed in spring can surprise you with how fast it builds. By midsummer in a good year, a strong nuc can fill the bottom box and be ready for a honey super. Inspect your frames every two weeks in the first month and then monthly. When seven or more frames in the bottom box are covered with bees and brood or stores, it is time to add a second deep or a super. Read more about timing your super addition in our post on when to add a honey super.
Varroa Monitoring
Do not skip varroa monitoring during your first year. A colony that arrives as a nuc with a low mite load can build up to dangerous levels by late summer without a single visible symptom until the colony crashes. Conduct an alcohol wash or sugar shake at 30, 60, and 90 days post-installation. If counts exceed 3 mites per 100 bees, treat according to your threshold and label directions.
The University of Minnesota Bee Lab maintains free, authoritative guidance on varroa monitoring methods and treatment thresholds. It is a reliable reference for any beekeeper.
Common Nuc Problems and How to Solve Them
Problem: No eggs or brood 10 days after installation. This usually means the queen has been lost or stopped laying. Open the hive carefully and look for queen cells, as the colony may be attempting to raise an emergency queen from existing brood. If you find no eggs, no larvae, no queen cells, and laying workers (multiple eggs per cell in scattered pattern), the colony is in trouble. Contact your nuc supplier. A reputable one will work with you.
Problem: Bees are clustered at the entrance (bearding) rather than working. In warm weather, this is normal ventilation behavior. It is not a problem unless it is happening in cool weather or the cluster is unusually large and the bees appear agitated. Make sure the hive has adequate ventilation (screened bottom board helps) and that the entrance is not completely blocked.
Problem: Heavy robbing behavior (bees fighting at the entrance, frantic activity) Robber bees from nearby hives will attack a newly installed, small colony that cannot defend a full entrance. This is why the entrance reducer is not optional. If you see robbing, close the entrance to the smallest possible opening. In severe cases, stuff a bit of grass in the entrance loosely. Your colony’s bees will find their way through; disoriented robbers will give up.
Problem: Frames covered in propolis and difficult to inspect. This is normal. Bees glue everything together with propolis. Use a hive tool to gently break the propolis seal along the top bar before lifting each frame. Do not pry without working the seal loose first, or you risk snapping a frame or rolling the queen.
Problem: The colony is not expanding after four weeks. A colony that has not expanded beyond its original five frames after a month is worth investigating. Check for a failing queen (spotty, irregular brood pattern or no eggs), chronic disease, or a very late or very poor nectar flow. If the queen is failing, the colony may already be raising a replacement. Give it time and re-inspect. If conditions are the issue, consider supplemental feeding.
Frequently Asked Questions
How many bees are in a 5-frame nuc? A five-frame nuc typically contains 10,000 to 15,000 bees, depending on the strength of the colony at the time of purchase. For comparison, a healthy full-sized colony in summer can hold 50,000 to 80,000 bees. A nuc is a starting point, not a finished colony.
Can I use a nuc if I have a top bar hive? Standard nucs come on Langstroth frames, which do not fit top bar hives. You can transfer the bees by shaking them from each Langstroth frame directly into the top bar hive, but you will lose the comb and have to cut brood from the frames and tie it in. This is workable but more complex. Ask specifically for a top bar nuc if that is your hive style; some producers offer them.
How long can I leave bees in a nuc box? Install the nuc within 24 hours of pickup if possible, and no longer than 48 hours. The bees will begin to feel the space constraints quickly, and the queen may reduce or stop laying if conditions deteriorate. The nuc box is not designed for long-term use.
What if the queen dies right after installation? Contact your supplier. A dead or lost queen within the first week of installation is typically considered a supplier issue, not beekeeper error. Established beekeeping suppliers will often replace a queen or offer a credit. Document what you find. Take a photo of the brood pattern (or absence of it) before reaching out.
Is a nuc easier to inspect than a full hive? Yes, for a new beekeeper, five frames is far more manageable than ten. You can work through an entire nuc inspection in five minutes once you know what you are looking for. Use this period to practice identifying eggs, queen cells, healthy vs. spotty brood, and the difference between capped honey and capped brood. The skills you build now will carry forward as the colony grows.
Do I need to re-queen after hiving a nuc? No, unless the queen proves to be failing. The queen that comes with the nuc is your colony’s queen. The purpose of buying a nuc over a package is precisely that you are getting an established, accepted, laying queen. Replacing a functional queen unnecessarily is a costly mistake and sets the colony back.
Conclusion
A bee nuc is the best starting point for most new beekeepers precisely because it shortens the most uncertain part of colony establishment. You start with a proven queen, drawn comb, and a colony already functioning as a unit. The first season with a nuc is not without challenges, but those challenges are about beekeeping, not about whether your bees will survive the initial setup.
Order early, pick up locally, do your first inspection at day seven, and resist the urge to open the hive every few days in the first month. The colony will reward patience.
Found this guide useful? Bookmark it for reference when your nuc arrives, or share it with someone who is starting their first hive this spring.