How to Order Honey Bees: Package Bees Timing, Sources, and What to Expect
This post contains affiliate links. As an Amazon Associate, I earn from qualifying purchases at no extra cost to you.
Few moments in beekeeping are more exciting than the day your first package of bees arrives. It’s also one of the most nerve-wracking. You’re holding a screened wooden box with 10,000 live bees inside, and you’re responsible for keeping them alive and giving them a home. The good news is that with the right preparation, ordering and installing a package of bees is completely manageable for a first-year beekeeper.
This guide walks you through the entire process: what a package actually is, when and where to order, what to expect from the time you place your order to the moment you close up your hive, and the most common mistakes that trip up new beekeepers.
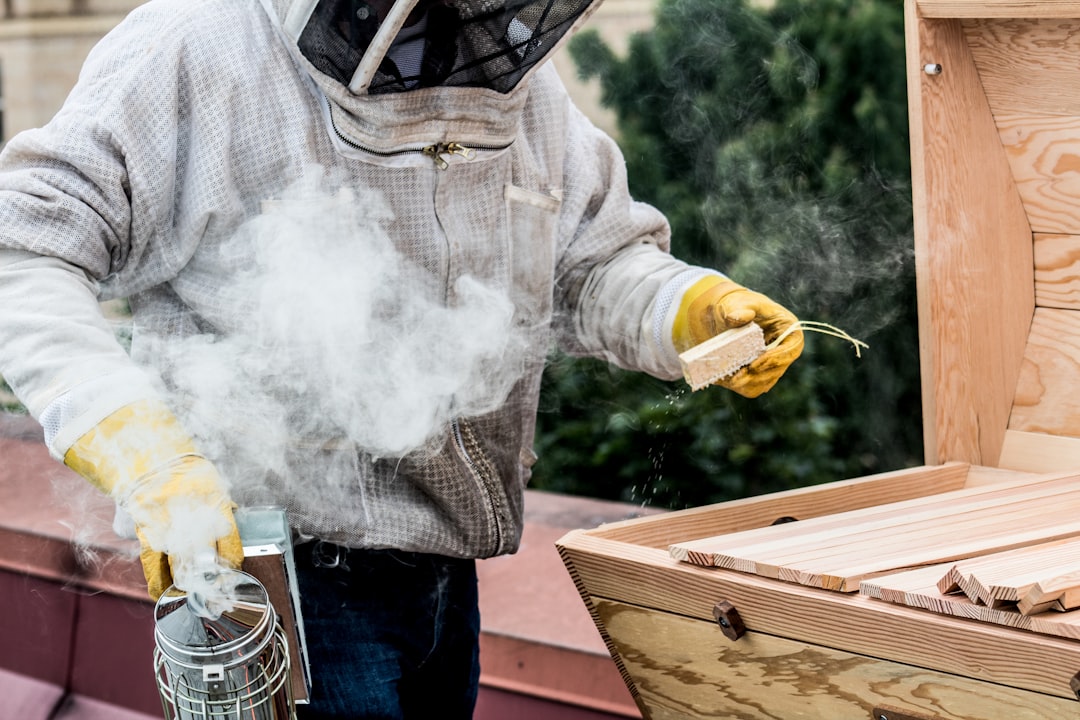
Photo by Meggyn Pomerleau on Unsplash
What Are Package Bees?
A package of bees is exactly what it sounds like: a screened wooden or wire cage containing a measured quantity of adult bees and one mated queen. The queen is shipped separately in a small cage within the package, separated from the worker bees by a candy plug. This separation gives the workers time to accept the queen during transit and installation rather than killing her as a stranger.
Packages come in three standard sizes: 2-pound, 3-pound, and 5-pound. The weight refers to the bees themselves, not the total package weight. A 3-pound package contains roughly 10,000 to 12,000 worker bees, which is the most common size and the one most suppliers default to. A 2-pound package is a bit lighter on population, which can make establishment slower in spring but reduces the purchase cost. A 5-pound package is overkill for most new beekeepers and can actually cause management challenges early in the season.
The bees in a package are not a colony in the usual sense. They don’t have drawn comb, no brood, no honey stores, and often the worker bees have no established relationship with the queen. This is an important distinction from a nucleus colony (nuc), which we will cover in the comparison section below. Because packages start from scratch, they require more active management in the first six weeks than established colonies.
Package bees are almost always Italian, Carniolan, or Buckfast bees. Italian bees are gentle and productive but tend to continue brood-rearing heavily into fall, which can lead to food stores being depleted. Carniolans ramp up and down with the flow, which makes them excellent in areas with distinct nectar dearths. We’ve started hives with both, and in our experience Carniolan packages establish quickly in spring and manage their own population well as summer progresses.
One thing that surprises new beekeepers: packages are not inspected for diseases the same way that state-inspected nucs are. You are trusting the supplier’s production practices. This is one of the reasons supplier selection matters.
When to Order Package Bees
The single most important thing to know about ordering package bees is that you should order early. Most reputable suppliers open their order books in late fall or January for spring delivery, and popular suppliers often sell out weeks or months before the first packages ship. If you’re reading this in March and haven’t ordered yet, you may already be looking at late-season availability at best.
Shipping windows vary significantly by region. Here’s a general guide by geographic zone:
Southeast (Georgia, Florida, the Carolinas): Early-to-mid April is typical. These warm-winter states are where most package bees are produced, and local delivery or pickup is available earlier than anywhere else in the country. Some Georgia producers start shipping in late March.
Mid-Atlantic and Midwest: Late April through May. A cold snap after installation in these regions can still kill a new colony, so most experienced beekeepers in zones 5-6 target a window when temperatures are consistently above 55 degrees Fahrenheit at night.
Pacific Northwest and high-elevation regions: May or even early June for high-altitude areas. Mountain regions with late springs should not rush installation. A package installed too early into a cold, wet spring will struggle to establish and draw comb.
Northern states (Minnesota, Wisconsin, Maine): Mid-May through early June. Some northern beekeepers do well by ordering early and holding packages indoors for a few days until conditions improve.
The timing rule of thumb we follow: order when the trees in your area are starting to bud, and aim for installation after dandelions are blooming and nights are staying above 50 degrees Fahrenheit. If you’re unsure of your local timing, your state’s land-grant university extension beekeeping program is one of the best free resources available. The Penn State Extension Beekeeping Program publishes excellent regional timing guidance and beginner resources.
When your supplier announces their ship dates, you will typically be given a one or two-week window for your region. You don’t always get to pick an exact day. Plan your schedule around that window so you’re home and ready to install within 24 hours of pickup or delivery.
Where to Order Package Bees
You have two main options for sourcing packages: local suppliers and mail-order suppliers. Both work, and which is better depends on your location and what’s available.
Local beekeeping associations are the best starting point. Many state and county bee clubs coordinate group orders from regional producers, which keeps costs low and reduces transit stress on the bees. Local packages also tend to be acclimated to your climate, and local beekeepers often know the producer personally and can vouch for quality. Search “[your state] beekeepers association” to find your state organization, which will link to local clubs.
Regional producers that you can pick up from directly are the next best option. Pick-up packages haven’t been in transit for days, the bees are fresher, and you can inspect the package before accepting it. Georgia, California, and Texas have large concentrations of package bee producers.
Mail-order suppliers like Mann Lake and Dadant ship packages via USPS Priority Mail. The postal service actually handles live bee packages under specific protocols, and packages typically arrive within two to three days of shipping. Mail-order works well for beekeepers in areas with limited local supply. When comparing mail-order suppliers, look for:
- A clear, published health guarantee and replacement policy
- Disclosure of what bee race you’re receiving
- An established track record with online reviews from beekeepers, not just retail customers
- Responsive customer service in pre-order communications
Questions worth asking any supplier before ordering: Are your queens naturally mated or instrumentally inseminated? Do you requeen the packages, or do they ship with the original queen? What is your dead-on-arrival policy and how do you handle claims?
In our experience, paying a few dollars more per package from a supplier with a strong reputation is almost always worth it over chasing the lowest price. A failing package costs you the entire season.
Package Bees vs. Nucleus Colonies: Which Should You Choose?
Both packages and nucs are valid ways to start a hive. The right choice depends on your budget, your region, and what’s available to you. Here’s a direct comparison:
| Factor | Package Bees | Nucleus Colony (Nuc) |
|---|---|---|
| Cost | Lower ($35-$60 typical) | Higher ($175-$250 typical) |
| Availability | Wide, including mail order | Often limited to local sources |
| Establishment speed | Slower (queen not yet accepted) | Faster (established brood nest) |
| Disease risk | Lower (no existing comb) | Some (inherits existing comb) |
| Queen acceptance | Not guaranteed | Queen already laying |
| Comb drawing | Starts from scratch | Has drawn comb ready |
| First honey | Rarely first year | More likely first year |
| Best for | Beginners on a budget, or where nucs aren’t available | Beekeepers who want faster establishment |
If nucs are available from a local, inspected source at a reasonable price, they’re often the better choice for new beekeepers because the colony is more forgiving of beginner mistakes. That said, packages teach you a lot about queen introduction, comb drawing, and colony development from the ground up, which is genuinely valuable experience. We’ve done both, and both have merit.
For a deeper look at nucs, including how to evaluate one before purchasing, see our guide: What is a bee nuc? How to buy, hive, and manage a nucleus colony.
What Happens After You Order Package Bees
Once you’ve placed your order, most suppliers will send a confirmation with your estimated ship window. Don’t expect a specific day until a week or two before your window.
About a week before shipping, prepare your equipment:
- Your hive body should be assembled, painted or treated, and ready with frames and foundation (or empty frames if you’re doing foundationless).
- Have your feeder ready and your sugar syrup made (1:1 white granulated sugar to water by weight for spring feeding).
- Know where your hive is going. The installation site should have morning sun, afternoon shade in hot climates, and wind protection.
When the packages are ready to ship, your supplier will notify you with a tracking number. USPS packages typically arrive at your local post office before the normal delivery window, and postal workers are often eager to call you early in the morning. Leave your phone number with the post office ahead of time so they can call you first thing when the packages come in, rather than having the bees sit in a warm sorting facility for hours.
If you’re picking up locally, inspect the package before accepting it. Look for:
- A live, active cluster of bees (they’ll be bunched around the queen cage)
- No more than a small cup’s worth of dead bees at the bottom of the cage (some loss in transit is normal)
- A live queen in her cage with bees attending her through the screen
If dead bee accumulation covers more than the bottom inch of the cage, or if you cannot locate a live queen, contact the supplier immediately.
On the drive home, keep the package in a cool, shaded spot in your vehicle. A hot car is one of the fastest ways to kill a package.
How to Install a Package of Bees
Install your package within 24 hours of pickup if at all possible. The longer bees remain in the package, the more stressed they become and the more their food supply (usually a can of syrup in the package) is depleted.
Safety note: Always wear your protective gear when installing a package. Even gentle bees can become defensive during installation, and the vibration and disruption of the process can provoke stinging. A quality veil and at minimum long sleeves and gloves are essential. The VIVO Ventilated Beekeeper Suit is a popular full-coverage option that includes gloves. For a broader comparison, see our beekeeping suits and protective gear review.
Step 1: Prepare the hive. Set up your bottom board, one hive body with 8-10 frames, and your inner cover and roof. Remove 3-4 frames from the center to create a space to dump the bees.
Step 2: Remove the feeder can. Most packages ship with a small metal can of sugar syrup plugged into the top. Use your hive tool to pry up the wood cover slightly, then hook and pull out the feeder can. Work quickly so the bees don’t all pour out at once.
Step 3: Remove the queen cage. The queen cage is usually attached to a cork or strap hanging from where the feeder can was. Pull it out and inspect it. The queen should be alive and the attendant bees around her should look healthy.
Step 4: Check the candy plug. The end of the queen cage has a candy plug that the bees will eat through over a few days, releasing the queen slowly. If the plug is still intact (it should be), leave it alone. Only remove the cork covering the candy end, not the candy itself. If the cage has a cork on both ends, remove only the one covering the candy.
Step 5: Hang the queen cage between two center frames. Position the queen cage so the screen faces the open hive interior and the candy end is accessible. The workers will eat through the candy and release the queen on their own timeline, which helps improve acceptance.
Step 6: Dump the bees. Hold the package over the open hive space and give it a firm, sharp shake downward. Most of the bees will fall out in one mass. Repeat until the package is mostly empty. Don’t worry about the bees that remain clinging inside the box.
Step 7: Slide the frames back in gently. Ease the center frames back into position over the mass of bees, being careful not to crush them. Replace the inner cover and roof.
Step 8: Set the empty package in front of the entrance. Leave the open package in front of the hive entrance for a day so any remaining bees can walk in on their own.
Step 9: Check for queen release in 5-7 days. Open the hive and look for the queen walking on the frames or, better yet, eggs in cells. If the candy plug is consumed but you don’t see the queen immediately, look for eggs. Her presence is confirmed by new eggs more reliably than by a visual queen sighting.
In our experience with packages, the most stressful moment is the first queen check. New beekeepers often can’t find the queen and panic. Focus on finding eggs in cells first. A single egg standing upright in the bottom of a cell tells you she was there within the past three days, which is good enough.
Feeding Your New Package Bees
New packages must be fed. There is no exception to this rule. A package has no drawn comb, no honey stores, and no brood to care for when they first arrive. Workers need to consume large amounts of sugar to produce the wax for comb-building, and that process cannot start until they have enough food.
Feed 1:1 sugar syrup (one part white granulated sugar to one part warm water by weight, not volume). This thin syrup mimics a nectar flow and stimulates comb drawing and brood-rearing. Feed continuously for at least the first four to six weeks, or until the colony has drawn out 6-7 frames of comb in the first hive body.
Two feeder types work well for new packages:
Entrance feeders attach to the front of the hive and allow bees to drink from a mason jar inverted over a tray. They’re simple and easy to refill. The Honey Hive Farms Boardman Entrance Feeder is a well-reviewed option that works with standard wide-mouth mason jars and makes refilling straightforward.
Hive-top feeders sit directly above the frames and hold a larger volume of syrup. They reduce the frequency of refilling and eliminate the robbing that can occur with entrance feeders when nearby hives are present. The NIZEFEI 4PC Hive Entrance Feeder set provides a cost-effective way to have multiple feeders ready across different hives if you’re managing more than one colony.
A few things to watch for when feeding new packages:
- Robbing: if other established hives are nearby, an entrance feeder can attract them. Reduce the hive entrance to a small opening and consider switching to a top feeder.
- Syrup fermentation: in warm weather, 1:1 syrup can ferment within a few days. Change it every 2-3 days if temperatures are above 80 degrees Fahrenheit, or add one teaspoon of apple cider vinegar per gallon to slow fermentation.
- Empty feeder syndrome: new beekeepers often don’t realize how fast a new package will consume syrup in the first two weeks. Check it every two to three days.
Some beekeepers also add a protein supplement (pollen patty) in the first weeks, especially early in spring before natural pollen is abundant. This is not required but can accelerate brood-rearing if you’re installing in a cold or early-spring environment.
Common Mistakes When Ordering Package Bees
Ordering too late. This is the single most common mistake. If you’re planning to start with package bees, decide by November and place your order in January. Period.
Installing in cold weather. The bees survive cold better after they’ve drawn some comb and have brood to cluster around. A bare installation in 40-degree weather with no drawn comb, no brood, and no honey stores is a recipe for a dead package. Wait for consistently warm weather, even if that means holding your package for a day or two indoors.
Opening the hive too soon after installation. It’s tempting to check every day. Don’t. Leave the hive alone for five to seven days after installation before your first inspection. Constant opening disrupts the queen acceptance process and can cause the workers to ball the queen.
Not feeding. Some beekeepers are nervous about feeding sugar to bees. For a new package, there is no choice. They have no stores and no comb. Without feeding, they starve before they can establish.
Rushing queen release. If you open the hive at day 5 and the candy plug is still in the queen cage, leave it. Don’t manually release the queen unless she is dead. Forced release too soon is one of the most reliable ways to get a queen killed by her own colony.
Ignoring mite loads. Package bees arrive with some mite load inherited from the production apiary. Do a mite wash within 30 days of installation to know your starting varroa levels. Catching a mite problem early in a new package saves you from losing the colony in late summer or fall. See our oxalic acid treatment guide for timing and methods.
Frequently Asked Questions
How long can I keep a package of bees before installing them?
You should install within 24 hours of pickup whenever possible. In a pinch, you can hold a package for up to 48 to 72 hours in a cool, dark location between 60 and 70 degrees Fahrenheit. Mist the screen lightly with water twice a day to keep humidity up and give the bees something to drink. Do not refrigerate them. Every hour beyond 24 hours increases stress and mortality, so don’t delay without good reason.
What if the queen is dead when I open the package?
Contact your supplier immediately. Most reputable suppliers have a replacement policy for dead queens during transit, but you’ll need to act fast. Document the dead queen before removing her. In the meantime, look carefully at the worker bees: if a queen is unmistakably dead in her cage but the workers seem calm, you may still be able to requeen with a purchased queen within 24 hours. Do not let the colony sit queenless for more than a day or two, as the workers will begin to lay unfertilized eggs (drone layer) which is difficult to reverse.
What is a 3-pound package vs. a 2-pound package?
The weight refers to the approximate weight of bees. A 3-pound package contains roughly 10,000 to 12,000 bees and is the standard choice. A 2-pound package has around 7,000 to 8,000 bees and establishes a bit more slowly but costs less. For most new beekeepers, a 3-pound package is the better investment. The extra bees make a meaningful difference in how quickly the colony builds up and how well it survives its first summer.
Can I install a package into a Langstroth hive with drawn comb?
Yes, and it’s actually better than bare foundation. If you have drawn comb from a previous colony that is free of American foulbrood (disease-free, not just “looks clean”), using it will dramatically accelerate your new package’s establishment. The queen can start laying within a day or two instead of waiting for comb to be drawn. If the comb has any history of disease, do not use it.
When will I get my first honey from package bees?
Realistically, most packages installed in spring will not produce surplus honey in their first year. The colony spends its first season drawing comb, building population, and storing enough food to survive winter. Some beekeepers in areas with strong summer flows do harvest a small amount from first-year hives, but as a rule you should expect to feed through the first fall and winter and plan to harvest from your second year onward.
The best thing you can do right now, even before your package ships, is to get your hive assembled, your feeder ready, and your gear on your body at least once so installation day doesn’t come with surprises. Walk through the installation steps mentally or on video before the package arrives.
If you haven’t reviewed your hive inspection technique, this is a good time: Your first hive inspection: what to look for walks through exactly what to observe in your first few visits and how to tell whether your new colony is on track.
Bookmark this guide and share it with anyone in your beekeeping club who’s starting from scratch this spring.
Related reading:
- What is a bee nuc? How to buy, hive, and manage a nucleus colony
- Your first hive inspection: what to look for