How to create a pollinator-friendly garden for your bees
This post contains affiliate links. As an Amazon Associate, I earn from qualifying purchases at no extra cost to you.
Most new beekeepers make the mistake of thinking their responsibility ends at the hive entrance. You spend weeks researching hive designs, obsessing over the brood nest, and worrying about Varroa mites, but you completely ignore the three mile radius around your apiary. If you want your colonies to thrive rather than just survive, you have to take an active role in managing their forage. Relying on your neighbors’ overgrown lawns or the random clover in the park is a recipe for a honey darth that can starve a colony in weeks. Creating a dedicated pollinator garden is not just a weekend hobby project; it is a critical infrastructure investment for your backyard apiary. You are building a high volume grocery store for your bees right in their backyard, reducing the energy they spend on long distance foraging flights and ensuring a steady flow of nectar and pollen throughout the season.
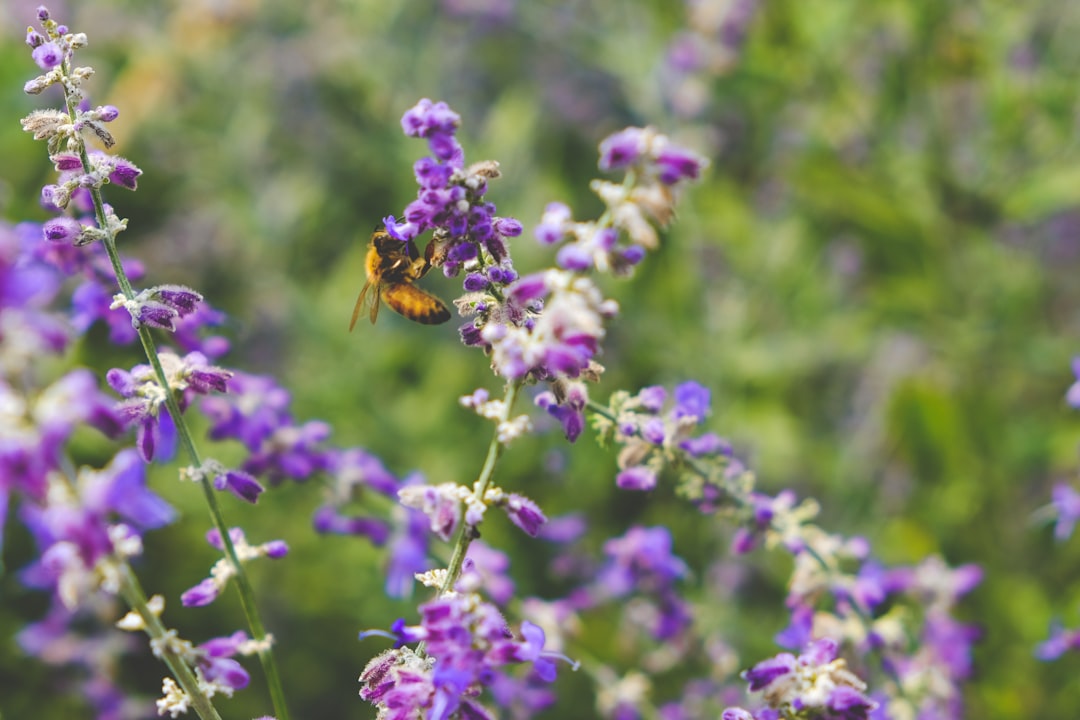
Photo by Scotty Turner on Unsplash
Strategic Planning for Year-Round Bloom Cycles
The biggest failure in most pollinator gardens is the mid summer gap. Everyone loves the burst of color in May and June, but your bees need to eat every single day from the moment they break cluster in the spring until they settle in for the winter. In our experience, the most dangerous time for a colony is July and August, when the spring flowers have faded and the autumn goldenrod has not yet bloomed. If you do not plan for successional blooming, your bees will be forced to travel miles for mediocre forage, which burns more calories than they bring back. This is especially critical if you are just starting out and have had to how to order package bees to get your season going. Those young colonies need immediate, close proximity food to build up their wax and store enough winter reserves.
To avoid these gaps, you must map out your garden by month. Start with early spring “bridge” crops like crocus, hellebore, and pussy willow. These provide the protein heavy pollen necessary for the queen to ramp up brood production when the weather is still unpredictable. Moving into late spring, you want high nectar producers like fruit trees and berry bushes. For the dreaded summer slump, look toward drought resistant perennials like lavender, Russian sage, and echinacea. Finally, the late season is dominated by asters and sunflowers. These are the heavy hitters that provide the final push of winter stores.
When you sit down to plan your space, do not think in terms of individual plants. Think in terms of “floral targets.” A honey bee is a creature of efficiency. They practice floral fidelity, meaning they will stick to one type of flower for an entire foraging trip. If you plant one single marigold, it is useless to them. You need to plant in drifts or clumps that are at least three feet in diameter. This allows the bee to stay on one plant type for several minutes, maximizing their efficiency. If your garden is a scattered mess of single plants, the bees will likely ignore it entirely in favor of a neighbor’s large patch of weeds.
Selecting the Right Seed Mixes and Native Species
There is a lot of debate in the beekeeping community about native plants versus ornamental cultivars. My stance is simple: go with what produces the highest quality nectar and pollen, which is almost always a native or naturalized species. Many modern ornamental flowers have been bred for “double blooms,” which look beautiful to humans but are functionally useless to bees. These extra petals often block the bee’s access to the nectaries, or the plant has been bred to be sterile, meaning it produces no pollen at all. You want “single” flowers where the reproductive parts are clearly visible and accessible.
For a large area, the most cost effective way to establish a garden is through a high quality seed mix. I highly recommend the Burpee Wildflower Seed Mix for Pollinators, Hummingbirds and Butterflies because it focuses on species that are known to be highly attractive to both honey bees and native pollinators. Using an organic mix is non negotiable. Many conventional seed mixes are treated with systemic pesticides that can be expressed in the pollen and nectar, effectively poisoning your bees before the garden even grows. When you broadcast these seeds, do not just throw them on top of grass. You need to clear the area, scuff the soil, and ensure good seed to soil contact.
Beyond seeds, you should incorporate perennial shrubs that act as permanent anchors for your garden. Native viburnums, elderberry, and even certain types of hydrangeas (the lacecap variety, not the mophead) provide massive amounts of forage in a compact footprint. Remember that honey bees are generalists, but they have preferences. They gravitate toward blue, purple, yellow, and white flowers. They cannot see red well, often perceiving it as black, so while a red flower might attract butterflies or hummingbirds, it is rarely the first choice for your honey bees. Focus your budget on the blues and purples like salvia, borage, and hyssop if you want to see the most activity from your hives.
Creating a Multi-Species Habitat and Water Source
While your primary focus might be your honey bees, a truly healthy pollinator garden supports the entire ecosystem. Honey bees are actually quite competitive, and in some cases, they can outcompete native solitary bees for resources. To balance this, you should provide specific nesting sites for native species. This is where a Mason Bee House Wax Coated Bee Hotel becomes a vital addition to your garden. These houses provide nesting tubes for mason bees and leafcutter bees, which are incredible pollinators that work in cooler temperatures than honey bees. By supporting these native species, you ensure that your garden stays pollinated even on days when your honey bees are staying inside the hive due to a light drizzle or a chill in the air.
Water is the most overlooked component of a pollinator garden. Bees use water for two main things: cooling the hive through evaporation and thinning out stored honey so it can be consumed. If you do not provide a clean water source in your garden, your bees will find one elsewhere, which usually means your neighbor’s salt water pool or a dirty puddle. A proper bee waterer is not just a bowl of water; bees are prone to drowning. You need a shallow basin filled with stones, marbles, or corks that stick up above the water line. This gives the bees a safe place to land and drink without the risk of falling in.
In our experience, a moving water feature or a simple solar powered fountain is even better because the sound of trickling water helps bees locate the source. You must keep this water source consistent. Once bees find a reliable water spot, they “register” it in their memory. If it dries up for a few days, they will move on to another source and it can be difficult to lure them back to your garden. Place your water source in a sunny spot that is sheltered from the wind, ideally between the hive and the main flower beds.
Soil Health and Nutrient Management for Nectar Production
You can plant the best flowers in the world, but if your soil is depleted, those plants will produce very little nectar. Nectar production is an energy intensive process for a plant. If the plant is struggling to survive due to poor soil nutrition, it will prioritize its own growth over the “reward” it offers to pollinators. This is why soil management is a beekeeping task. We have found that a slow release approach is far superior to liquid fertilizers that provide a quick spike and then wash away. I suggest using Osmocote Smart-Release Plant Food Plus Outdoor and Indoor for your perennial beds and potted pollinator plants. It provides a steady supply of nutrients for up to six months, ensuring the plants have the resources they need to pump out nectar during the peak of summer.
Be careful with high nitrogen fertilizers, however. Nitrogen promotes lush green leaf growth, which is great for a lawn but can actually reduce the number of flowers a plant produces. For a pollinator garden, you want a balanced fertilizer or one slightly higher in phosphorus to encourage blooming. Beyond chemical fertilizers, top dressing your garden with two inches of organic compost every spring is the best thing you can do for long term soil health. Compost improves soil structure, helps retain moisture during dry spells, and introduces beneficial microbes that help plants absorb nutrients.
Mulching is another critical factor. While mulching helps suppress weeds and retain moisture, you should avoid using heavy layers of cedar or dyed mulches. Many native bees are ground nesters. If you cover every square inch of your garden with thick mulch and landscape fabric, you are locking out the native bees that need bare soil to burrow. Leave a few patches of “messy” ground in the back of the garden where the soil is exposed. This balance between a tidy, well fed garden and a natural habitat is the key to a high functioning ecosystem.
Safety Warning: Pesticide Use in Pollinator Gardens
CRITICAL SAFETY WARNING: NEVER use neonicotinoids or systemic pesticides in or near your pollinator garden. Chemicals like Imidacloprid, Clothianidin, and Thiamethoxam are highly toxic to honey bees and can linger in the soil and plant tissues for years. Even “bee safe” organic pesticides like Neem oil or Spinosad should only be applied late in the evening after the bees have returned to the hive for the night. Always research any chemical treatment thoroughly before application. If you have a pest outbreak that requires intervention, consider physical barriers or biological controls first. For professional grade advice on hive health and pest management tools that do not rely on garden chemicals, consult the resources at Dadant.
Pesticide drift is a major killer of backyard colonies. Even if you are not spraying your garden, your neighbor might be treating their roses or their lawn. Education is your best tool here. Talk to your neighbors about what you are doing and explain the value of the bees. Most people are willing to switch to bee friendly products once they realize the impact on the local environment. If you must use a herbicide for invasive weeds, use a targeted “wick” application rather than a broad spray to minimize the risk of contaminating nearby flowers.
Step-by-Step: Establishing Your Pollinator Patch
Building a garden from scratch can feel overwhelming, so it is best to break it down into a logical sequence. Do not try to do the whole yard at once. Start with a 10x10 foot plot and expand each year as you learn what grows well in your specific microclimate.
- Site Selection: Choose a spot that gets at least 6 to 8 hours of direct sunlight. Most high nectar plants are sun lovers. Ensure the site is protected from heavy winds, which can make it difficult for bees to land on flowers.
- Soil Preparation: Remove existing grass and weeds. You can use the “sheet mulching” method by laying down cardboard and covering it with compost and mulch to kill the grass without chemicals.
- Define Your Bloom Windows: Select at least three species for each season (Spring, Summer, Fall). Ensure you have a mix of heights to create a “layered” effect that provides different microclimates for various insects.
- Planting in Drifts: When planting your starts or seeds, group the same species together in large blocks. This makes the garden much more visible and attractive to foraging bees.
- Install the Infrastructure: Place your water source and your Mason Bee House Wax Coated Bee Hotel before the plants get too tall.
- Ongoing Maintenance: Deadhead flowers (cut off dead blooms) throughout the summer to encourage the plant to produce a second or third flush of flowers. This is especially effective with perennials like salvia and lavender.
- Fall Cleanup (or lack thereof): Do not cut your garden back to the ground in the fall. Many pollinators overwinter in the hollow stems of dead plants. Wait until the temperatures are consistently above 50 degrees Fahrenheit in the spring before doing your garden cleanup.
| Feature | Best For | Maintenance Level | Pro Tip |
|---|---|---|---|
| Wildflower Meadow | Large areas, maximum diversity | Low (Mow once a year) | Use a mix like Burpee Wildflower Mix for best results. |
| Perennial Border | Structured yards, long term forage | Medium (Pruning, weeding) | Focus on “single” bloom varieties for nectar access. |
| Container Garden | Patios, small backyards | High (Daily watering) | Use Osmocote to prevent nutrient washout. |
| Flowering Trees | High volume nectar “supermarkets” | Very Low (Once established) | Basswood and Black Locust are the gold standard for honey. |
Common Mistakes and Troubleshooting
One of the most frequent mistakes we see is the “one and done” planting approach. Beekeepers will plant a beautiful garden in April and then wonder why the bees are gone by August. This usually happens because they ignored the late season. If you do not have asters or goldenrod, your bees will spend the end of the season desperately searching for food, which can lead to robbing behavior where they attack other hives to steal honey. If you notice your bees becoming aggressive or “flighty” in late summer, check your garden. If nothing is blooming, you may need to provide supplemental feeding with sugar syrup using equipment from Mann Lake to get them through until the fall nectar flow starts.
Another issue is the use of “invasive” pollinator plants. Some plants, like Butterfly Bush (Buddleia), provide plenty of nectar but offer zero value to the larval stage of native butterflies and can quickly take over your yard, choking out the native plants that provide a more balanced diet. Always check your local extension office’s list of invasive species before planting. You want a garden that supports the environment, not one that destroys local biodiversity.
Water quality is a third common failure point. If your water source smells like algae or is stagnant, the bees will avoid it. Mosquitoes are also a concern in stagnant water. To troubleshoot this, add a small “mosquito dunk” (a biological control that is safe for bees) to the water or ensure the water is changed every couple of days. If you see bees at your neighbor’s pool instead of your waterer, try adding a pinch of sea salt or a splash of chlorine-free pool water to your birdbath. For some reason, bees are highly attracted to the minerals found in treated water, and “scenting” your water source can help redirect them.
FAQ
Which flowers produce the most honey for my bees? Not all flowers are created equal when it comes to honey production. While a variety is good for nutrition, certain “heavy hitters” are responsible for the bulk of your honey harvest. In North America, White Sweet Clover, Alfalfa, and Basswood trees are legendary for their nectar volume. If you have the space, planting a Linden (Basswood) tree is one of the best things you can do for your bees. One mature tree can provide as much nectar as an entire acre of wildflowers. For smaller gardens, focus on herbs like Borage and Lemon Balm. Borage is unique because its nectaries refill very quickly, allowing a bee to visit the same flower multiple times in a single day.
Can I create a pollinator garden if I have a very small yard? Absolutely. You do not need an acre of land to make a difference. In a small yard, you should focus on vertical gardening and high density perennials. Use trellises for flowering vines like Honeysuckle (make sure it is a native variety, not the invasive Japanese version) or Clematis. Large pots filled with Lavender, Salvia, and Catmint can be placed right next to the hive entrance. Even a few window boxes filled with herbs can provide a critical “snack” for bees on days when the weather is too marginal for long distance flights. The key in a small space is to use a high quality fertilizer like Osmocote to keep those container plants blooming as long as possible.
How do I know if the plants I am buying are bee-safe? This is a major concern because many “big box” nurseries sell plants that have been treated with systemic neonicotinoids. These chemicals stay in the plant for months and can be toxic to pollinators. The best way to ensure safety is to buy from local organic nurseries or specialized native plant societies. Always ask the manager: “Have these plants been treated with systemic insecticides?” If they cannot give you a definitive “no,” do not buy them. Growing from seed using an organic mix like the Burpee Wildflower Seed Mix for Pollinators, Hummingbirds and Butterflies is the only way to be 100 percent sure that your garden is a safe haven rather than a trap.
Conclusion
Creating a pollinator friendly garden is one of the most rewarding aspects of beekeeping. It transforms your apiary from a collection of boxes into a vibrant, living ecosystem. By planning for year round blooms, focusing on native species, and maintaining a chemical-free environment, you are providing your bees with the best possible chance for health and productivity. Remember that your garden is a work in progress; observe which flowers your bees visit most frequently and expand those patches next year. Your bees will thank you with a heavier honey crop and a much higher winter survival rate.
Take a walk through your yard today and identify one 10-foot area where you can replace grass with a pollinator-friendly flower drift.
Related reading: