Bee Nuc Installation Mistakes That Cause Absconding or Queen Loss
This post contains affiliate links. As an Amazon Associate, I earn from qualifying purchases at no extra cost to you.
A nucleus colony is one of the best ways to establish a productive hive. Five frames of drawn comb, a mated laying queen, and a cohesive population of nurse bees give you a head start that a package simply cannot match. But that head start evaporates fast when the installation goes wrong. Absconding (the entire colony abandoning the hive) and queen loss in the first two weeks are the two most demoralizing outcomes a hobbyist beekeeper can face, and both are almost always preventable.
The frustrating part is that most nuc installation failures don’t happen because beekeepers are careless. They happen because the steps that matter most are counterintuitive. Opening the hive early feels responsible but can trigger disaster. Overfeeding feels generous but creates chaos at the entrance. Skipping a weather check feels inconsequential but can collapse a vulnerable colony before it ever establishes.
This guide covers the specific errors that cause nucs to abscond or lose their queens, explains the mechanism behind each one, and gives you a clear protocol to avoid them. If you want a foundation on what a nucleus colony is and how it differs from a package, start with our What Is A Bee Nuc Nucleus Colony Guide before working through these installation details.
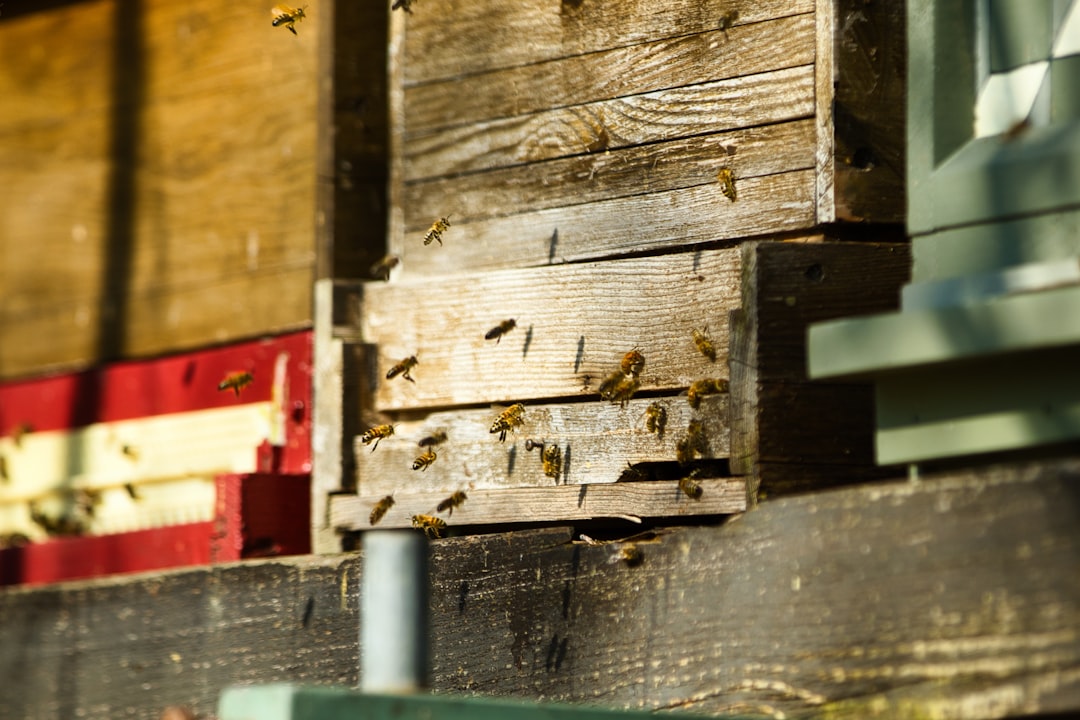
Photo by 𝕡𝕒𝕨𝕤 𝕒𝕟𝕕 𝕡𝕣𝕚𝕟𝕥𝕤 on Unsplash
Why Nuc Colonies Abscond or Lose Their Queens After Transfer
Absconding and queen loss share a common driver: stress. A nuc colony has been functioning as a tight social unit in a small enclosure, usually for two to four weeks before you receive it. The queen is actively laying, nurse bees maintain consistent temperatures on the brood, and foragers have memorized the entrance location down to its compass bearing. When you transfer that colony into a new hive, you disrupt every spatial, chemical, and thermal cue the colony relies on to function.
Absconding is not a random event. It is a coordinated survival decision triggered by pheromone signals indicating the current location is not viable. A colony is most likely to abscond when:
- Environmental conditions at the new hive site are threatening, including excessive heat, strong chemical odors, or high vibration
- The nest cavity is unfamiliar and lacks the colony’s existing scent profile
- The bees perceive they have been attacked through rough handling, incorrect smoke use, or a premature inspection
- The queen is lost, crushed, or separated from the colony during the transfer
Queen loss during installation is a separate failure mode but is equally avoidable. New queens can be crushed during frame handling, killed by workers that “ball” her under installation stress, or accidentally left behind in the transport box when the beekeeper closes the new hive without confirming she made the move.
Understanding these mechanisms is the foundation for everything else in this guide. Each mistake described below creates one or more of these destabilizing conditions, and correcting the mistake removes the condition.
Preparing Your Hive Correctly Before Nuc Installation
The most impactful work you can do happens before you pick up the nuc, not on installation day. A hive that smells of fresh solvents, lacks ventilation, or sits in direct midday sun is a problem before a single bee arrives.
Select the right site. An entrance facing southeast to east receives morning sun, which prompts foragers to become active early, and avoids the worst afternoon heat of summer. Full-day sun during July and August across most of North America can push internal hive temperatures well above safe brood thresholds during the stress of transfer. Afternoon shade from a tree or structure is not a compromise; in August heat it is a meaningful colony protection measure.
Match your equipment dimensions. A standard Langstroth deep body is the correct receiving box for a five-frame nuc. Placing nuc frames into a medium super or a non-standard hive without accounting for frame size and depth creates brood exposure, chilled larvae, and bees forced into unfamiliar geometry. The five transferred frames should sit alongside five additional frames of drawn comb or fresh foundation, filling the box completely. Gaps cause temperature regulation problems and invite small hive beetles to establish.
Air out new equipment. New lumber can off-gas solvents and wood preservatives for days after fabrication. New plastic equipment can carry manufacturing residue. Both categories of odor are detectable to bees and may register as threat signals. Setting new equipment outside in shade for at least 48 hours before use reduces these chemical signals substantially. If you are reusing equipment from a previous colony, verify that it was fully cleaned and that there is no disease residue.
Set up your feeder before the bees arrive. An entrance feeder such as the RONYOUNG 4 Pack Bee Feeder Entrance Feeder can be prepped and ready to slide into position the moment frames are transferred. Fumbling with feeding equipment with an open, agitated colony in front of you adds unnecessary handling time and increases colony stress.
Track hive-site conditions in the days before installation. Ambient temperature and humidity near the hive matter more in the first 72 hours than at any other time. A device like the Govee Indoor Hygrometer Thermometer H5075 placed near the hive gives you a reference reading so you can respond to heat spikes with shade cloth or ventilation adjustments before the colony has to do all the thermal regulation work alone.
Step-by-Step Nuc Installation That Prevents Absconding
The transfer itself takes fifteen to twenty minutes when executed methodically. Rushing or reversing these steps is one of the most consistent sources of installation error.
-
Transport the nuc in shade with ventilation. During pickup and transit, keep the transport box out of direct sun. A sealed nuc in a hot car can reach dangerous internal temperatures within thirty minutes. The Pro Nuc 5 Frame Plastic Nuc Box with Locking Lid features a locking lid that prevents accidental opening during transport.
-
Install in late afternoon or early evening. Forager bees are out of the transport box during peak daytime hours. Transferring in the late afternoon means most foragers have returned to the nuc, and the colony begins life in its new box as a complete unit. A colony missing its foragers on day one takes longer to establish and is more prone to temperature and feeding problems.
-
Apply cool smoke and wait two full minutes before opening. Use cool, white smoke puffed at the entrance. Wait the full two minutes before lifting the lid. Smoke suppresses the alarm pheromone isoamyl acetate; cutting the wait short reduces the suppression effect significantly. For detailed guidance on producing effective smoke, see How To Use A Smoker Properly.
-
Locate the queen before removing any frame. Open the transport box and identify which frame the queen is on before you move anything. Transfer that frame first and place it in the center of the receiving box. This minimizes the risk of crushing her during subsequent moves and ensures she is established in the new environment from the start.
-
Transfer frames in order, maintaining their original arrangement. Brood nest organization is not random. Nurse bees maintain spatial relationships with specific brood stages. Transfer frame 1 to position 1, frame 2 to position 2, and so on across the box. Scrambling frame order forces bees to relearn brood-care geography while already under stress from the move.
-
Clear stragglers from the transport box. Shake or brush any remaining bees from the transport box into the new hive. Do not leave them behind. Straggler bees include nurse bees critical to brood care in the first 48 hours, and reducing the installed population at the outset slows establishment measurably.
-
Reduce the entrance to one to two bee-widths immediately. A full-width entrance on a five-frame colony is an open invitation to robbing bees, yellow jackets, and small hive beetles. Guard bees cannot defend a large entrance when colony population is low. Entrance reduction is one of the simplest, most effective things you can do to protect a new nuc.
-
Do not inspect for seven to ten days. Set a calendar reminder and close the hive. This is the hardest rule to follow and the most important. Every inspection in the first week disrupts queen pheromone distribution, breaks nurse bee brood-care patterns, and in warm weather can cool brood fatally. The colony needs uninterrupted time to orient to its new location and accept it as home.
Feeding and Temperature Errors That Stress a New Nuc Colony
A freshly installed nuc has five frames and limited stored honey. The colony needs to draw out the remaining five frames quickly to expand the brood nest before peak population hits. That requires consistent nutrition and a stable thermal environment.
Feed immediately, but control the volume. Offer 1:1 sugar syrup (one part sugar to one part water by weight) starting on installation day. This ratio stimulates wax production and comb drawing, which is exactly what the colony needs to expand. Stop active feeding once the bees have drawn out most of the additional frames and foragers are returning with pollen consistently, because excess syrup at that point suppresses foraging motivation and increases robbing pressure at the entrance.
Essential oil additives and experimental supplements have no place in the first two weeks. The Honey Bee Health Coalition’s Varroa management tools guide notes that poorly timed nutritional additives can disrupt foraging behavior, and a newly installed nuc cannot afford reduced forager activity while it is still establishing comb and expanding its population.
Overfeeding creates its own problems. Flooding an entrance feeder daily with more syrup than a small colony can consume quickly causes overflow. That overflow attracts robber bees, yellow jackets, and wax moths within hours. Offering smaller, consistent amounts every two to three days is more effective than one large daily fill, and it reduces the risk of creating a robbing situation that can overwhelm a new colony’s defenses.
Thermal management is more important than most guides acknowledge. Colony thermoregulation research, including work from the University of Minnesota Bee Lab, establishes that sustained brood nest temperatures above 96 degrees Fahrenheit cause brood mortality. A nuc transferred into a new box on a 95-degree August day is already working at the edge of its thermal capacity. If the hive site is in full sun and the entrance reducer is blocking ventilation, internal temperatures will spike and brood will die. Dead brood generates rapid stress signals within the colony and accelerates absconding behavior. Providing shade cloth or a temporary lean-to over the hive during heat events in the first week is a straightforward intervention. Remove it once the colony is drawing comb strongly and foragers are well established.
Common Bee Nuc Installation Mistakes to Avoid
This section focuses on the errors most consistently linked to absconding or queen loss, with the specific mechanism that connects the mistake to the outcome.
Opening the hive in the first seven days. This is the most common error and the most damaging. Every time the hive is opened in the first week, the queen’s pheromone gradient through the colony is disrupted. When workers cannot reliably detect queen mandibular pheromone, they begin producing emergency queen cells or become agitated and difficult to manage. Agitated colonies are significantly more prone to absconding, and emergency queens produced from inadequate larvae produce poor-quality replacements.
Using harsh or acrid smoke during transfer. Burning damp wood, synthetic material, or green leaves produces dark, irritating smoke that triggers the colony’s flight instinct rather than its feeding reflex. Cool, white smoke from dry fuel such as burlap, pine needles, or untreated wood shavings is what you want. Two to three light puffs at the entrance before opening is almost always sufficient. More smoke is not better.
Placing the hive near traffic, vibration, or chemical sources. Bees exposed to regular vibration from lawn equipment, vehicle traffic, or nearby machinery register elevated stress. Chemical odors from fresh herbicide applications, gasoline storage, treated lumber, or exterior paint are detected almost immediately and can trigger relocation instinct within hours of installation. Site selection matters before you set the hive down.
Failing to reduce the entrance. A full-width entrance on a new, small colony is effectively impossible for guard bees to defend. When robbers breach the entrance and steal stores, the colony perceives a territorial loss and may abscond rather than continue defending an untenable position. An entrance reducer is one of the lowest-cost, highest-impact tools in your installation kit.
Reusing disease-contaminated equipment without treatment. If the hive body previously housed a colony that died from American Foulbrood or another spore-forming pathogen, installing a healthy nuc without addressing the contaminated comb exposes the new colony to immediate disease pressure. This is not a risk worth taking. Scorching or replacing affected equipment before installation is non-negotiable.
Separating the queen from the colony during transfer. If the queen is still in the transport box when you close the new hive, the colony in the new box will attempt to return to her location. Some beekeepers discover their entire installed nuc clustered on or around an empty cardboard box the following morning. Always confirm the queen transferred before sealing the hive.
Post-Installation Inspections: Reading the Signs of Recovery
Your first inspection at day seven to ten should give you a clear picture of whether the colony is establishing successfully or has encountered a problem. Approach it methodically rather than reactively.
Signs the nuc is establishing well:
- Eggs present in worker cells, standing upright at the base of the cell
- Young larvae curled in a “C” shape with royal jelly visible at the cell base
- New comb being drawn on previously bare foundation
- Foragers returning through the entrance with pollen on their corbiculae
- Calm, non-defensive behavior when you open the hive with minimal smoke
Signs of potential queen loss:
- No eggs visible after day ten (use a bright headlamp and tilt frames toward natural light)
- Multiple emergency queen cells built on the face of brood frames
- A single large peanut-shaped cell hanging from the bottom of a frame
- Unusually loud, agitated colony sound when you open the hive
Understanding what healthy brood looks like versus stressed or diseased brood is a skill built across multiple inspections. For a thorough visual reference on what different brood patterns communicate about colony health, How To Read Brood Patterns covers the range of conditions you are most likely to encounter in a new colony’s first month.
If you find no eggs and no viable queen cells by day twelve, the colony is queenless. Your practical options are to introduce a mated replacement queen directly, to combine the queenless nuc with a queenright colony using the newspaper method, or to wait a few additional days if you suspect a late-emerging virgin queen is developing from an overlooked cell.
Frequently Asked Questions About Bee Nuc Installation Mistakes
Why did my nuc abscond the day after installation?
Same-day or next-day absconding almost always traces back to one of three causes: chemical irritants at the hive site such as freshly treated lumber, herbicide residue, or paint fumes; transferring the colony during peak afternoon heat without adequate shade; or significant disturbance during the installation itself, such as dropping a frame or applying excessive smoke. In most cases, the colony has departed permanently. However, if you locate the cluster nearby within a few hours, set the empty hive next to the cluster with its entrance open. Some colonies will walk back in voluntarily, particularly if the queen is with the cluster rather than still inside the abandoned transport box.
How do I know if the queen was lost during the nuc transfer?
You will not know with certainty until day ten to twelve, when the absence of fresh eggs makes the situation clear. Until then, pay attention to colony sound on day two or three. A higher-pitched, more continuous tone than normal is a recognized indicator of a queenless colony. If you suspect queen loss, do not open the hive to search immediately. Opening too soon disrupts any residual pheromone presence and makes the colony’s situation worse. Wait until day ten, use a good light source to confirm no eggs are present, and then decide whether to introduce a mated queen or allow a developing emergency cell to proceed on its own.
Is it normal for a new nuc to have bees clustering outside the hive?
Yes, bearding in the first few days after installation is common and is generally not a cause for concern. A small colony working to regulate brood nest temperature in a larger new space will push some workers outside to reduce the heat load inside. Normal bearding bees move slowly and return inside by morning. What distinguishes pre-absconding behavior is the pattern: a pre-absconding cluster consolidates into a denser mass, often away from the entrance rather than on the front face of the hive, and the bees become increasingly agitated rather than calm. A true absconding swarm lifts off in a coordinated formation, typically in the late morning hours.
Should I re-queen if I find emergency queen cells at day ten?
Not automatically. Emergency queen cells confirm the colony is responding to queen loss, but they may be viable and worth allowing to develop. Before purchasing a replacement queen, check whether any cells are intact and capped. A single healthy capped cell is worth preserving. A virgin queen will emerge, take mating flights within one to two weeks depending on weather and drone availability, and begin laying. Re-queening with a mated queen makes more practical sense when you have no viable cells at all, when the season is late and drone populations are declining, or when you need a specific genetic line for production or behavioral reasons.
Conclusion
Installing a nuc successfully comes down to preparation before the bees arrive and restraint after they do. Prepare the hive location, condition the equipment, and stage your feeder before pickup. Transfer frames in the late afternoon with careful attention to frame order and queen location. Then close the hive and enforce the seven-to-ten-day wait. The instinct to check early is understandable; suppressing it is what separates successful installations from ones that end in an empty box.
When inspection day arrives, eggs in the cells and new comb extending onto the foundation are all the confirmation you need. The colony is yours to grow from that point forward. If you are still in the process of sourcing your nuc and want to know what quality indicators to look for before the transfer even begins, read Bee Nucs For Sale What To Look For before placing your order.
If this guide helped you prepare for your nuc installation, bookmark it for reference or share it with your local beekeeping club before their spring nuc pickups.
Related Reading