Nuc Box vs. Full-Size Hive: When to Transfer and What Equipment You Need
This post contains affiliate links. As an Amazon Associate, I earn from qualifying purchases at no extra cost to you.
A nuc box is designed to be temporary - that is the point, not a flaw. A five-frame nucleus colony gives a new queen a tight, manageable environment to build up brood, fill comb, and establish a coherent cluster before facing the demands of a full-size box. Confined space lets workers maintain brood-nest temperature efficiently, the queen covers minimal ground, and nurse bees spend their energy on brood rather than heating empty wax.
The problem is that five frames fills up fast. A productive queen in peak season lays 1,500 to 2,000 eggs per day. Within four to six weeks under good conditions every cell around the brood nest gets packed, and when workers start backfilling brood cells with nectar because there is nowhere else to put it, expansion stalls and swarm pressure builds.
Transfer too early and you drop a small colony into a box too large to heat efficiently. Transfer too late and you lose a swarm from a box not designed to contain one. Getting the timing right is one of the most consequential decisions in managing a new colony. This guide covers what to look for, how to execute the move, and which equipment you need staged and ready before you open anything.
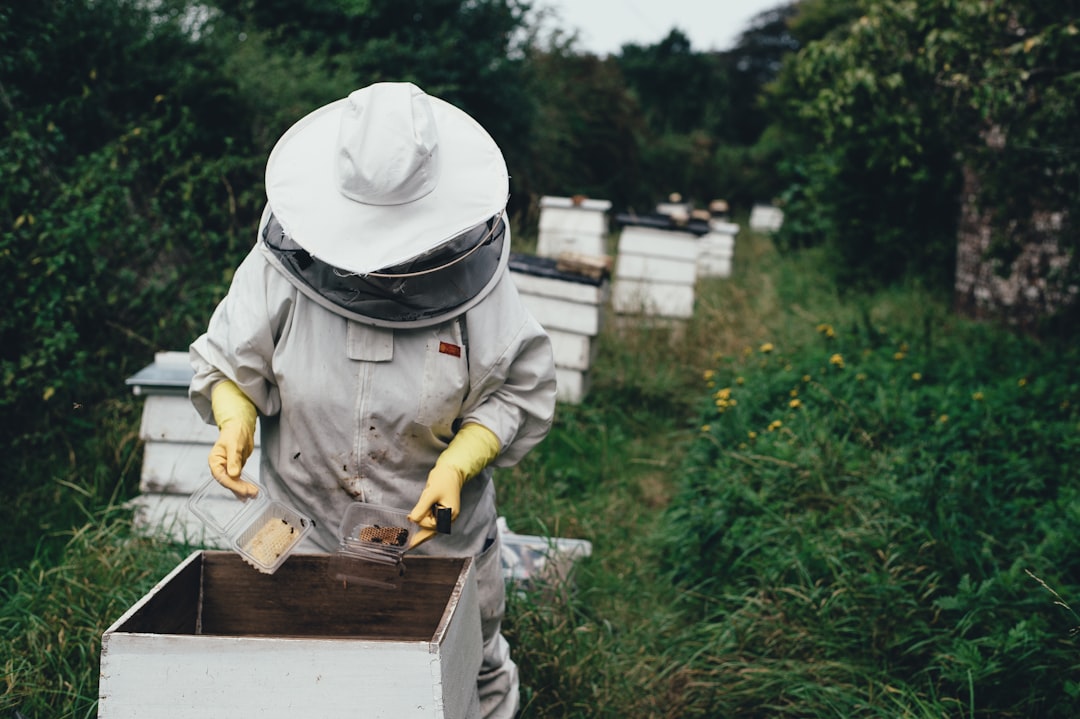
Photo by Annie Spratt on Unsplash
What a Nuc Box Is Built For (and Why It Cannot Be Permanent)
A nucleus colony is self-sufficient: a mated, laying queen; three to ten thousand workers; brood in all developmental stages; and stored pollen and honey. The standard Langstroth nuc box holds five frames - half the capacity of a ten-frame deep. That limited volume is functional, not incidental.
Bees are endotherms within the hive. The colony maintains brood-nest temperature at approximately 93 to 95 degrees Fahrenheit regardless of ambient conditions. A small worker population sustains that temperature in a five-frame box far more efficiently than in a half-empty ten-frame box. University of Florida IFAS Extension beekeeping documentation notes that confined early-season colonies rear more brood per bee than those spread across excess space, because workers freed from thermoregulation are available for nursing duties instead. Tight space also keeps foragers close to the nectar drop-off point and nurse bees near the brood cluster.
But those same dynamics make a nuc box unsuitable as permanent housing. A healthy late-summer colony of 40,000 to 50,000 bees does not fit in five frames. There is no volume for meaningful honey storage. In cold-climate winters, the cluster needs the thermal mass of a full deep box to survive. And when the colony reaches the five-frame ceiling - which it will within weeks of a good start - bees swarm rather than continue building, leaving the beekeeper with an empty box and no colony.
The nuc box is a launching pad. Understanding that function clearly prevents the two most common errors: treating it as permanent housing, or transferring before the colony can occupy more space. For a full breakdown of nuc biology and how nucleus colonies differ from packages or swarm captures, see What Is A Bee Nuc Nucleus Colony Guide.
When to Transfer Your Nuc Box to a Full-Size Hive
The transfer trigger is observable - you do not need to count bees or run calculations. Three visual indicators tell you when the colony is ready, and all three should be present before you make the move.
Indicator 1: Five-frame bee coverage. Every frame in the nuc should be covered wall-to-wall with bees. Look from the top down when you lift the lid. If you can see bare comb between clusters, the colony is still building. If bees are packed tightly enough that individual frames are barely distinguishable, you are at or past the threshold. Evening is a useful time to check: foragers are home and the population appears at its fullest.
Indicator 2: Three or four frames of solid brood. Pull a middle frame and assess the pattern. You want a dome-shaped brood area of capped and open cells covering the majority of the frame surface with a tight, consistent layout. One or two frames of brood means the queen is still establishing. Three solid frames with growth into the corners means the population will keep accelerating. For guidance on interpreting healthy brood versus patterns that signal problems, see How To Read Brood Patterns.
Indicator 3: Capped honey arching across the top of the brood frames. When golden arcs of capped honey fill the top corners of three or more brood frames, the colony has packed every available non-brood cell. The queen cannot expand the brood nest further. In a five-frame box, this signals the beginning of swarm preparations.
Seasonal timing. In most northern hemisphere locations, an April nuc is ready to transfer by mid-May through early June - roughly five to seven weeks. A July or August nuc builds more slowly as nectar flow tapers and day length shortens; both factors reduce colony ambition. A late-season nuc showing adequate coverage can still be transferred, but consider restricting the new box to seven or eight frames with a follower board, then expanding once the colony demonstrates it can cover that space. Err toward transferring a few days early rather than late. A colony moved into a ten-frame box with five strong frames and five empty ones will expand naturally. A colony that swarmed out of a congested nuc leaves you nothing to work with.
Nuc Box vs. Full-Size Hive: A Head-to-Head Comparison
The differences between a five-frame nuc and a standard ten-frame deep go beyond size. They affect winter survival, honey production potential, swarm management, and long-term colony trajectory.
| Feature | 5-Frame Nuc Box | 10-Frame Deep Hive Body |
|---|---|---|
| Frame capacity | 5 | 10 |
| Typical bee population at capacity | Smaller, developing colony | Larger, established colony |
| Queen’s laying room | Limited before crowding | Room to expand |
| Honey storage potential | Minimal - no practical harvest | Full super system possible |
| Winter viability (cold climates) | Low - cluster too small for insulation | High with proper winterization prep |
| Swarm risk at full capacity | High - few management options | Moderate - manageable with supers or splits |
| Equipment expandability | None | Unlimited via supers, additional boxes |
| Best use | Colony establishment, transport, holding splits | Permanent year-round colony housing |
The table makes one point clearly: a nuc box and a full-size hive are not competing options but sequential stages of colony development. No meaningful comparison frames either as a permanent substitute for the other. The real question is always timing.
Equipment You Need for the Nuc-to-Hive Transfer
The transfer goes smoothly or poorly depending almost entirely on whether everything you need is staged and ready before you open the nuc. Scrambling for missing gear with bees in the air creates precisely the conditions that produce the mistakes covered in the next section.
A full-size Langstroth hive body. A ten-frame deep box is the standard configuration and the format with the deepest supply chain for frames, supers, and accessories. The Mann Lake 10-Frame Deep Hive Kit, 9⅝” Bee Hive Body, Painted is a practical choice for new beekeepers: it comes pre-painted, which matters because raw wood exposed to weather warps and checks within a single season. Buying as a kit means components come together as a matched set, which matters because mixing woodenware from different manufacturers often creates gaps that bees fill with propolis and that cause friction at every future inspection. Check what the kit includes and source frames and foundation separately if needed. Drawn comb is preferable where available, but undrawn foundation works fine - the colony will begin drawing it within days of moving in.
A hive tool. Bees glue frames to box walls and to each other with propolis within the first two weeks of occupation. After a month in a nuc, those frames will not come free by hand. The WEICHUAN 2PCS Stainless Steel Hive Scraper Tools give you scraping and levering capability you will use on every frame during the transfer. Having two in the set is practical: if one gets coated in propolis mid-inspection or you need to set it down while supporting a heavy frame, the second is immediately available. Stainless steel construction cleans up easily between uses.
Head and face protection. Even docile colonies can become defensive when frames are being rearranged in daylight. A veil is the baseline minimum during a transfer - not optional. The 2 Pack Beekeeping Hat with Veil offers a hat-and-veil option with a long elastic shoulder strap that helps keep the mesh away from your face as you lean over open frames; the ventilated construction suits warm-weather work. If you already own a full suit or jacket with an integrated veil, these make useful backup gear or a lightweight option for short inspections on calm days.
A lit smoker. Light it before you approach the apiary, not when you realize mid-inspection that you need it. Two puffs of cool white smoke at the nuc entrance before opening, then gentle puffs across the top bars as you work, will keep the colony calm throughout the transfer. Do not let it go out midway through - relighting while bees are active adds unnecessary disruption.
Five to six empty frames of drawn comb or undrawn foundation. You need enough to fill all ten slots in the new box on transfer day. Open slots invite cross-comb construction within seventy-two hours and create problems that compound at every future inspection.
How to Transfer a Nuc Box to a Full-Size Hive: Step-by-Step
Set up the new hive body on its permanent stand before you touch the nuc. Bottom board in place, hive body loaded with five or six empty frames pushed to one side, inner cover and outer cover within arm’s reach. Position the nuc immediately adjacent to the new hive at roughly the same height.
-
Suit up and light your smoker. Do not skip protection even if your colony has been calm at prior inspections. A transfer involves more sustained frame movement than a routine check. Give the nuc entrance two puffs of cool white smoke and wait sixty seconds before lifting the lid.
-
Remove the nuc lid and apply light smoke across the top bars. Two gentle puffs move bees downward and away from the surface you are about to handle. Do not oversmoke - heavy smoke makes bees agitated and gorged on honey, neither of which helps you work efficiently.
-
Lever the first frame free with your hive tool’s J-hook. Press the hook under the bottom rail and lift gently. If the frame resists, run the flat scraper along the side wall to break the propolis seal before lifting again. Never force a frame - you risk rolling bees and crushing the queen against the box wall.
-
Inspect each frame briefly as you remove it and locate the queen. You are not doing a thorough inspection - you are scanning for her position so you can handle that frame with extra care. Look for a longer, more deliberate bee moving through the cluster. If you find eggs standing upright in cell bottoms, the queen was active within the past three days. Plan to move her frame last once you have identified it.
-
Place each nuc frame into the center of the new hive body in the exact same left-to-right order they sat in the nuc. Do not rearrange or reverse the sequence. Bees organize the brood nest with intention: youngest brood in the warmest center, older capped brood toward the periphery, food stores at the edges. Preserving that layout means the colony resumes normal operation within hours rather than spending days reorganizing.
-
Scrape burr comb from the nuc box’s rails and side walls before setting each frame down. Thirty seconds per frame of scraping with the flat end of your hive tool prevents propolis buildup from migrating into the new woodenware and making future inspections progressively harder.
-
Shake remaining bees from the empty nuc box into the new hive body. Tilt the nuc over the open box and give it one firm downward shake. Most remaining bees will drop in. Set the empty nuc directly in front of the new hive’s entrance with the lid off - foragers that have been orienting to the nuc’s old position will walk into their new home within a day.
-
Fill remaining frame slots, place the inner cover, and add the outer cover. Do not add a honey super at this stage. The colony needs to settle into the new space and begin drawing empty foundation before any additional volume is introduced. Check back in five to seven days to confirm the queen is laying in the new box and workers have started building comb on the empty frames.
The Bee Informed Partnership, which tracks colony losses across thousands of managed hives annually, consistently identifies first-season establishment errors as a significant contributor to winter losses. Getting the nuc transfer right is one of the highest-leverage actions available to a new beekeeper.
Common Mistakes When Transferring a Nuc Box Colony
Most transfer problems are preventable. These are the errors that appear most often and cost beekeepers weeks of colony build-up time.
Transferring before all five frames are covered. This is the most frequent mistake among first-year beekeepers. A colony covering three of five frames is still building. Move it into a ten-frame box prematurely and you spread the cluster too thin to maintain brood temperature during a cold snap. Chilled brood dies silently, the setback becomes visible a week later, and by then you have lost ten to fourteen days of the season. Wait for full five-frame coverage before making the move.
Scrambling the frame order. Placing frames randomly in the new box disrupts the thermal gradient of the brood nest. The colony recovers, but it burns time and wax doing so - resources better directed at expansion and foraging. Transfer in sequence: frame one from the nuc goes into position one in the new box, frame two into position two, and so on.
Leaving open frame slots. Beekeepers sometimes transfer five nuc frames and leave five slots empty because they have no frames ready. Bees build wild comb in open space within seventy-two hours. Wild comb cannot be removed without destroying it, establishes cross-comb precedent that compounds at every inspection, and gives small hive beetles shelter in the voids. Fill all ten slots on transfer day, even with bare foundation.
Transferring on a cold day. Any inspection that exposes the brood nest to ambient temperatures below about 50 degrees Fahrenheit risks chilling developing larvae. In spring, watch the forecast and choose a warm afternoon above 60 degrees with no rain expected within the following twelve hours.
Not verifying the queen is present before closing the box. If the queen gets crushed between a frame and the box wall during a rushed transfer, you will not know until five to seven days later when you find no eggs and a colony radiating the restless energy of queenlessness. Scanning for eggs as you transfer each frame takes an extra thirty seconds per frame and catches problems before they compound.
Adding a honey super immediately after the transfer. A freshly transferred colony is not ready for additional volume. It needs to occupy and heat ten frames before workers are available to draw super comb. Adding one too early overextends thermoregulatory capacity and creates open space that attracts small hive beetles.
Not managing the empty nuc box afterward. Stragglers left on nuc box walls in direct summer sun can overheat. Set the empty nuc in front of the new hive’s entrance, open, so remaining bees can walk in. Remove or store it within twenty-four hours.
Frequently Asked Questions
How long does a nuc colony typically stay in a nuc box before it is ready to transfer?
Under ideal conditions - active spring nectar flow, temperatures consistently above 60 degrees Fahrenheit, and a productive laying queen - a five-frame nuc can be ready for transfer in four to six weeks. Later-season nucs installed in June or July typically take longer because nectar flow is lighter and declining day length reduces colony ambition. Rather than relying on a calendar, check the colony every seven to ten days. You are looking for full five-frame coverage, three or more frames of brood in a solid pattern, and capped honey arching across the upper corners of the brood frames. All three together signal readiness; one or two out of three means give it another week.
Can I leave bees in a nuc box indefinitely to keep the colony small and manageable?
Not effectively. A five-frame nuc box cannot support the population or honey stores a colony needs for winter survival in most climates. The colony will swarm repeatedly as it tries to expand, leaving ever-shrinking populations and no honey surplus. Some beekeepers run eight-frame medium equipment as a smaller alternative to a standard ten-frame deep - that is a legitimate system with its own tradeoffs - but a five-frame nuc is a temporary management tool, not permanent housing. Any colony left in a nuc through summer will either swarm out repeatedly, dwindle from congestion stress, or enter fall without adequate stores to survive the winter cluster.
Do I need to re-introduce the queen when transferring the nuc into the new box?
No. The queen travels with her colony on her own frames. She is already fully accepted by the workers - that acceptance occurred when the nuc was assembled, typically well before you received it. A nuc transfer is a relocation of an established colony, not an introduction of an unfamiliar queen to unfamiliar bees. Your only queen-related concern during the transfer is physical safety: move frames slowly, avoid slamming them against the box wall, and scan each frame briefly before setting it down. If you identify the queen on a particular frame, handle that frame last and with extra deliberateness.
What size hive body should I transfer a nuc into?
For a standard five-frame Langstroth nuc, the correct destination is a ten-frame deep hive body - the industry-standard Langstroth brood box with a nine-and-five-eighths-inch internal depth. This matches the frame dimensions used in virtually all commercial nucs and ensures compatibility with any equipment you add later. The Penn State Extension beekeeping program recommends standardizing on one equipment type across your entire apiary so that frames, supers, and boxes are fully interchangeable between hives. If you plan to run eight-frame equipment, source nucs built on eight-frame frames from the beginning - mixing frame dimensions between a nuc and its destination box creates problems at every future inspection.
Conclusion
The transfer from nuc box to full-size hive is one of the most consequential steps in a new colony’s first season. Done at the right time, with equipment staged in advance and frames moved in their original order, the colony hits the ground running in its permanent home. Done too early or too late, you lose weeks of build-up time you cannot recover, especially heading into fall.
Wait for all three indicators: five-frame coverage, three or more frames of solid brood, and capped honey arching across the upper corners of the brood frames. Stage your full-size hive, hive tools, smoker, and protective gear before you open the nuc. Transfer frames in sequence. Fill all ten slots on day one. Check back in a week. Followed consistently, that process gives your bees what they need to move into their first winter as a strong, established colony.
If you found this guide useful, bookmark it for your next nuc inspection and pass it along to anyone in your local club who is getting their first nucleus colony this season.
Related Reading
- What Is A Bee Nuc Nucleus Colony Guide - Everything you need to know about what makes a nucleus colony different from package bees or a swarm capture
- Bee Nucs For Sale: What To Look For - How to evaluate nuc quality before you buy so you start with the strongest possible colony