Early Warning Signs Your Bee Colony Is in Trouble
This post contains affiliate links. As an Amazon Associate, I earn from qualifying purchases at no extra cost to you.
Most hive losses are not sudden. They build quietly over weeks or months while beekeepers mistake warning signs for normal colony behavior. A colony that looked fine in July can be collapsing by September - not because disaster struck overnight, but because early signals were missed or misread. The biology does not lie: honey bee colonies communicate distress long before the situation becomes irreversible.
These signals are legible if you know what to look for. Spotty brood, elevated mite counts, unusual flight patterns, and dwindling food stores are readable messages. Catching them at week two or three of a developing problem gives you real intervention options. Catching them at week ten often means combining a failing colony if you are lucky, or losing it if you are not. This guide covers the most reliable early warning signs your bee colony is in trouble, what each signal tells you about the underlying cause, and the concrete steps to take before a manageable problem becomes a catastrophic loss.
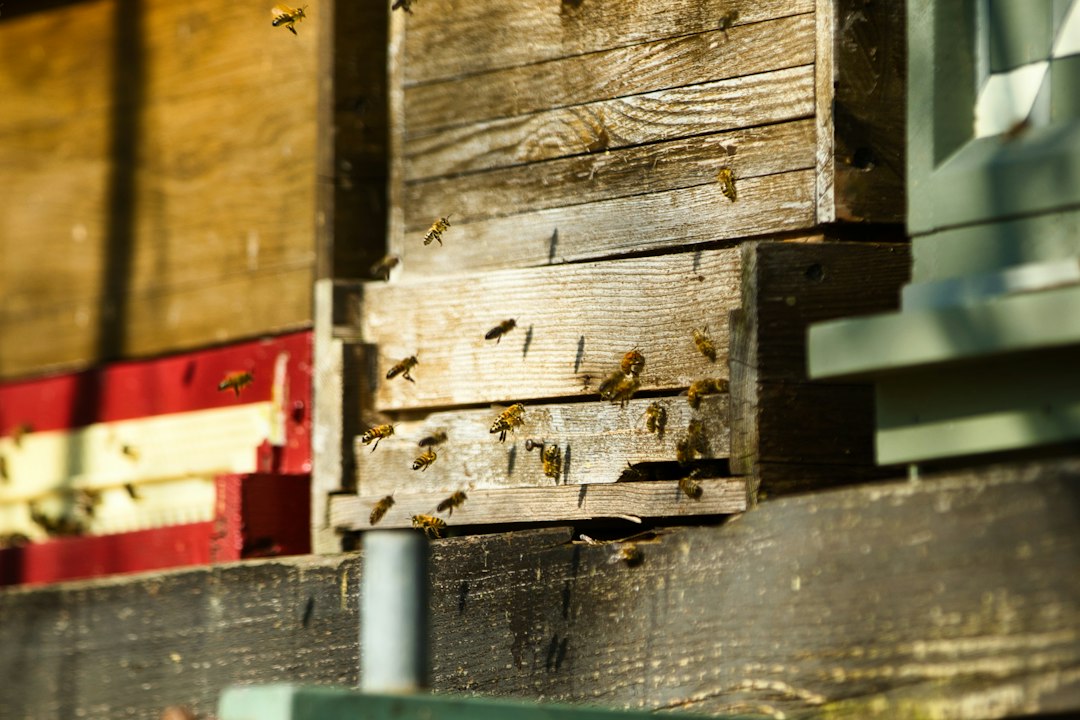
Photo by 𝕡𝕒𝕨𝕤 𝕒𝕟𝕕 𝕡𝕣𝕚𝕟𝕥𝕤 on Unsplash
Why Acting Early Determines Whether You Save Your Bee Colony
Honey bee colonies have significant biological resilience. A strong colony can compensate for early stressors - a moderate mite load, a brief foraging dearth, even a temporarily disrupted brood cycle - if the beekeeper identifies the problem and intervenes at the right time. That window closes faster than most beginners expect. A colony that tips from stressed-but-manageable to active decline can do so within two to three brood cycles, roughly six to nine weeks.
The underlying mechanism is compounding. Varroa mites reproduce inside capped brood cells, so a modest mite load during peak summer brood can explode into a crisis by early fall. A weakened queen produces a shrinking brood nest, which means fewer nurse bees, which means worse brood survival, which accelerates population decline faster than new adults can replace losses. Each stressor amplifies the next.
Penn State Extension’s Varroa management guidance consistently emphasizes that regular, systematic inspections timed to the brood cycle are the highest-leverage habit in preventive colony management. A two-week inspection interval during the active season gives you the earliest practical read on developing problems. Keeping brief inspection notes - even a sentence or two per visit - transforms isolated observations into a trend you can act on rather than a series of unconnected data points.
Behavioral Warning Signs Your Bee Colony Is in Trouble
Behavior at and around the hive entrance tells you a great deal before you ever open a box. These cues are available every time you walk past your apiary, and they are often the first indicators that something has shifted inside.
Sudden or increased defensiveness. A colony that was previously calm and now rushes the entrance at the sound of footsteps or a lawnmower engine has changed its demeanor. Sudden defensiveness can indicate queenlessness, active robbing pressure from a neighboring colony, or a sick colony being targeted by opportunistic robbers. Whatever the trigger, a personality shift warrants a targeted inspection - not dismissal as an off day.
Bearding in the wrong context. Bees clustering on the outside of the hive during hot weather is a normal ventilation strategy. Bearding that continues after cooler nights, or that presents as a disorganized loose cluster rather than a compact thermal mass, can indicate overcrowding or inadequate ventilation. Neither condition self-corrects without intervention.
Reduced foraging activity. On a warm, calm day between 10 AM and 3 PM, a healthy mid-season colony shows consistent two-way forager traffic at the entrance. A significant quiet - especially compared to other hives or to what was normal two weeks prior - can indicate a failing queen, a collapsing worker population, or a foraging dearth hitting a colony with insufficient reserves. Running two hives side by side makes this comparison straightforward and gives you an immediate reference point.
Robbing behavior. Robbing presents as frantic, disorganized activity at the entrance: bees wrestling at the landing board, bees flying tight circles rather than arcing cleanly in and out with pollen loads. A colony being actively robbed has almost always lost the ability to defend its stores. Reduce the entrance to a single-bee opening immediately and investigate the underlying weakness before anything else.
Abnormal bottom-board clustering during daytime. Large numbers of bees sitting on the bottom board during normal foraging hours can indicate high internal temperatures, elevated Varroa loads depressing adult bee energy levels, or in late fall, early cluster formation signaling the colony is contracting under stress ahead of schedule.
Brood Pattern Problems That Signal a Colony in Trouble
The brood nest is the most information-dense area of any hive inspection. Healthy colonies produce compact, consistent brood patterns with cells progressing evenly from egg through larva to capped pupa. When that pattern breaks down, it is communicating something specific.
Spotty or shotgun brood. A pattern with many empty or uncapped cells scattered through the capped brood area indicates that bees are removing dead, sick, or mite-damaged larvae. Some sporadic empty cells are normal at brood nest edges, but when scattered empties make up more than roughly 20 to 25 percent of cells in the active brood area, it signals one of three causes: a failing or drone-laying queen, brood disease such as sacbrood or European foulbrood, or Varroa-damaged larvae being removed by hygienic behavior. The spotty pattern alone does not identify which cause applies - you need to examine the larvae directly and run a mite count before drawing conclusions.
Sunken or perforated cappings. Healthy capped brood has slightly convex, uniform tan cappings. Sunken, discolored, or perforated cappings with dark brown coloration are the hallmark of American foulbrood (AFB). Confirm with the ropiness test: insert a thin stick into a suspect capped cell and withdraw slowly. AFB-infected brood pulls out as a sticky, stringy rope 2 to 3 centimeters long with a characteristic sour odor. The USDA’s APHIS American foulbrood program provides reporting guidance because AFB is a legally reportable disease in many states. Do not attempt home treatment of a confirmed or suspected AFB hive without first understanding your state’s specific regulatory requirements.
Chalkbrood mummies. Hard, mummified white or gray larvae at or near the hive entrance indicate fungal infection by Ascosphaera apis. A handful of mummies during damp spring conditions often clears up as colony population grows and hygienic behavior improves. Persistent chalkbrood through summer, or large numbers of mummies accumulating at the entrance, suggests weakened hygiene behavior - frequently a downstream symptom of high Varroa loads or a poorly mated queen.
Discolored or mispositioned larvae. Healthy young larvae are pearlescent white, curled symmetrically in the cell bottom, bathed in a slight sheen of royal jelly. Larvae that appear yellow, brown, or watery, or that lie in unusual positions in the cell, are diseased. The specific disease matters for your response, so identify before treating.
Varroa Mite Loads - The Most Critical Warning Sign for Any Bee Colony
Varroa destructor is the primary driver of managed honey bee colony losses across North America. If you are tracking only one metric for hive health, it must be your mite count.
The central challenge is that the most visible Varroa symptoms arrive late in the damage cycle. Bees with deformed wing virus - recognizable by crumpled, vestigial wings that do not unfurl - are already well past the point where early intervention is possible. By the time you see substantial numbers of deformed-wing bees crawling in front of the hive, your mite load has almost certainly been at or above the treatment threshold for weeks. The deformed adults are the end result of a problem that began in the brood nest long before any surface sign appeared.
Active mite monitoring through alcohol wash or sugar shake sampling is the only reliable early detection method. Passive sticky board counts significantly undercount infestation rates and are not suitable for treatment decisions. The Honey Bee Health Coalition’s best management practices set a general treatment threshold of 2 mites per 100 bees (a 2 percent infestation rate) during summer and early fall, with some programs recommending action at 1 percent during peak brood rearing when mite populations grow fastest. The companion post on how to do a mite wash: alcohol roll vs sugar shake covers sampling mechanics in detail.
When your mite count exceeds the threshold, treatment is urgent - not a judgment call. Apivar® 2.0 Amitraz Strips for Varroa Mite Control are a widely used Varroa treatment placed between brood frames for a full treatment cycle according to label directions. Follow the label precisely; underdosing or shortening the treatment window often produces partial results and mite populations rebound quickly.
After any treatment cycle, recheck your mite count 4 weeks after treatment ends. Continued high counts indicate either treatment failure - documented with amitraz-resistant mite populations in some regions - or re-infestation from neighboring colonies. Both scenarios require a different management response than simply repeating the same treatment.
Hive Weight, Food Stores, and Temperature as Early Indicators
A colony running short on food does not announce the problem dramatically. Stores deplete gradually, and by the time workers are visibly listless from starvation rather than cold, emergency intervention is often too late to prevent losses heading into or through winter.
Hefting. Lift the back edge of the hive body with one hand and feel for weight. With consistent practice at each visit, you develop a reliable sense of what a hive at your location should weigh at each point in the season. A hive that feels noticeably lighter than your other hives in late summer is a concern: that is precisely when colonies should be building winter stores. A light hive in August or September needs a frame inspection and likely supplemental feeding immediately.
Frame inspection for stores ratios. During each inspection, track the ratio of capped honey to open cells across the upper boxes. A colony heading into fall should have capped honey arching above the brood on most frames and full or near-full upper boxes if the season supports it. Colonies underweight on stores heading into fall need supplemental feeding now, not in November when cold limits hive access.
Continuous temperature and humidity monitoring. A colony failing to maintain a stable cluster temperature in the brood area (approximately 93 to 95 degrees Fahrenheit during active brood rearing) is under physiological stress. The WiFi Temperature Humidity Sensor provides wireless remote monitoring with app alerts, so you can track internal hive conditions without opening the box. Sudden overnight temperature drops or unusual humidity spikes can signal cluster failure or moisture buildup and warrant visual follow-up - especially heading into fall and early winter when frame inspections become impractical but colony stress peaks.
Conducting a Diagnostic Inspection and Avoiding Common Mistakes
When a warning sign appears, your next hive visit should be targeted and systematic rather than a general exploratory session. The goal is to gather diagnostic data efficiently, not to rearrange frames. However, it’s important to understand common mistakes that can delay your response and worsen outcomes.
Preparing for and Conducting a Diagnostic Inspection
Before opening the hive, suit up fully. Stressed or defensive colonies are more likely to sting during a focused close-range inspection, and stings are a distraction when you need your full attention on individual cells. The Mann Lake Deluxe Bee Suit features a zippered square veil, which helps maintain visibility when examining larvae at close range.
Run through this sequence every time you suspect your colony is in trouble:
-
Observe the entrance for two full minutes before lighting your smoker. Check flight activity level, count dead bees on the landing board, note their orientation (bees found face-first in empty cells suggest starvation; scattered dead bees near the entrance suggest pesticide exposure), and watch for any signs of robbing. Two minutes of observation gives you critical context that frames everything you will find inside.
-
Remove outer and inner covers, then pause before touching frames. Look at the top bars from above for population density. Note any wax moth webbing, hive beetle clusters in corners, or surface abnormalities before disturbing anything.
-
Locate the brood nest and note its position. Remove the outermost frame to create working space, then move inward toward brood. Assess whether the nest is centered, appropriately sized for the season, and whether bees are covering the brood adequately.
-
Assess the brood pattern on at least three consecutive brood frames. Look for compactness, capping shape and color, larval color and position, and signs of disease. Investigate individual abnormal cells before drawing conclusions about the pattern as a whole.
-
Confirm queen-right status using eggs - not the queen herself. Fresh eggs standing upright in the cell bottom, appearing as tiny white rice grains, confirm a laying queen within the past three days. No eggs, no young larvae, and only older capped brood or empty cells means a queenless or failing-queen situation needs to be ruled in or out.
-
Check food stores on at least two upper frames. Note the ratio of capped honey to open cells. Gently shake a frame of bees: a colony in a dearth condition will rush toward any open cells, while a colony with strong stores will not break readily.
-
Conduct a mite wash before closing the hive. Collect approximately 300 bees from a brood frame, complete the wash, count, and record the result against your threshold. Compare to your last recorded count to identify the trend.
Common Mistakes Beekeepers Make When Spotting Colony Problems
Recognizing a warning sign is only useful if you interpret and act on it correctly. Several patterns of error reliably delay intervention and worsen outcomes in ways that are entirely preventable.
Confusing normal variation with warning signs, and vice versa. Beginners frequently panic at normal behavior - bees clustered on the landing board on a warm evening, a handful of chalkbrood mummies, orientation flights that look chaotic - while missing genuine signals like an unusually quiet entrance during peak foraging hours. Build and maintain your baseline carefully and compare observations over time rather than evaluating any single observation in isolation. Three consecutive inspections showing the same abnormal pattern constitute a trend. One observation is just a data point.
Opening the hive too often without a diagnostic purpose. A beekeeper who opens the hive every three or four days to “check on things” is disturbing the colony without gathering actionable data. Frequent disturbance suppresses foraging, disrupts brood nest temperature regulation, and stresses bees in ways that compound any existing problem. Reserve hive openings for scheduled inspections with a clear checklist, or for targeted diagnostic visits triggered by a specific warning sign.
Delaying treatment because the problem might resolve on its own. Varroa loads do not self-correct without intervention. Queenlessness does not resolve unless the colony successfully raises an emergency queen - a process that takes three to four weeks and is not guaranteed even when everything goes correctly. American foulbrood does not respond to supportive care of any kind. When an inspection identifies a confirmed problem, commit to a treatment decision within 48 to 72 hours of your inspection, not after another week of observation.
Assuming your strongest hive does not need regular monitoring. A thriving colony can tip rapidly if its queen fails, if mite loads spike during a summer brood break, or if robbing pressure from a collapsing neighbor hits during a late-season dearth. Prior strength provides no immunity to current stressors. Every colony in your apiary earns its own inspection data on the same two-week schedule, regardless of performance history.
Not keeping written inspection records. Without records, you cannot see trends. “That hive seemed a little off last time” is not actionable. “That hive has shown a declining brood pattern across three consecutive inspections and the mite count has risen from 1.4 percent to 3.1 percent” is actionable. Consistent records are the difference between reactive management and genuinely preventive management. For a broader framework on tracking colony health across the season, the post on how to read your hive’s population through the season covers the full picture.
Frequently Asked Questions
How often should I inspect my hive to catch early warning signs of colony trouble?
During the active season - spring through early fall - inspect every two weeks. This interval aligns with the worker brood cycle, so a single visit shows you eggs, open larvae at multiple developmental stages, and recently capped brood, giving you a complete developmental snapshot to compare against your prior visit. If you have already identified a problem - a high mite count, a spotty brood pattern, or a suspected queen issue - increase to weekly visits until the situation resolves or you have begun executing a treatment decision. In winter, avoid full frame inspections that risk chilling the cluster. Rely instead on hive weight changes, entrance activity on days above 50 degrees Fahrenheit, and continuous temperature monitoring if you have a sensor installed.
What is the single most important early warning metric to track?
Varroa mite load, without qualification. Varroa destructor and the viruses it vectors are responsible for more managed colony losses in North America than any other single factor, and the most dangerous aspect is that serious brood damage accumulates well before visible symptoms appear in adult bees. Deformed wing virus produces symptoms in adults only after the viral load has been building for weeks or months inside capped brood. A monthly alcohol wash during mite season - late spring through fall - catches infestations while treatment is still straightforwardly effective. If your count reaches 2 percent or higher, treat promptly and recheck 4 to 6 weeks after the treatment cycle ends to confirm efficacy.
My colony is significantly smaller than it was two months ago - is that a red flag?
In midsummer, yes. Population naturally contracts heading into fall as queens reduce laying and colonies prepare for the winter cluster. But a colony losing substantial population in July or August - when worker numbers should be at or near their seasonal peak - is almost certainly responding to an active stressor. The most likely causes are a failing or recently failed queen (check immediately for fresh eggs and young larvae), a high mite load accelerating adult bee mortality (run a mite wash), or disease reducing adult lifespan and suppressing brood production. A shrinking colony is also disproportionately vulnerable to robbing from stronger neighbors, which can accelerate collapse and make the root cause harder to diagnose. Do not wait to see if the population stabilizes: inspect and mite-wash before the colony falls below the threshold at which intervention is still effective.
Conclusion
The early warning signs your bee colony is in trouble are almost always present before the situation becomes irreversible. Spotty brood, rising mite counts, entrance behavioral shifts, declining food stores, and unexpected population drops are all readable signals - if you are looking on a regular schedule and keeping records that let you see trends across visits rather than isolated snapshots.
Two habits will change your hive survival rate more than any other: inspect every two weeks during the active season, and conduct a mite wash at every inspection. When those two habits are in place, everything else - queen assessment, food evaluation, disease identification - becomes sharper and more accurate. And when you find a problem, act within the week. The biology of a declining colony will not hold while you wait for a more convenient inspection date.
Save this post for reference before your next hive inspection, or subscribe via RSS to get new guides as they publish.
Related reading: