How to Predator-Proof Your Apiary Against Wildlife
This post contains affiliate links. As an Amazon Associate, I earn from qualifying purchases at no extra cost to you.
A ransacked hive is one of the most demoralizing sights in beekeeping. A black bear can destroy a four-hive apiary in a single night and will return every night until there is nothing left. A family of skunks drains a colony’s forager population through repeated nightly visits, weakening hives so gradually you do not notice until fall inspection reveals a colony too weak to cluster. Even a determined raccoon prying open a hive lid can trigger swarming or absconding.
These are routine losses in wildlife-active areas, and nearly all are preventable. The strategy is layered: an electric perimeter fence handles large predators; targeted physical hardware handles smaller, persistent threats that would walk under or ignore a fence entirely. Getting both layers right eliminates the vast majority of wildlife losses from a backyard or small-field apiary.
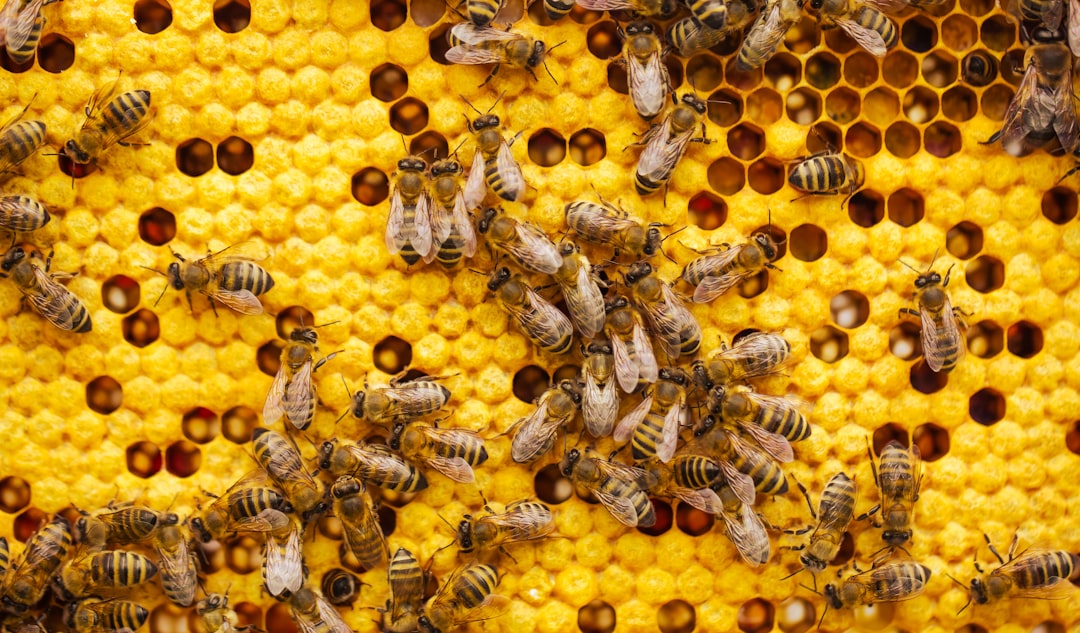
Photo by Simon Kadula on Unsplash
Identifying the Wildlife That Targets Backyard Apiaries
A realistic predator assessment for your location is the foundation of any sensible protection plan, because the layer you need most depends entirely on what is actually present in your area.
Black Bears
Black bears are the most destructive apiary predators in North America. According to Pennsylvania State University Extension, a single bear visit can destroy multiple hives, and bears return to a food source repeatedly once they have located it. They are motivated by both honey and brood protein and can overturn cinder-block stands and pull apart hive bodies entirely. Black bears are present across most of the eastern United States, the Pacific Northwest, and significant portions of the Southwest. If your hives are within documented black bear range and not behind an electric fence, the question is not whether a bear will find your apiary but when.
Skunks
Skunks scratch at the entrance at night, eat the guard bees that emerge to investigate, and repeat this behavior across multiple nights and weeks. The colony loses foragers steadily and often arrives at autumn underpowered with insufficient winter stores. Diagnostic markers are muddy scratch marks on the landing board, small piles of dead bees directly in front of the entrance, and bees that are unusually aggressive even in good weather. Raising hive stands to 18–24 inches is the most effective deterrent.
Raccoons
Raccoons can lift unsecured hive lids, remove feeder components, and harass a colony enough to trigger excessive defensive responses or absconding. A rock or brick on top of the cover is not adequate deterrence for a motivated raccoon. Ratchet straps or purpose-built hive clips that secure the lid to the hive body are the correct fix, and they cost almost nothing.
Mice
Mice move into hives in early fall to overwinter. They build nests in the lower box, destroy comb, and contaminate frames with urine and feces. A colony cannot pursue them into cold corners once cluster formation begins. Metal mouse guards installed by early October are the specific solution. Wooden entrance reducers are not a substitute because mice gnaw through them without difficulty.
Yellow Jackets and Wasps
Late-season yellow jackets raid weak colonies aggressively for honey and brood, particularly in August and September. A strong colony can usually defend a properly reduced entrance; a small or queenless colony cannot. Reducing the entrance to a single bee-width during yellow jacket season is a low-cost, high-value intervention. Hopelessly weak colonies should be combined rather than left to be raided.
Opossums
Opossums engage in entrance-scratching behavior similar to skunks and are a common nuisance across the South and Mid-Atlantic. The same stand-height solution that addresses skunks handles opossums equally well - no separate hardware is needed.
Why Electric Fencing Is the Core of Predator-Proofing Your Apiary
For bear-country beekeepers, electric fencing is the recommendation from every credible source. USDA Wildlife Services and Penn State Extension both identify properly installed electric fencing as the primary defense against bear predation at apiaries. A properly charged fence delivers an aversive stimulus strong enough that even a motivated bear learns to avoid the area. It does not injure the bear seriously; it conditions it to associate your apiary with pain before it ever reaches a hive.
A standard small-apiary setup uses two or three electrified wire strands at approximately 8, 16, and 24 inches above the ground, enclosing the hive area with at least 10 feet of clearance on all sides. That spacing prevents a bear from standing outside the fence and reaching a hive. The energizer must be adequate for the fence perimeter length and vegetation load, because grass and weeds in contact with the wire bleed charge and reduce shock intensity below the deterrent threshold.
For a small apiary, the Patriot PE2 Electric Fence Energizer is a solid plug-in option. It delivers 0.10 joules of output. For remote apiaries without grid access, a 12V deep-cycle battery with a solar trickle charger paired with a battery-compatible energizer is the standard alternative, though plug-in systems are more reliable and lower maintenance where utility power is available.
The gate is the most common failure point in otherwise functional electric fences. A non-electrified or poorly integrated gate creates a low-resistance gap in the fence circuit that a bear will find and exploit. The Zareba Electro-Gate Kit is a weather-resistant electric gate kit that includes anchors, an adjuster, a plastic handle, and fencing cord, designed to maintain circuit continuity when the gate is closed. This is the correct hardware for your access point, not a coiled spare wire or improvised handle.
Grounding and Vegetation: The Two Most Common Failure Points
Poor grounding and uncontrolled vegetation cause the majority of electric fence failures. Drive the ground rod at least 3 feet into moist soil and connect it to the energizer ground terminal with properly rated wire. In dry climates or during summer drought, add a second rod 10 feet from the first, connected in series to the same terminal, to significantly improve reliability.
Vegetation touching fence wires bleeds charge continuously. Mow or string-trim inside and outside the perimeter weekly during the growing season. A fence voltage tester lets you verify output at the far corner - the point farthest from the energizer. You want at least 3,000–4,000 volts under load for reliable bear deterrence. If voltage is low, check vegetation contact first, then the ground connection, then look for wire breaks.
Safety note: Electric fence energizers designed for livestock and apiary use deliver a high-voltage, low-amperage pulse - painful but not dangerous to healthy adults. Anyone with an implanted cardiac device, young children, or elderly visitors must be clearly warned before approaching the apiary. Always de-energize the fence before entering to perform hive inspections. Post clearly visible “Electric Fence” warning signs at regular intervals around the perimeter; in many jurisdictions, this is a legal requirement.
Physical Barriers for Smaller Predator Threats
Electric fencing handles large predators. Everything smaller requires targeted hardware at or on the hive itself. These measures are inexpensive, fast to install, and collectively eliminate every remaining category of common predator damage.
Metal Mouse Guards — Install by early October. Entry openings of approximately 3/8-inch diameter allow bees to pass and exclude mice. Wooden entrance reducers are not a substitute; mice chew through them routinely. Remove the guard in early spring before population buildup begins, because even moderate entrance restriction slows forager turnover enough to matter during peak nectar flow.
Hive Stand Height — Raise hives to 18–24 inches off the ground. At that height, a skunk cannot comfortably plant its front feet on the ground and reach the entrance simultaneously. Cinder blocks stacked two high, purpose-built metal stands, or treated lumber frames all work. Ensure the stand is level and stable under both wind load and the weight of a fully loaded production hive.
Lid Security — Ratchet straps run vertically over the hive from handle to handle, or stainless hive clips pinning the cover to the upper brood box, are the correct hardware. This is a $5–10 fix per hive that categorically eliminates raccoon lid intrusion as an issue.
Entrance Reduction — During yellow jacket season from late August through October, reduce the entrance to the smallest opening available. A strong colony defends a narrow entrance far more effectively than a full-width one. The screened bottom board setup on your hives also affects entrance defense dynamics, so factor that in when sizing the opening for your specific configuration.
Tack Strips at Ground Level — For persistent scratching pests where stand height alone has not resolved the issue, placing a strip of hardware cloth or a carpet-tack strip face-up directly in front of the entrance creates foot discomfort that skunks and opossums reliably avoid. This is a secondary reinforcement measure, not a substitute for raising the hives.
Step-by-Step: How to Predator-Proof Your Apiary With Electric Fencing
Setting up an effective electric fence is a half-day project for most small apiaries. Follow this sequence for a clean, functional installation that will protect your hives for years with minimal ongoing maintenance.
-
Mark your perimeter. Flag a rectangle or polygon that provides at least 10 feet of clearance from each hive on all sides. Use marking flags or stakes at each corner and any significant directional change. This spacing prevents a bear from standing outside the fence and reaching any hive body.
-
Drive corner posts and line posts. Use fiberglass or wood posts rated for electric fence use. Drive corner posts at least 18 inches into the ground for structural stability. Space intermediate posts every 10–15 feet to prevent wire sag.
-
Drive the ground rod. Select a location within 25 feet of the energizer mounting point that stays reasonably moist year-round. Drive a 4-foot galvanized steel ground rod at least 3 feet deep. In dry or rocky soil, drive a second rod 10 feet away and connect both to the energizer ground terminal in series using insulated lead-out wire.
-
Attach insulators to posts. Mount plastic post insulators at 8, 16, and 24 inches for bear protection; 8 and 16 inches if your concern is skunks only. Use insulators rated for the wire type you are running.
-
Run fence wire. Starting from the energizer post, thread galvanized or aluminum fence wire through the insulators around the full perimeter. Maintain consistent tension - tight enough that the wire does not sag or contact vegetation, but not so tight that corner posts lean inward under load.
-
Install the gate. Attach the Zareba Electro-Gate Kit at your access point on each wire strand. The included fencing cord connects the gate to the fence wire on each side of the opening, maintaining circuit continuity when the gate is closed. The plastic handle allows you to open the gate safely while the fence is energized.
-
Connect the energizer. Mount the Patriot PE2 Electric Fence Energizer to a post or nearby wall with access to a power outlet. Connect the fence terminal to the perimeter wire and the ground terminal to your ground rod assembly using insulated lead-out wire. Plug in and switch on.
-
Test output voltage. Use a fence voltage tester at the far corner of the perimeter. You need at least 3,000–4,000 volts under load for effective bear deterrence. Low voltage indicates vegetation contact, a poor ground connection, or a wire break. Do not consider the installation complete until voltage tests acceptable at the far corner.
-
Post warning signs. Place clearly visible “Electric Fence” signs at eye level at minimum every 50 feet around the perimeter. Check your local ordinances for specific requirements on sign frequency, placement height, and any required language.
Apiary Placement Decisions That Reinforce Predator-Proofing
Siting choices reduce predator pressure before any hardware goes in, and the right location makes both physical and electrical deterrents more effective and easier to maintain.
Place hives in open areas with at least 30–50 feet of clearance from dense vegetation, tree lines, brush piles, and creek banks. Bears and raccoons approach under cover of vegetation; open siting removes the concealed approach corridor and makes perimeter fence vegetation easier to keep trimmed. Secondary benefits align here: more morning sun reaches the hives, air circulation improves, and nearby yellow jacket nests are less likely to go unnoticed until they become a problem.
Motion-activated lights are a useful, low-cost supplement for nocturnal predators. Skunks and raccoons strongly prefer complete darkness, and a solar-powered motion sensor light aimed at the entrance area disrupts their routine without requiring utility power. Bears are less reliably deterred by light alone, so treat lighting as a supplement to electric fencing rather than a replacement.
Orient hive entrances toward the southeast to capture morning sun - broadly considered best practice - and to face open ground rather than toward vegetation cover in most backyard layouts, giving guard bees better detection angles and removing the direct low-approach vector for skunks and opossums.
The guide on how to prepare your apiary for winter covers additional entrance management, placement, and protection steps specific to the fall-to-winter transition that complement the year-round deterrents described here.
Common Mistakes That Leave Your Apiary Vulnerable
Installing an electric fence without testing it. The most common electric fence failure is an energizer or ground system not delivering adequate voltage. A bear that contacts a low-voltage fence gets a mild surprise, pushes through, and learns the fence is harmless. After that, the fence provides no protection even if you repair it. Buy a voltage tester at the same time you purchase the energizer. Test the far corner at installation and every month thereafter - this is a $15–25 tool that protects an investment many times its value.
Waiting until after a bear attack to install fencing. A bear that has already raided an apiary is substantially harder to condition away from the site than one encountering a fence for the first time. Install before your first season if you are within documented black bear range. Replacing destroyed equipment and sourcing new bees mid-season costs far more in time and money than installing a fence proactively.
Using an energizer that is undersized for actual field conditions. Fence energizers are rated under ideal conditions with clean wire and no vegetation load. Grass and weeds in contact with the lower wire drain significant charge, so an energizer delivering 3,500 volts on day one may deliver 1,500 volts by midsummer. Keep wire heights above heavy grass, trim weekly, or move up to a higher-joule energizer if consistent maintenance is impractical to sustain.
Installing mouse guards too late. Mice do not wait for obvious cold weather - they enter hives during mild fall nights when many beekeepers assume the colony is managing the threat. Once cluster formation begins, the colony cannot pursue them into cold corners. Treat October 1 as a fixed calendar date for metal mouse guard installation regardless of current temperature.
Relying on a rock or brick to secure the hive lid. A motivated raccoon removes a rock-weighted cover without difficulty. Ratchet straps or hive staples cost little, install in minutes, and categorically eliminate this failure mode. There is no acceptable reason to leave lids unsecured.
Underestimating skunk damage because it is gradual. Beekeepers who have not encountered skunk predation before often misattribute the symptoms to disease, mites, or a failing queen. Scratch marks at the landing board, dead guard bees in front of the hive, and unusually defensive bees during inspections point specifically to skunks. Raising stand height to 18–24 inches resolves the problem quickly. For a broader look at the management-level errors that compound into colony losses over a season, the post on beginner beekeeping mistakes is worth reviewing before your first winter.
Quick Reference: Predator-Proofing by Threat
| Threat | Primary Solution | Secondary Measure | Approximate Cost |
|---|---|---|---|
| Black bear | Electric fence (energizer + gate kit) | Apiary sited in open area | $80–200 |
| Skunk | Hive stand at 18–24 inches | Tack strip or hardware cloth at entrance | $0–20 per hive |
| Raccoon | Ratchet strap or hive clip on lid | Motion-activated light | $5–15 per hive |
| Mice | Metal mouse guard at entrance | Install by Oct 1 as fixed habit | $5–10 per hive |
| Yellow jackets | Entrance reducer to single bee-width | Combine or requeen weak colonies | $0–5 |
| Opossum | Hive stand at 18–24 inches | Entrance reducer | $0–20 per hive |
The only threat requiring meaningful expenditure is bears. Every other predator issue is resolved with inexpensive hardware available from any farm supply store. Concentrate your electric fence budget on a reliable energizer and a proper gate kit, and use low-cost hardware solutions for everything else.
Frequently Asked Questions
Do I need an electric fence if I have never seen a bear near my property?
Absence of bear sightings does not mean bears are absent. It means they have not yet located your apiary. Black bear populations have been expanding their range across the eastern United States for decades, and the first indication many beekeepers receive of local bear activity is a destroyed hive, not a prior sighting. Penn State Extension and USDA Wildlife Services both recommend installing electric fencing before any attack for beekeepers within documented black bear range. Once a bear raids a honey source, it returns within days. Replacing destroyed equipment and sourcing new bees mid-season costs far more than a fence installed proactively. Prevention is the only version of this situation that works out well.
Can the Patriot PE2 energizer run on battery power for a remote apiary location?
The Patriot PE2 is a plug-in energizer designed for utility power. For remote apiaries without grid access, you need a solar-integrated energizer or a separate 12V deep-cycle battery with a solar trickle charger paired with a battery-compatible energizer. Plug-in energizers deliver more consistent output and require less maintenance than battery-solar systems. For off-grid setups, confirm the energizer you select is rated for battery input, size the battery for your perimeter length and expected cloudy-day duration, and still test voltage at the far corner monthly regardless of power source type.
How do I confirm skunks rather than Varroa or a failing queen are causing damage?
Inspect the entrance area during the day for muddy scratch marks, claw striations on the wooden landing board, and small clusters of dead bees lying directly in front of the hive. Then check after dark with a red-light flashlight, which does not trigger significant bee response. Skunks are creatures of habit and will return to the same hive at roughly the same time each night. Varroa infestations produce deformed-wing bees visible during a frame inspection; a failing queen produces irregular brood patterns and laying workers. Skunks leave no visible internal hive damage - the harm is entirely the accumulated loss of guard bees over time.
Is it legal to install an electric fence in a residential or semi-rural yard?
In most jurisdictions, low-joule electric fence energizers designed for livestock and apiary use are legal to install on private property, but local ordinances vary. Some municipalities restrict electric fencing in residential zones or require specific setback distances from property lines and public rights-of-way. HOA covenants may apply as well. Check your local zoning code and any applicable HOA rules before installation. Posting clearly visible “Electric Fence” warning signs is both a legal requirement in many areas and a basic courtesy to neighbors and anyone who might otherwise contact the fence unknowingly. Most small apiary installations fall under agricultural use provisions even in semi-rural residential zones, but confirm before you drive the first post.
Conclusion
Predator-proofing your apiary is a solvable problem with an established, affordable solution set. The practical order of operations: install metal mouse guards and raise hive stands to 18–24 inches before your first cold snap, add ratchet straps or hive clips to every lid, then build an electric perimeter fence if you are in bear country - which covers most of the continental United States. The Patriot PE2 energizer and the Zareba Electro-Gate Kit provide a weather-resistant starting point for a small-apiary perimeter fence that largely maintains itself with monthly voltage checks. None of this requires specialized skills or significant budget - only acting before the first incident, not after. The colonies that survived last winter deserve protection going into the next one.
Bookmark this guide and share it with any new beekeeper in your local club who is setting up their first apiary in wildlife-active territory.
Related Reading: