Re-Queening Your Hive: Timing Methods and Selecting the Right Replacement Queen
This post contains affiliate links. As an Amazon Associate, I earn from qualifying purchases at no extra cost to you.
A hive with a failing queen is a hive in slow collapse. Egg production drops, brood patterns become patchy and scattered, and the colony loses the population momentum it needs to get through winter or capitalize on a nectar flow. Re-queening stops that decline before it becomes irreversible, but the timing and the queen you choose determine whether the procedure actually works or creates a new set of problems.
Most hobby beekeepers wait too long. They notice the warning signs, convince themselves the colony will sort it out, and find themselves with a laying worker situation by the time they act. A colony cannot fix a failed queen on its own without emergency resources, and if those resources are absent, it will raise a replacement that may be inferior, poorly mated, or both.
This guide covers how to recognize when re-queening is genuinely necessary, the seasonal timing windows that give a new queen the best chance at acceptance and mating success, and what to look for when selecting or ordering a replacement. Whether you are ordering from a reputable breeder, purchasing locally, or selecting from your own stock, the decisions you make upfront set the trajectory for the next two to three years of that hive’s productivity.
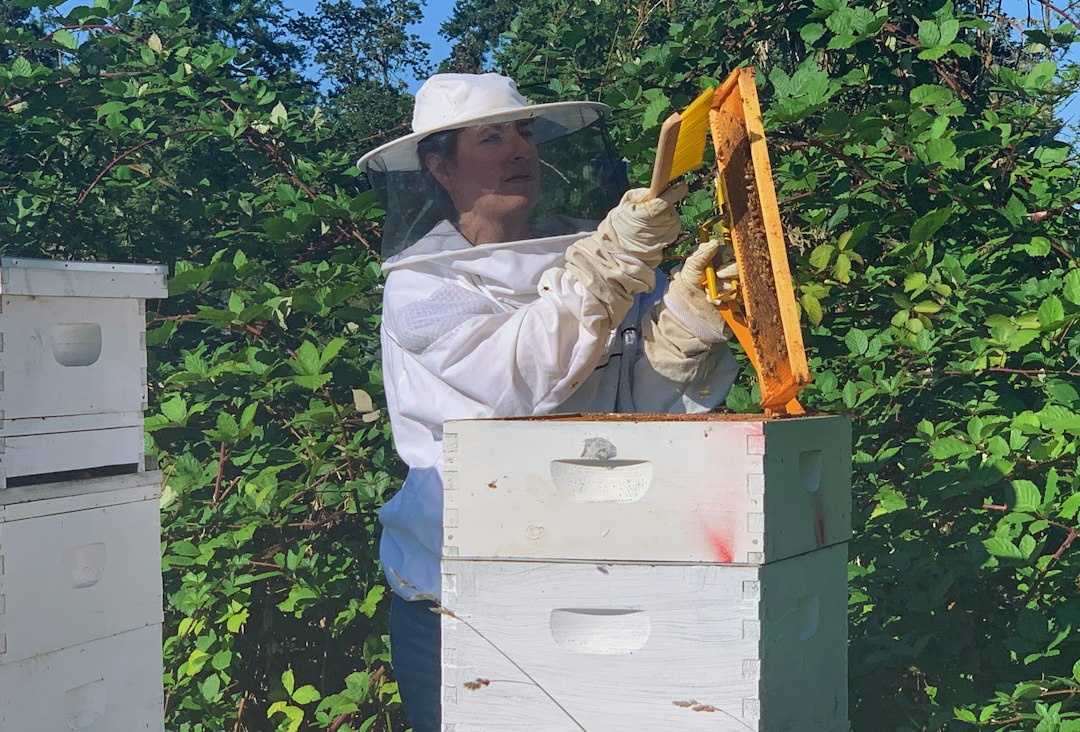
Photo by Melissa Askew on Unsplash
Why Re-Queening Your Hive Is a Proactive Management Tool
Most beekeepers treat re-queening as a rescue operation, something you do when a queen fails dramatically and the colony is already struggling. The more useful frame is to treat it as scheduled maintenance. Commercial operations re-queen annually as a matter of policy, regardless of apparent queen quality. That is not overcaution; it is yield management. A one-year-old queen in peak condition lays 1,500 to 2,000 eggs per day. That output declines meaningfully by year two and drops further by year three. Replacing queens on a two-year cycle at most keeps colonies at or near peak population capacity throughout the productive season.
For hobby beekeepers managing two to ten hives, the calculus is similar but less rigid. A queen showing strong, consistent egg-laying in a full, tight brood pattern is worth keeping. A queen who has already slowed, whose brood shows excessive scattered cells, or whose colony temperament has shifted toward defensiveness should be replaced rather than tolerated for another season.
The genetic benefits of thoughtful re-queening are also substantial. Colonies with hygienic behavior traits show measurably better resistance to Varroa destructor, the primary driver of colony collapse in North America. University of Minnesota Bee Lab research on hygienic behavior has documented that colonies from hygienic-selected queens remove mite-infested brood at significantly higher rates than unselected stock. Selecting queens from breeders who actively screen for these traits gives your colony a structural advantage that no chemical treatment can replicate on its own.
Re-queening is also the fastest route to correcting colony temperament. If a hive has become aggressive, following you from the apiary, stinging through your suit, or responding to normal inspections with disproportionate defense, introducing a new queen from calmer genetic stock usually resolves the problem within three to six weeks as the worker population turns over. Waiting for the old queen to die on her own timeline means tolerating the aggression for months.
Reading the Signs That a Colony Needs a New Queen
The brood pattern is the primary diagnostic. Lift a frame of capped brood and look at the coverage. A healthy queen produces a pattern where 90 percent or more of cells in a given area are capped, arranged in a solid mass with few gaps. A failing queen produces what beekeepers call a “shotgun” or “peppered” pattern: scattered cappings with many empty cells interspersed throughout. Some empty cells are normal due to dead larvae or hygienic removal, but large-scale scatter indicates reproductive inconsistency.
Watch for these specific indicators:
- Low brood density. Fewer than 70 percent of cells occupied in the brood area, with no obvious Varroa-related cause.
- Multiple eggs per cell. A sign that a laying worker may already be active, which often means the queen has been absent longer than you realized.
- No eggs visible across two consecutive inspections. Eggs are the freshest data point in the hive. Their absence is a reliable signal.
- Drone brood in worker-sized cells. An infertile or depleted queen begins laying unfertilized eggs in worker cells, producing drone brood in a scattered pattern across worker combs.
- Visible queen abnormalities. A queen missing a leg, moving sluggishly, avoiding worker contact, or not receiving attendant grooming are all grounds for immediate replacement.
- Sudden colony temperament shift. An unexplained increase in defensiveness in a previously calm hive often correlates with queen status changes.
If you are uncertain whether the queen or a Varroa infestation is causing brood abnormalities, treat for mites first and re-inspect in three to four weeks before committing to re-queening. High mite loads produce brood patterns that can look nearly identical to queen failure.
Re-Queening Timing: Seasonal Windows That Maximize Success
Timing a re-queening correctly is nearly as important as queen selection. A queen introduced at the wrong point in the season faces a colony that is behaviorally less receptive. Drone populations may be insufficient for mating if you are using a virgin queen. And late-season introductions give the new queen little time to build winter population before clustering.
Spring (late April through May) is the most favorable window in most North American climates. The colony is expanding, drones are abundant, worker acceptance behavior is at its most generous because population growth is the colony’s primary drive, and a new mated queen has the entire spring and summer nectar flow to establish herself and build stores. This is the best time to make a proactive replacement even when the existing queen is only marginally underperforming.
Early summer (June through mid-July) is viable but carries more risk if you are using a virgin or locally mated queen, because drone populations begin declining after the summer solstice in many regions. Mated queens from established breeders remain a reliable option throughout this window. The post-solstice drone decline is gradual rather than sudden, so early July introductions generally succeed.
Late summer to early fall (August through mid-September) is the last realistic window for re-queening in most temperate climates. The introduced queen needs a minimum of four to six weeks of active laying to build a population of young winter bees before the colony clusters. Penn State Extension’s beekeeping management resources recommend completing re-queening no later than six weeks before your expected first frost date. In USDA hardiness zone 6 and warmer, that typically means finishing by mid-September. In colder zones, late August is safer.
Mid-winter re-queening in clustered colonies is not feasible. Queens introduced when the cluster is tight will not be accepted reliably, and there is no laying opportunity until temperatures break in spring.
If you are planning a preventive re-queen for the following season, order replacement queens in late winter or early spring. Top breeders and queen producers book out months in advance, particularly those offering hygienic or VSH-selected stock. Waiting until the problem is obvious usually means settling for whatever remains in inventory.
How to Select the Right Replacement Queen
The queen you introduce determines the colony’s genetic direction for the next one to three years. Selection criteria fall into three areas: genetic traits, source reputation, and physical queen quality.
Genetic Traits Worth Paying For
Hygienic behavior is the trait with the strongest evidence base for Varroa resistance. Hygienic colonies detect and remove mite-infested or diseased pupae before or shortly after capping, disrupting the mite’s reproductive cycle. Look for breeders who test for hygienic behavior using the freeze-killed brood or liquid nitrogen assay, targeting 95 percent or higher removal rates within 24 to 48 hours.
VSH (Varroa Sensitive Hygiene) is a more specific trait developed by USDA ARS researchers. VSH workers actively interrupt mite reproduction in capped cells, resulting in mite populations that cannot compound at normal rates. VSH stock is available from licensed breeders and is worth the premium for beekeepers who prefer to minimize chemical interventions.
Local adaptation matters more than many beekeepers expect. A queen from a Florida breeder introduced into a Minnesota colony may produce workers whose clustering behavior and winter preparation instincts are poorly matched to the local climate. Sourcing from breeders in your region, or a region with a similar seasonal profile, improves overwintering outcomes.
Temperament is heritable. If defensiveness is your primary reason for re-queening, select breeders who actively score colonies for gentleness and publish their selection criteria.
Evaluating Source Reputation
For a full breakdown of how to vet queen suppliers, the post on where to buy queen bees: what to look for and how to order covers breeder evaluation in depth. The short version: buy from breeders who publish their selection criteria, who hold queens in mating nucs rather than banking large numbers in bulk, and who can describe their mating yard protocols. Avoid purchasing queens solely on price.
Physical Queen Quality on Arrival
When your queen arrives or when you pick her from a local producer, examine her before introduction. Her abdomen should be long and tapered, visibly larger than workers. Her movements should be deliberate and confident, not erratic or sluggish. The attendant workers in her cage should be actively grooming and feeding her. Missing legs, damaged wings, or dead attendants in the cage are red flags worth calling the supplier about before proceeding.
How to Re-Queen Your Hive: A Step-by-Step Process
Successful re-queening requires preparation, patience, and the right tools. The process below assumes you are introducing a commercially purchased, mated queen in a standard candy-plug cage.
-
Find and remove the existing queen. Conduct a thorough inspection two to three days before the planned introduction. Use a KINGLAKE Beekeepers Polished Stainless Steel Hive Scraper Tool to gently pry apart propolis-sealed frames and inspect each one methodically. Once you locate the old queen, remove her from the hive. Do not immediately introduce the new queen; allow the colony twelve to twenty-four hours to register the loss before the introduction.
-
Confirm the colony is queenless before introducing. Return the next day and check for queenless indicators: a subtle roaring sound when you open the hive, increased general agitation among workers, and bees searching the bottom board area. If workers have already begun emergency queen cells from young larvae, knock those back before introducing your caged queen.
-
Mark the new queen before introduction. This makes every future inspection dramatically easier. Use a queen bee marking pen set to apply a small, clear dot of the year-appropriate color to the center of her thorax (not the abdomen). The 2026 international color code is white. A marked queen is visible at a glance, and your re-queening records become far more useful when you can immediately verify the queen’s introduction year.
-
Introduce the queen in her candy-plug cage. Suspend the cage between two frames in the brood nest, candy side up. This orientation prevents workers from blocking the candy tunnel with wax or debris. Do not remove the cork from the candy end before placement; workers need to chew through on their own timeline, which takes two to five days and serves as a built-in acceptance test.
-
Leave the hive undisturbed for five days. Resist the urge to check earlier. Repeated disturbance during the acceptance window increases rejection probability by agitating workers and disrupting the pheromone adjustment process.
-
Check the cage on day five and assess. Look for one of three conditions: candy fully consumed and the queen released into the colony (success); queen still in the cage with calm, living attendants (give two more days); or queen dead or the cage being aggressively balled (proceed to troubleshooting). If the cage is intact and workers are calmly clustered on it rather than chewing at it aggressively, that is generally a positive sign.
-
Confirm establishment at fourteen days. By two weeks after release, a successfully accepted queen should be laying fresh eggs. Look for eggs standing upright in cells at the center of the brood nest. The new workers she produces will begin emerging at twenty-one days post-laying, and colony population, brood pattern, and temperament should shift visibly within four to six weeks. If you need to handle or move the queen during any subsequent inspection, a Mann Lake One Handed Catcher, Queen lets you capture her without pinching or rolling her abdomen, which can damage her internal reproductive structures.
Common Re-Queening Mistakes to Avoid
Introducing the new queen too soon after removing the old one. A colony needs time to shift from a queenright to a queenless behavioral state. Introducing a new queen within hours of removing the old one means workers are not yet receptive, and the probability of balling or rejection is high. A minimum twelve to twenty-four hour gap is required; many experienced keepers wait a full twenty-four hours before placing the cage.
Failing to remove emergency queen cells before introduction. If the colony had already begun raising emergency cells from young larvae before you removed the failing queen, workers may have committed to those cells and will reject the caged introduction outright. Always inspect for and remove all visible emergency queen cells before placing the new queen’s cage. This is the single most commonly overlooked step in failed re-queening attempts.
Re-queening too late in the season. Autumn re-queening comes with a tight margin. A new queen who begins laying in mid-October in a zone 5 climate has six to eight weeks before clustering, which is not enough time to produce a large population of young winter bees from scratch. If the season timing is marginal, weigh whether combining the weak hive with a stronger colony is a better outcome. The guide on how to combine weak hives safely covers the newspaper method and timing considerations in detail.
Neglecting to mark the queen. An unmarked queen hides effectively among workers and becomes nearly impossible to locate during inspections. Without a mark, you lose the ability to confirm the queen’s age, verify whether the colony has superseded her quietly, or track how long a re-queening has been in effect. Mark every queen you introduce, without exception.
Checking the hive repeatedly during the acceptance window. Frequent inspections in the five to seven days after introduction increase the probability of agitating workers and triggering a rejection response. Set a calendar reminder for day five and leave the hive alone until then.
Purchasing queens on price alone. A low-cost queen from an unlabeled or unverified source is a gamble with poor odds. A poorly mated queen, a queen from banked inventory that is past her optimal condition, or a queen carrying unknown genetic traits will cost you weeks of colony disruption and force a second attempt. Budget queens routinely cost more in lost time and colony stress than the dollars saved at purchase.
Frequently Asked Questions
How do I know if my colony has already superseded the queen on its own?
Supersedure happens quietly, often without the chaos of a swarm. Signs include finding two queens present simultaneously during an inspection, a queen cell built on the face of a frame rather than the bottom edge or corner, and then a sudden change in which queen you can locate. If you marked your original queen and now find an unmarked queen occupying the hive, supersedure has already occurred. The colony chose its replacement without your intervention. Evaluate the new queen’s brood pattern and egg-laying consistency for three to four weeks before deciding whether to accept her or replace her with selected stock from a known breeder.
Should I re-queen every year regardless of queen performance?
Annual re-queening is standard in commercial operations because it maximizes peak egg-laying output and eliminates the risk of queen failure during critical population-building windows. For hobby beekeepers, a two-year cycle is a reasonable compromise. A queen demonstrating strong, consistent brood patterns and a productive, manageable colony is worth carrying through a second season. A queen showing any performance decline by the end of her first full season should not be carried into a third year. The cost of a high-quality replacement queen is modest compared to the cost of managing a colony through queen failure mid-season.
What is the international queen color coding system and why does it matter?
The system assigns a specific marking color to each year on a repeating five-year cycle: white (years ending in 1 or 6), yellow (2 or 7), red (3 or 8), green (4 or 9), and blue (5 or 0). For 2026, the correct marking color is white. A marked queen tells you her birth year at a glance, making it immediately clear how long she has been in service and whether the colony has replaced her without your knowledge. The Honey Bee Health Coalition’s hive management resources include quick-reference charts for the color rotation and queen tracking.
Can I re-queen during an active nectar flow?
Yes, and in fact a strong nectar flow is one of the more favorable conditions for introduction. A colony actively taking in nectar is focused outward and less likely to direct defensive energy toward a caged queen. Worker temperament is generally calmer, and the colony’s growth orientation makes acceptance more likely. The core process remains unchanged: remove the old queen, wait twenty-four hours, introduce via candy-plug cage, and resist checking before day five. Favorable conditions do not shorten the required acceptance window.
What should I do if my introduced queen is found dead in the cage on day five?
This indicates rejection, not a cage failure. Before attempting a second introduction, thoroughly inspect for emergency queen cells, signs of a laying worker, or an unmated virgin queen the colony may have produced on its own. Any of these conditions will cause repeated rejection of introduced queens. Address the underlying issue first. If no competing queen production is present, wait forty-eight hours, then attempt a second introduction with a fresh queen using the same candy-plug method. A second consecutive rejection usually signals a queenright condition you have not yet identified, so inspect carefully before ordering another queen.
Conclusion
Re-queening is one of the highest-leverage decisions available to a hobby beekeeper, but only when done at the right point in the season, with a queen selected for verifiable traits, and with the discipline to let the acceptance process run without interference. Spring is the ideal timing window. Late August or early September is the last viable one in most climates. Every queen you introduce is worth marking immediately, worth confirming at fourteen days, and worth evaluating honestly at the six-week mark.
Your next step is to assess your current queens before the season closes. If any hive is showing a patchy brood pattern, a declining population, or a queen past her second season, get a replacement on order now and schedule the re-queening while weather and drone populations still allow it.
If this guide was useful, bookmark it before your next inspection or share it with a fellow beekeeper managing a struggling colony.