Managing swarms prevention capture and relocation for small beekeepers
This post contains affiliate links. As an Amazon Associate, I earn from qualifying purchases at no extra cost to you.
A swarm is the most visible thing a honey bee colony does, and for a small beekeeper it is usually the most expensive. When a strong hive swarms, roughly half the workers and the old queen leave in a single afternoon, taking your honey crop with them. The parent colony is left with a queen that has not yet emerged, a gap in brood production, and a shrunken workforce heading into the main nectar flow.
This guide takes a simple position: swarming is natural, but losing swarms is mostly a management failure. For an apiary of one to ten hives, prevention beats chasing clusters up trees. The cheapest swarm is the one that never leaves. The second cheapest is the one you planned for, with a nuc box ready and a pickup route in mind. The most expensive is the one that lands in a neighbor’s chimney while you are at work.
It is late October, so swarm season is behind you in most of the US. That makes this the right time to plan: order equipment, map your inspection calendar, and decide how you will handle prevention, capture and relocation before May arrives.
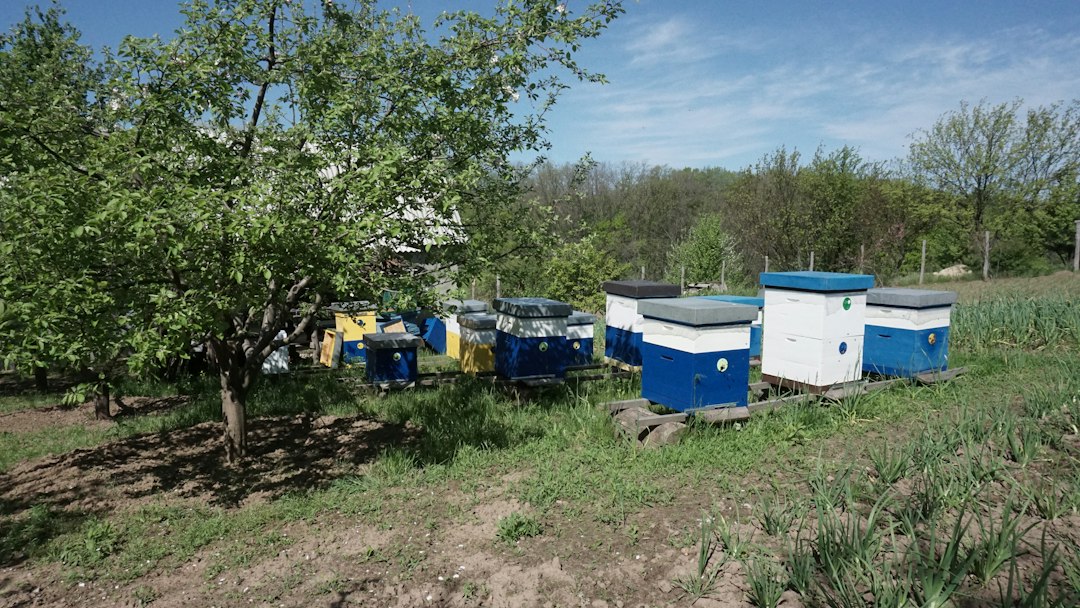
Photo by Dmytro Glazunov on Unsplash
Swarm Prevention Starts Before the Season
Colonies swarm to reproduce. A hive that overwintered well, built up fast in spring and filled its brood nest has done exactly what you wanted, and that success is what triggers swarming. The urge builds when the brood nest becomes congested, when young nurse bees outnumber the available work, and when queen pheromone no longer circulates well through a crowded colony. Those pressures stack up in the weeks before and during the first strong flow.
Prevention is therefore a calendar job, not a reaction:
- Late winter: Plan equipment. Confirm you have spare boxes, frames and at least one empty nuc box per three or four hives.
- Early spring buildup: Watch population growth. Our guide to reading your hive’s population through the season explains what normal growth looks like so you can spot a colony racing ahead of its space.
- Four to six weeks before your local main flow: Start inspections every seven to ten days and add room before the colony asks for it.
- During the flow: Keep adding supers ahead of the bees, and check for queen cells on every inspection.
Local timing matters more than any generic date. In many regions swarm season runs from spring through early summer, with the peak tied to the first major nectar source, so a beekeeper in Georgia and one in Minnesota may be weeks apart. Your state extension office, resources like Penn State Extension beekeeping guides, and local associations are the best sources for your flow dates. The Honey Bee Health Coalition also publishes best-management guidance useful for a seasonal plan.
One caution about autumn. Swarms in October are uncommon and usually small. A cluster you see now is more likely an absconding colony, a starving one or a late afterswarm. Those bees are poor candidates for winter, so treat any fall capture as a salvage job, not a free colony.
Reading Swarm Signals During Inspections
You cannot prevent what you do not recognize. Swarm preparation produces predictable signs, and most are visible if you inspect with intent.
Queen Cells: The Clearest Signal
Look at the bottom edges of frames, where bees build swarm cells because those are the easiest places to attach them. Several cells at the bottom point toward swarm preparation. A single cell in the middle of a comb face is more often a supersedure cell, built to replace a failing queen. The distinction is useful but not absolute, so judge by the whole pattern: how many cells, where they are, and how crowded the box is.
Cell stage matters. Eggs or open larvae in queen cups mean you probably have days, not hours. A capped queen cell is the red flag, because a swarm often departs around the time the first cells are capped.
Secondary Signs
- Backfilled brood nest: Bees store nectar in empty brood cells, squeezing the queen’s laying room.
- Fewer eggs, slimmer queen: The queen slims down so she can fly, and egg laying drops.
- Bearding and heavy traffic: Large clusters of bees hanging on the front of the hive on warm evenings suggest crowding, though heat can cause this too.
- Many drones: A colony in reproduction mode raises plenty of drone brood.
Why You Should Not Just Cut the Cells
Many new beekeepers destroy queen cells and consider the problem solved. Extension and research sources consistently describe cell removal as unreliable, because colonies can build more cells quickly and may leave anyway. Cutting cells treats the symptom while the cause, congestion, remains. If you find capped swarm cells, plan a split or an artificial swarm instead. Our guide to creating and maintaining inspection logs shows how to record cell counts and dates so you can see the trend across visits.
Swarm Prevention Methods Compared
Not every method suits every keeper. The table compares the main approaches by effort, cost and how well they hold up against a colony already committed to swarming.
| Method | Effort | Added equipment | Best timing | Main tradeoff |
|---|---|---|---|---|
| Add supers early | Low | Extra supers and frames | Before the flow | Helps with congestion only; will not stop a colony already building cells |
| Reverse or open the brood nest | Medium | None | Early spring buildup | Takes skill and good weather; can chill brood if done too early |
| Remove brood to a nuc | Medium | Nuc box, frames | Before cells are capped | Reduces crowding and creates a spare colony |
| Split the hive (walk-away or queen-right) | Medium to high | Full hive body or nuc | Pre-swarm or at first cells | Temporarily reduces honey production in the parent |
| Artificial swarm (Pagden method) | High | Extra hive body, floor | When capped cells appear | More steps; requires finding the queen |
| Requeen with a young queen | Medium | Purchased queen | Late summer or early spring | Young queens are less swarm-prone, but cost and introduction risk apply |
For most small-scale hobbyists the best combination is simple: add space early, then split decisively when cells appear. A hive split in time becomes two colonies and keeps most of its crop potential. Our walkthrough on how to split a hive to prevent swarming covers the steps in detail, and the guide to making nucleus colonies covers the nuc side.
Colonies headed by a first-year queen tend to swarm less than those with older queens, which is one reason many keepers requeen on a schedule. If you are weighing that route, read re-queening timing and methods before you order.
Adding supers helps only if the bees use them. Place the new super above the brood nest and, when possible, include a drawn or partly drawn frame to pull bees up. A super of bare foundation often sits untouched during a slow start.
The Honey Side of the Decision
A colony that stays together through the flow can fill several supers. If your harvest outgrows hand-crushing and gravity straining, a VIVO BEE-V003D 3-frame honey extractor is one small option to consider. It is not a swarm tool, and you should not buy one until your colonies are producing surplus. When you reach that point, our guide to best honey extractors for small-scale beekeepers compares the realistic options.
Swarm Capture: Gear, Safety and Steps
If a swarm does leave, capture is often straightforward. Swarming bees have no home, brood or stores to defend, and they have gorged on honey before leaving, which makes them less inclined to sting. That is a general pattern, not a guarantee, and a disturbed cluster can still defend itself.
Safety first. Swarm calls often involve ladders, branches and roofs. Do not climb above a height you can safely manage, do not work alone on a ladder, and do not cut branches overhead without a plan for where they will fall. If the cluster is on a roof, inside a wall, or on a utility structure, call a professional or a local bee removal volunteer. If you have a known allergy to stings, do not attempt a capture without medical guidance and an epinephrine plan from your doctor.
Gear Worth Having Ready
A capture kit does not need to be elaborate. Keep these in one bin by the door:
- A ventilated bee suit and veil
- A cardboard box or nuc box with a lid
- A bedsheet to lay under the cluster
- A soft bee brush or large feather
- Pruning loppers and a hand saw
- Rubber bands or tape, and a spray bottle with plain water
- A smoker and fuel, even though swarms tend to be calm
A ventilated suit is worth the cost if you capture in summer heat. A model like the OZ ARMOUR 3-layer ventilated bee suit pairs a 3-layer ventilated design with a round veil. Sizing varies, so check the manufacturer’s measurements before you order, and remember that no suit is truly sting-proof. Seams, zippers and gloves are where stings usually land.
For the container, a Pro Nuc 5-frame plastic nuc box with a locking lid can do double duty. It can carry a swarm and, later in the season, hold splits or a queen mating nuc. A locking lid matters most when you drive a captured swarm home, since a lid that pops open in a car is a problem you only have once. For more on equipment, see our comparison of best nuc boxes and feeders for starting or splitting colonies.
How to Capture a Swarm, Step by Step
- Assess the site. Confirm the cluster is accessible and that you can stand safely. If you cannot, stop and call someone with the right equipment.
- Suit up and prepare the container. Put one or two frames, ideally with drawn comb, into the nuc box. A little lemongrass oil or old comb can help attract bees, though it is not required.
- Position the box. Place it directly below the cluster when possible, with a sheet under it if the cluster is on the ground or a low shrub.
- Dislodge the bees in one motion. For a cluster on a branch, give the branch a firm, sharp shake or cut it and lower it gently. Most of the bees will drop into the box.
- Check for the queen. Watch for bees fanning at the entrance with abdomens raised, exposing a scent gland. This usually means the queen is inside and the workers are calling the others in.
- Wait until evening. Leave the box near the original site until dusk so stragglers can join. Do not move it before the late flyers return.
- Close and relocate. Close the entrance or lock the lid, and carry the box to its new home.
If you cannot confirm the queen on the spot, watch the box. If bees keep leaving it and returning to the original site, the queen is likely still out there. Wait and try again, or shake the remainder down.
For a second walkthrough with photos and field tips, read our guide to catching and hiving a swarm.
Swarm Relocation: Where the Colony Goes Next
Capturing a swarm is the easy half. A swarm is a promising but fragile colony, and how you relocate and set it up determines whether it survives or leaves again.
Choose a Site and Move Distance
A newly captured swarm has no memory of your apiary, but foragers still orient to the spot where the box sits, so a short move can send them back to the capture site. For a swarm caught within a few hundred feet of your apiary, relocating it to another yard a mile or more away is the safer choice. If that is not possible, block the entrance with grass or foliage so the bees have to reorient when they leave.
Pick a site with morning sun, wind protection and a level stand. Face the entrance away from prevailing winds and keep the hive away from heavy foot traffic. In a suburban lot, check local regulations before adding a hive. Zoning and registration vary widely, and our guide to urban beekeeping regulations and legal requirements covers the questions to ask.
Installing the Swarm
Place the swarm into a hive body with frames of foundation or, better, some drawn comb. Feed 1:1 sugar syrup right away, since a swarm has few stores and feeding helps the bees draw comb fast. Keep the entrance reduced for the first week so a small cluster can defend itself against robbing and wasps. Our article on protecting hives from wasps, hornets and backyard predators covers the threats a small new colony faces.
Many swarms abscond within a few days if the setup is poor. The usual causes are an oversized cavity, no comb to anchor to, no food and disturbance. Our piece on bee nuc installation mistakes that cause absconding or queen loss applies equally to captured swarms.
Use the Brood Break
A fresh swarm has no brood for a short period, so mites that normally hide in capped cells are exposed on adult bees. Extension resources on varroa mite management note that this brood break is a useful window for mite control, since treatments aimed at phoretic mites work better when no capped brood shelters them. Whether you treat, and with what, depends on product labels, local rules and your management approach, so check the label and your state guidance first. A simple mite count tells you where you stand before and after, and our walkthrough on how to do a mite wash with alcohol or sugar shake shows the method.
Know What You Caught
A swarm of unknown origin could carry disease or come from a feral colony with different genetics. Treat it as a new colony that needs watching. Inspect after two or three weeks for eggs and brood. If there is no sign of a queen after about three weeks, consider combining it with another colony or introducing a mated queen. Check brood patterns for the warning signs described in our guide on identifying and treating American foulbrood, and for early cues in early warning signs your bee colony is in trouble.
Managing the Parent Hive After a Swarm
If your own hive swarmed, do not assume it is doomed. The parent colony usually has queen cells and will raise a new queen. Reduce the entrance, leave the colony alone for a couple of weeks while the new queen emerges and mates, then look for eggs. Disturbing a hive during queen mating risks losing the virgin on her flights. Colonies can also cast afterswarms with virgin queens, which shrinks the parent further, so check cell numbers a few days after the first swarm.
Common Swarm Management Mistakes to Avoid
Most swarm losses trace back to a small set of repeat errors.
Inspecting too rarely during buildup. A fourteen-day interval is too long when a colony is expanding quickly. Capped cells can appear and the swarm can leave between visits. A seven to ten day schedule during the swarm window gives you a realistic chance to catch cells while they are still open.
Adding space too late. A super added after the brood nest is already backfilled does little. Space needs to be in place before congestion, not after.
Relying on cell cutting. Removing queen cells can delay a swarm but frequently does not stop one, and it can leave the colony without a viable queen if you remove everything.
Splitting without a plan for the queen. A split that leaves you unsure which half has the queen can produce a queenless colony with no eggs to raise a replacement. Confirm eggs in both halves a few days later.
Setting up a captured swarm in a poor hive. Large empty boxes, no feed and a wide-open entrance invite absconding. Start small, feed and reduce the entrance.
Moving a caught swarm too short a distance. Foragers can return to the capture site. Move farther, or obstruct the entrance so they reorient.
Ignoring local rules and neighbors. A swarm that lands on someone else’s property creates a legal and social problem. Keep neighbors informed, and consider registering as a swarm contact with your local association so people call you first.
Skipping safety. Ladder falls cause more serious injuries in swarm calls than stings. Do not work above your comfort level, and bring a second person when you are on a ladder.
Treating captured swarms as free colonies. A swarm of unknown origin carries disease and genetic uncertainty, and a poor one can cost you feed, equipment and time. Compare it against the cost of a purchased nuc when deciding how much to invest.
FAQ
How can I tell if my hive is about to swarm?
Check the bottom edges of the frames for queen cells, which are peanut-shaped and hang vertically from the comb. Several cells at the bottom, especially capped ones, suggest an imminent swarm. Supporting signs include a backfilled brood nest, fewer eggs, a slimmer queen, many drones and heavy bearding. No single sign is conclusive, but a crowded colony with queen cells during a nectar flow is a strong candidate, so inspect weekly and have a split ready. If you find capped cells, act within a day or two rather than waiting for the next scheduled visit.
Should I destroy queen cells to stop a swarm?
Usually not. Extension guidance generally describes cell removal as unreliable, because bees can rebuild cells quickly and may still leave. If you cut everything, you can also remove the colony’s chance to requeen after a swarm. A better response is to relieve congestion by splitting the hive or creating an artificial swarm, which gives the old queen a new home and keeps both halves productive. If you remove cells as a short-term measure, keep inspecting every few days and be ready to split at the first sign that the colony is committed.
Can I keep a swarm I catch?
In most places, yes. A swarm without a known owner is generally treated as free to take, though local rules vary and a neighbor may claim a swarm you can quickly identify as theirs. Before you commit, consider the risks: swarms may come from feral or unmanaged colonies, so disease and mite load are unknown. Feed the colony, reduce the entrance, check the brood pattern after three weeks and run a mite count. If brood looks unusual, consult your state apiarist or local association before combining it with your other hives.
How far should I move a captured swarm?
If you caught the swarm close to your apiary, move it a mile or more away if you can, so foragers do not drift back to the capture point. If that is not possible, block the entrance with grass or leaves for a day so the bees reorient when they leave. Keep the entrance reduced and feed them to help the colony settle.
Conclusion
Swarm management comes down to three decisions made in advance. First, build your inspection calendar around your local flow and commit to weekly checks during the swarm window. Second, give the bees room before they ask for it and split decisively when queen cells show up. Third, keep a capture kit ready, with a suit and a locking nuc box, so a call from a neighbor turns into a free colony rather than a lost opportunity.
Your next step is practical. Before winter, review your hive notes for cell sightings and congestion dates, and list the equipment you would need to split every colony next spring. Order the gaps now, while the pressure is off.
If this guide was useful, bookmark it for next spring or leave a comment with your own swarm timing.
Related Reading