Your First Hive Inspection: What to Look For
This post contains affiliate links. As an Amazon Associate, I earn from qualifying purchases at no extra cost to you.
Your first hive inspection can feel intimidating. You have thousands of stinging insects just inches from your face, and you are not entirely sure what you are looking at. The good news is that a basic inspection follows a simple checklist, and after two or three visits you will feel surprisingly comfortable pulling frames and reading what your colony is telling you.
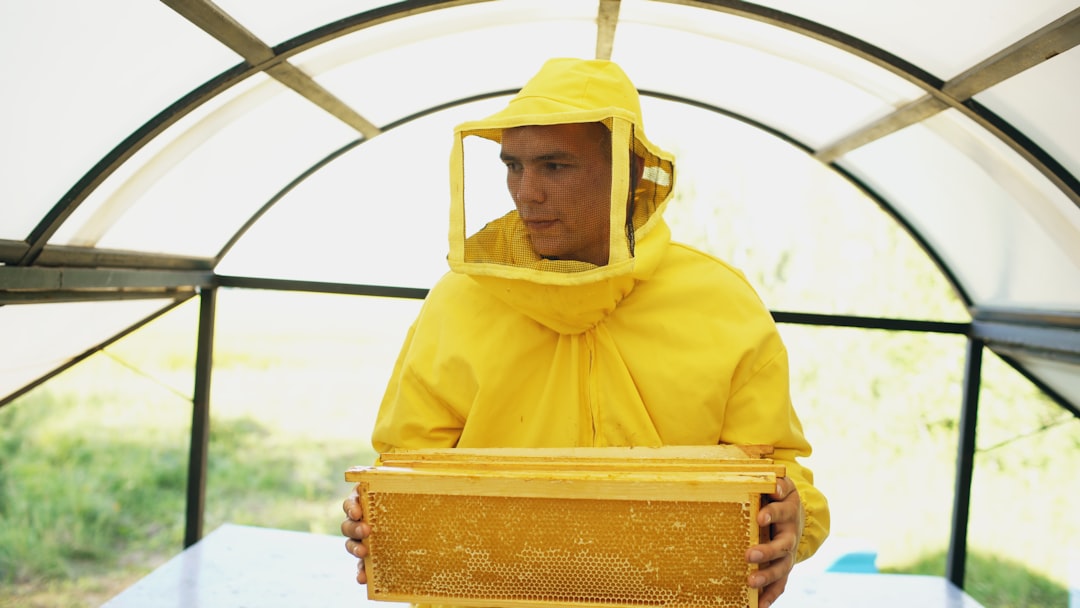
Photo by Vitaly Gariev on Unsplash
In our experience, the biggest mistake new beekeepers make is spending too long inside the hive. Your goal is to get in, confirm a few key things, and get out within about ten minutes. This guide walks you through exactly what to look for and how to stay efficient.
When to Do Your First Inspection
Timing matters more than most beginners realize. Wait at least one week after hiving your package or nuc before opening things up. The bees need time to settle in, start drawing comb, and accept their queen.
Choose a warm, calm day - ideally above 60°F (15°C) with little wind. Late morning to early afternoon works best because many foragers will be out of the hive, which means fewer bees to manage and less disruption to the colony. Avoid inspecting in the rain, heavy wind, or late evening when all the foragers are home and the colony is more defensive.
Gear You Need Before Opening the Hive
Before you pull your first frame, make sure you have everything within arm’s reach. Walking away from an open hive to grab a forgotten tool wastes time and stresses the bees.
Here is what you need every time:
A good hive tool is non-negotiable. The Maxant Stainless Steel Hive Tool is what we reach for most often. It pries apart frames that are glued with propolis, scrapes burr comb, and lifts frame ends cleanly. A flat screwdriver is not a substitute - the angled blade on a proper hive tool makes a real difference.
Your smoker should be lit and producing cool, white smoke before you crack the lid. We have been using the VIVO Bee Hive Smoker and it holds a flame long enough to get through a full inspection without relighting. Use pine needles, burlap, or dried wood shavings as fuel. Avoid anything treated or synthetic.
Wear your full protective gear, especially for early inspections when you are still learning to move calmly around the hive. The Honey Keeper Beekeeping Suit gives full coverage with a zippered veil and is breathable enough for warm days. As you gain confidence, you may decide to work in lighter gear, but start with maximum protection.
You should also bring a frame rest or an empty box to set frames in while you work. Leaning frames against the hive stand risks crushing bees and rolling the queen.
How to Open the Hive
Start with two or three gentle puffs of smoke at the entrance. Wait about 30 seconds. This gives the guard bees time to retreat and the colony time to begin gorging on honey - their natural response to smoke, which makes them calmer and less likely to sting.
Crack the outer cover with your hive tool and give one light puff of smoke across the top bars. Lift the cover smoothly and set it upside down nearby. If you are using an inner cover, pry it up the same way.
Work from one side of the hive to the other. Start by removing an outer frame, which is usually a honey or pollen frame and has fewer bees on it. Set it aside gently. This gives you room to slide frames apart without rolling bees between them.
What to Look For: The Five-Point Checklist
Every inspection should answer five questions. If you can check all five, you have a healthy hive and you can close up.
1. Is the Queen Present (or Has She Been Recently)?
You do not need to find the queen every time. In fact, many experienced beekeepers rarely spot her. What you are really looking for is evidence of a laying queen: fresh eggs.
Eggs look like tiny grains of rice standing upright at the bottom of cells. They are easiest to see if you hold the frame at an angle with the sun behind you. One egg per cell, centered at the bottom, means your queen is healthy and laying well.
If you see eggs, your queen was active within the last three days. That is good enough. If you do not see eggs but you see young larvae (small white C-shaped grubs), your queen was active within the last week. Still fine.
We have found that spotting eggs gets much easier after three or four inspections. Do not worry if you struggle at first - it is a skill that develops quickly.
2. What Does the Brood Pattern Look Like?
A healthy brood pattern is solid and compact. You want to see a large oval of capped brood in the center of the frame with very few empty cells scattered through it. Some beekeepers describe the ideal pattern as looking like a football shape.
Spotty brood - where capped cells are scattered with many empties between them - can indicate a failing queen, disease, or pest pressure. A few empty cells are normal (the bees remove unhealthy larvae), but if more than 20 percent of the brood area looks empty or irregular, it is time to investigate further.
Look at the color of the cappings. Healthy brood cappings are tan to brown and slightly convex. Sunken, greasy-looking, or punctured cappings can indicate disease. If you see anything suspicious, take a close-up photo and compare it with resources from the University of Georgia Cooperative Extension or your local beekeeping association.
3. Do You See Larvae in Different Stages?
A healthy hive will show eggs, young larvae, older larvae, and capped brood all on the same frame or across a few frames. This progression tells you the queen has been laying consistently.
Young larvae are small, white, and curled in a pool of royal jelly at the bottom of the cell. Older larvae fill most of the cell and appear plumper. Capped brood means the larvae have pupated and will emerge as adult bees in about 12 days.
If you only see capped brood and no eggs or young larvae, your queen may have stopped laying or may have been lost. This is not an emergency if you just spotted eggs last week, but it is worth checking again in a few days.
4. Are There Enough Food Stores?
Look at the outer frames on both sides of the hive body. You should see cells filled with honey (capped with white wax) and pollen (packed into cells in a rainbow of yellows, oranges, and sometimes blues or reds).
During spring buildup, a colony needs food to support rapid brood rearing. If the outer frames are mostly empty, your colony may need supplemental feeding. A 1:1 sugar syrup is standard for spring - one part white sugar dissolved in one part water by weight.
When we started keeping bees, we underestimated how much food a growing colony needs in early spring. A strong colony can consume several pounds of stores per week when brood production is ramping up.
5. Are There Any Signs of Pests or Disease?
While you are going through frames, keep an eye out for the common problems. Varroa mites are the biggest threat - look for small reddish-brown dots on adult bees or on the white surface of drone brood. A dedicated mite count (alcohol wash or sugar shake) gives more accurate numbers than visual inspection, but you should still watch for obvious signs.
Small hive beetles are shiny black beetles about half the size of a honeybee. A few beetles in a strong colony are usually manageable, but large numbers indicate a problem. Wax moth larvae leave silk webbing and tunnels through the comb - this is more common in weak colonies or stored equipment.
For disease, watch for anything that looks or smells wrong. Healthy brood does not have an odor. A foul, sour smell from the brood area is a red flag that warrants immediate investigation.
How Long Should an Inspection Take?
Aim for ten to fifteen minutes for a single-box hive. As you add boxes, each additional box adds about five minutes. We have tested pushing inspections longer, and we found that after about 20 minutes, the bees become noticeably more agitated regardless of how much smoke you use.
If you cannot find what you are looking for in that time, close the hive and come back in a few days. The bees will be fine, and you will have a chance to think about what you saw without pressuring yourself.
Common Mistakes During First Inspections
The number one mistake we see new beekeepers make is dropping frames. Frames covered in bees are slippery and heavier than you expect. Grip firmly with both hands and keep the frame over the hive while you inspect it. If you drop a frame, the bees will be upset, and you risk killing the queen if she is on that frame.
Another common mistake is prying frames apart too aggressively. Bees glue everything with propolis, and new beekeepers often yank on frames instead of using the hive tool to break the seal gently. Slide the curved end of your hive tool between the frame ears and twist slowly.
Finally, do not forget to put frames back in the same order. Bees organize their hive deliberately - brood in the center, pollen next to brood, honey on the outside. Shuffling frames disrupts this arrangement and creates extra work for the colony.
Keeping Records
Write down what you saw immediately after closing the hive. Even a few bullet points in a notebook or phone app will help you track patterns over time. Note the date, weather, number of frames with brood, food stores, queen status (seen, eggs seen, or not confirmed), and anything unusual.
When we look back at our inspection notes from the first season, the improvement in pattern recognition is obvious. Records turn individual snapshots into a story about your colony’s health.
Recommended Products
Here are the tools we use and recommend for hive inspections:
- Maxant Stainless Steel Hive Tool - durable stainless steel construction that resists propolis buildup
- VIVO Bee Hive Smoker - stays lit reliably and produces cool smoke
- Honey Keeper Beekeeping Suit - full-body protection with a ventilated veil
You can also find quality smokers and accessories from Dadant & Sons and Mann Lake, two of the most established beekeeping suppliers in the country.
As an Amazon Associate we earn from qualifying purchases at no extra cost to you.
What Comes Next
Once you are comfortable with basic inspections, you will naturally start noticing more detail - the difference between worker and drone brood, how the bees behave when the queen walks past, and how pollen patterns shift with the season. If you are still getting your hive set up, check out our Beginner’s Guide to Starting a Beehive for the full step-by-step.
Bookmark this guide and come back to it before your next few inspections until the checklist becomes second nature. You might also like our guide on When to Add a Honey Super - it is one of the first big decisions you will face once your colony is established.