Beginner Beekeeping Mistakes and How to Avoid Them
Starting out in beekeeping is exciting, but it is also easy to make mistakes that can set your hives back or even cause colony loss. After years of working with new beekeepers, we have seen the same patterns show up again and again. The good news is that most beginner mistakes are avoidable once you know what to look for. This guide covers the most common errors and how to sidestep them from your very first inspection.
This post contains affiliate links. As an Amazon Associate, I earn from qualifying purchases at no extra cost to you.
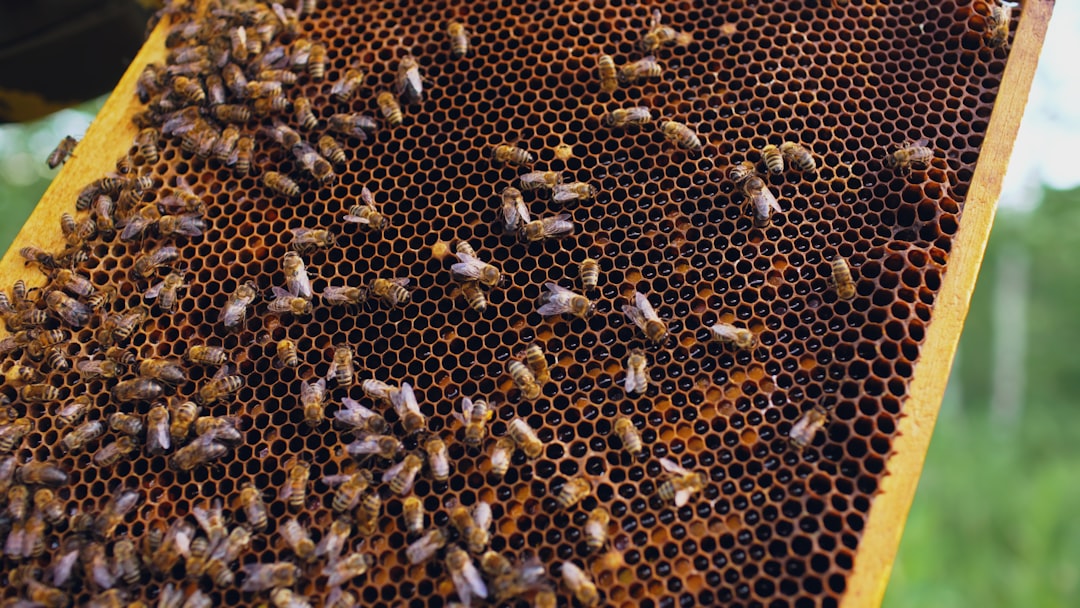
Photo by Vitaly Gariev on Unsplash
Opening the Hive Too Often
One of the most common mistakes new beekeepers make is opening the hive every few days “just to check on things.” Every time you crack open a hive, you disrupt the colony is temperature regulation, disrupt the queen is laying pattern, and set back their progress by a day or two.
We made this mistake in our first year. We opened our strongest hive four times in two weeks because we were worried about swarming. By the fourth inspection, the colony was visibly agitated and the queen had slowed her egg production. We learned to stick to a seven-day inspection cycle unless there was a specific reason to open the hive sooner.
A seven-day cycle gives the colony enough time to recover from the disturbance and continue building. If you are worried something is wrong, watch the entrance for a few minutes first. Strong, steady bee traffic, orientation flights, and pollen coming in are all good signs that the hive is fine.
Skipping the Smoker or Using It Incorrectly
Some beginners skip the smoker because they think their bees are gentle, or they find smoke intimidating to work with. This is a mistake that often ends in a sting to the face or hands.
Smoke works because it interrupts the alarm pheromone communication between bees. When you puff smoke before opening the hive, the bees are far less likely to mount a defensive response. Even calm-natured colonies can become defensive when you start prying apart boxes and pulling frames.
The key is to puff smoke at the entrance before you open the cover, wait about thirty seconds for the bees to react, and then add another puff or two as you work. You do not need billowing clouds of smoke. A thin stream directed at the frames is enough.
If you are just starting out, invest in a quality smoker that will hold a fire for the full length of an inspection. Cheap smokers go out mid-inspection, which puts you in a difficult position.
Not Having the Right Tools Ready Before Opening the Hive
Going through your first inspection fumbling for a hive tool, dropping your frame grip, or realizing you left the smoker fuel in the garage is a stressful way to learn. New beekeepers often underestimate how much they need within arm’s reach before lifting the first lid.
Before every inspection, lay out your full toolkit on the lid of a nearby cooler or a clean cloth. You need:
- Your smoker, fully lit and going
- A sturdy hive tool or two
- Frame grip
- Bee brush
- Spray bottle with sugar syrup (optional but helpful)
- Notebook or phone for taking notes
Walking into an inspection prepared keeps you calm, keeps the hive open for less time, and gives you a much better experience overall.
Harvesting Too Much Honey in the First Year
It is exciting to see frames of capped honey in your first season, and it is tempting to take some home. But harvesting honey too early can leave your colony short on winter stores and force you to feed sugar syrup all fall, which is not ideal for colony health.
In most climates, a strong colony needs between sixty and ninety pounds of honey to make it through winter. That is roughly eight to twelve full medium frames of capped honey. Before you pull any honey, do the math on what your colony actually has stored.
Our rule for the first year is simple: leave all the honey the bees store. Let them build up their winter pantry. If you have a surplus above that threshold, you can take a small harvest, but only after you have confirmed they have enough. In subsequent years, you will develop a feel for when your hives have more than they need.
Ignoring Varroa Mites Until It Is Too Late
Varroa destructor mites are the single greatest threat to honey bee colonies in North America. Beginner beekeepers often do not start monitoring for mites until they see visible problems, by which point the colony may already be compromised.
Varroa weakens bees by feeding on their fat bodies and spreading viruses. A colony with high mite loads will have deformed wings, spotty brood patterns, and declining bee populations. By the time you see these symptoms, the damage is done.
Start monitoring for mites the moment you install your first package or nuc. Use a sugar roll or alcohol wash every three to four weeks during the active season. If your count hits three mites per hundred bees in a sugar roll or alcohol wash, treat the hive. Do not wait.
For monitoring supplies, the Mann Lake Varroa Easy Check is a straightforward tool that makes the process clean and repeatable.
Placing the Hive in a Poor Location
Hives need at least six hours of direct sunlight, good air circulation, and protection from prevailing winds. They should be oriented so the entrance faces southeast or east, which encourages early morning flights and helps the colony get to work faster each day.
Avoid low-lying areas where cold air settles, dampness accumulates, or standing water collects after rain. Avoid placing hives under trees that drip sap or drop heavy limbs. Avoid spots that flood in spring or become mud holes during rainy seasons.
We see beginners set up hives in shaded back corners because they want to hide them from neighbors. Shaded hives are more prone to moisture problems, brood disease, and sluggish spring buildup. If you are concerned about visibility, a simple fence or hedge provides privacy without compromising sunlight.
Check your property for slopes and drainage before you set up. A hive that sits in a puddle for half the winter is not going to thrive.
Failing to Keep Records
Beekeeping is data-driven even though it does not always feel like it. Beginners often rely on memory for inspection notes, which sounds fine until you are trying to remember whether the queen was spotted in March or April and whether you saw eggs.
Keeping a simple log for each hive takes five minutes during each inspection. Write down the date, what you saw, any actions you took, and what you plan to check next time. Over a season, these notes reveal patterns in your colony is behavior and help you make better decisions.
There are plenty of apps and paper logbooks designed for beekeeping. We use a simple spreadsheet, but anything that gives you a searchablerecord of your inspections works.
Buying Weak or Unknown-Quality Bees
Not all bees are equal. Packages and nucs from large commercial producers may travel long distances and arrive with elevated mite loads, poor genetics, or stressed queens. The lowest price is not always the best value.
When possible, buy from local producers who raise bees suited to your climate. Local bees have already adapted to your winters, your nectar flows, and your local pest pressures. Ask other beekeepers in your area for recommendations.
Nucs are generally a better starting point than packages because they come with drawn comb, brood in multiple stages, and an established queen. A strong nuc from a reputable local breeder gives you a head start that a package of bees simply cannot match.
Check with Dadant is local dealer network to find reputable suppliers in your area who carry quality nucs and packages.
Recommended Equipment for New Beekeepers
Starting out with reliable equipment makes every inspection easier and reduces the learning curve.
Mann Lake Standard J-Hook Hive Tool - Every beekeeper needs at least two hive tools. The J-hook design works well for prying apart boxes and lifting frames. Mann Lake is a trusted supplier with consistent quality.
VIVO Stainless Steel Bee Hive Smoker - A reliable smoker with a good heat shield and large firebox. It stays lit through a full inspection and holds up season after season.
AukBeeFun 7-in-1 Hive Tool Set - A multipurpose tool that combines a J-hook, frame lifter, scraper, and other functions. A solid option if you want one tool that handles most tasks.
Mann Lake Pro Hive Tool - A professional-grade tool with a comfortable grip and durable stainless steel construction. Worth the upgrade once you know beekeeping is for you.
As an Amazon Associate we earn from qualifying purchases at no extra cost to you.
Frequently Asked Questions
How often should a beginner inspect a hive?
Once every seven days during the active season is the standard recommendation. Inspect more frequently only if you have a specific concern, such as a swarm cell check after the nectar flow starts or a suspected queen issue.
What should I do if I cannot find the queen during an inspection?
If you do not see the queen but you see eggs, she was there within the last three days. Do not tear the hive apart looking for her if you have fresh eggs. Close up and check again in a week. Persistent queenlessness will show up as multiple queen cells or a spotty brood pattern.
How do I know if I have enough honey for winter?
A general guideline is eight to twelve medium frames of fully capped honey per hive going into fall. Weighing a full medium super gives you a more precise number. Err on the side of leaving too much rather than too little.
When should I start treating for varroa mites?
Start monitoring as soon as you install your bees. Treat when your mite count exceeds three mites per hundred bees in a sugar roll or alcohol wash. The best treatment timing depends on your climate, but midsummer and late fall are critical treatment windows.
Is it normal to be stung during every inspection?
Some stings are normal, especially during the first year when you are still learning to move smoothly around the hive. Consistent smoker use, calm movements, and working with the colony is natural flight path all reduce sting frequency. If every inspection turns into a defensive battle, your technique or your bees may need adjustment.
Related Reading
If you found this guide helpful, check out our complete guide to hive inspections for step-by-step inspection instructions. For a deeper dive into mite management, see our step-by-step guide to oxalic acid treatment. Getting these fundamentals right from the start makes everything else in beekeeping easier.
Getting started in beekeeping means accepting that you will make mistakes. The difference between a beekeeper who improves each season and one who struggles is the willingness to learn from those mistakes quickly. Use this guide as a checklist for your first year. Work through it before your first inspection, and come back to it whenever something does not go as expected. The bees are forgiving if you are attentive.